Introduction
This manual provides detailed instructions for the Antonki Digital Timer, Model Kitchen Timer 2 Pack. These timers are designed for precise time management in various activities such as cooking, studying, exercising, and classroom use. Please read this manual thoroughly to ensure proper operation and to maximize the timer's functionality.

Image: Two Antonki Digital Timers, showcasing their compact design and clear digital displays.
Setup
1. Battery Installation
Each Antonki Digital Timer requires one AAA battery for operation. The timers are supplied with batteries included.
- Locate the battery compartment cover on the back of the timer.
- Slide the cover open.
- Insert one AAA battery, ensuring the correct polarity (+ and - terminals).
- Close the battery compartment cover securely.

Image: The Antonki Digital Timer package, showing two timers and two AAA batteries.
2. Placement Options
The timer offers versatile placement options:
- Magnetic Back: The strong magnet on the back allows attachment to metal surfaces such as refrigerators, ovens, or whiteboards.
- Kickstand: A durable kickstand allows the timer to stand upright on any flat surface.
- Hanging Hole: A small hole is provided for hanging the timer on a hook.
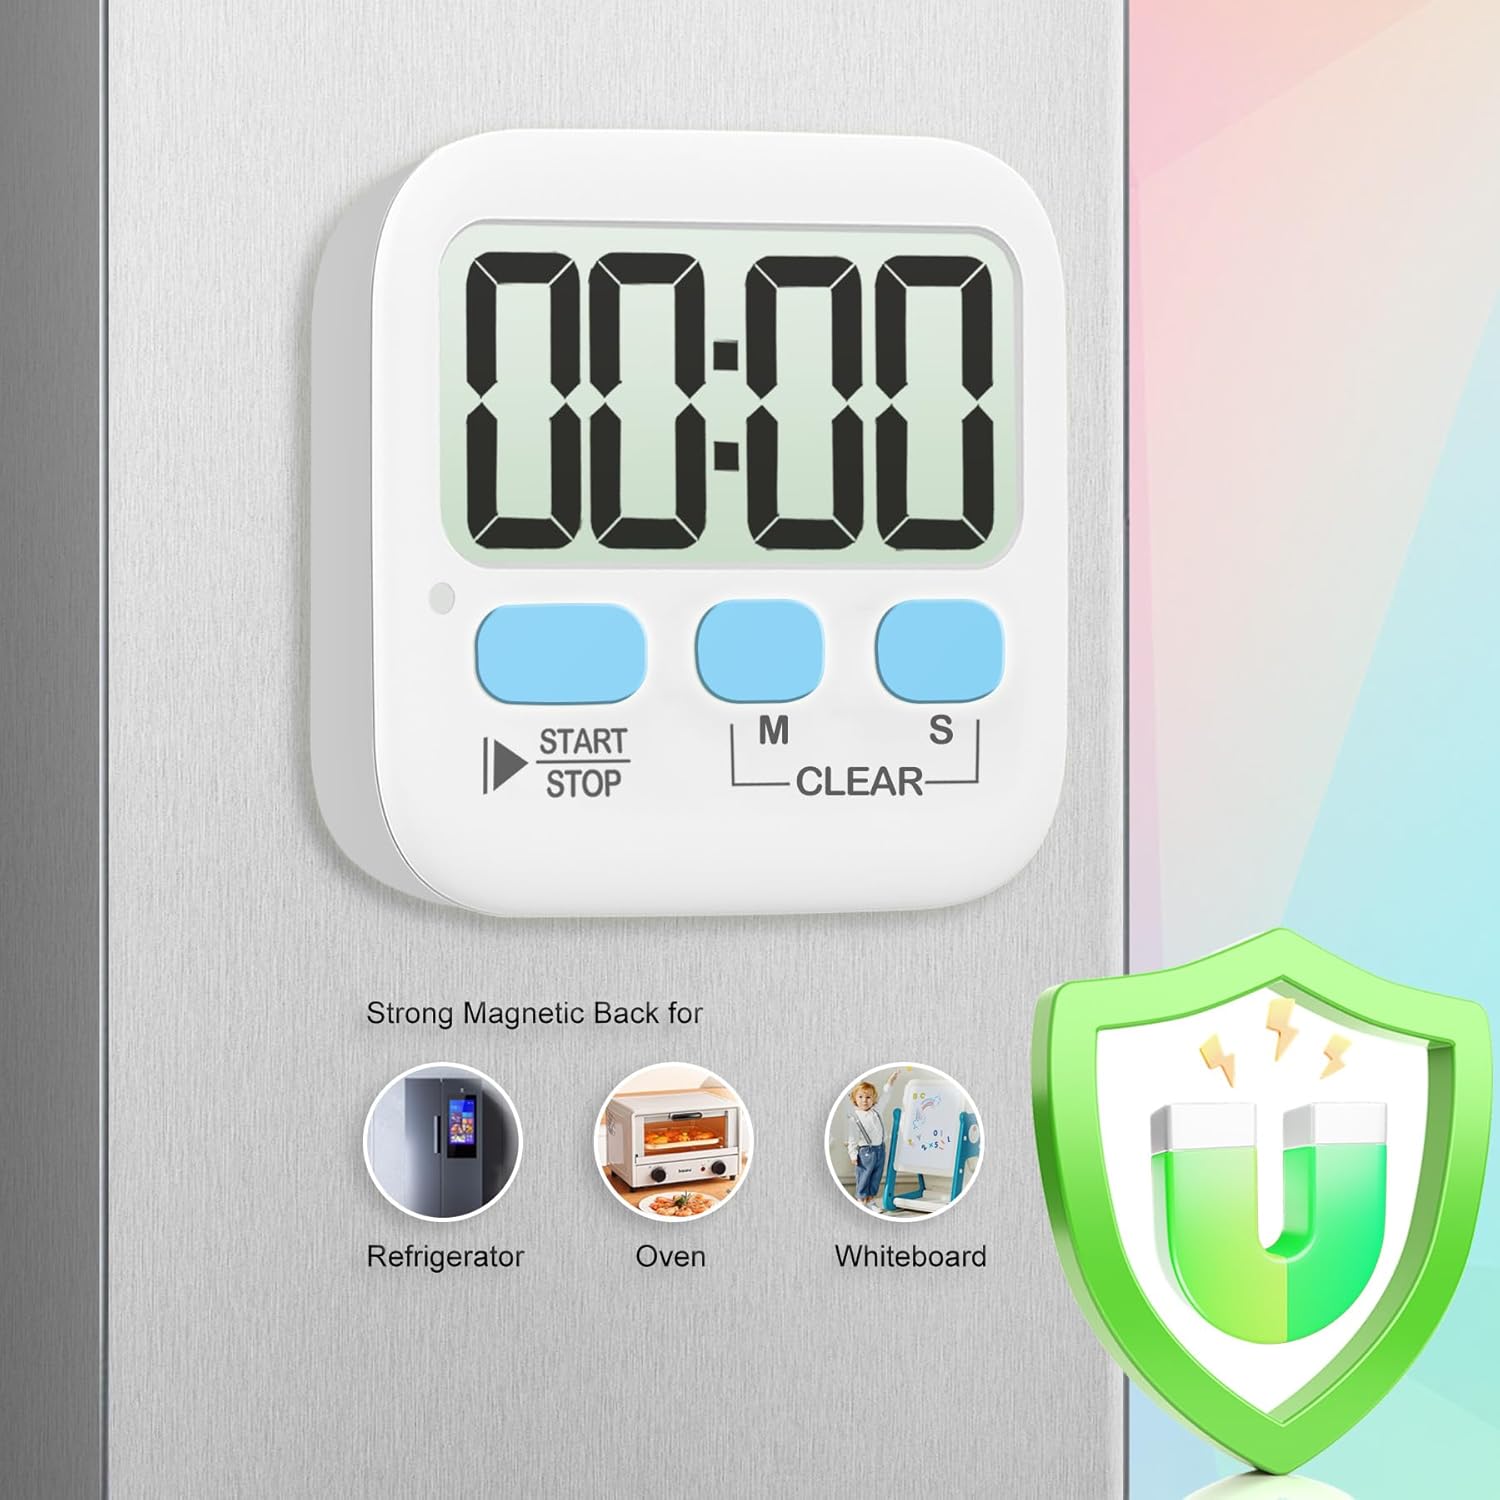
Image: The timer's magnetic back feature, shown attached to a refrigerator.
Operating Instructions
The Antonki Digital Timer features three main buttons: START/STOP, M (Minutes), and S (Seconds).
1. Setting the Timer (Countdown Mode)
- Press the M button to set the desired minutes. Each press increases minutes by one. Long press the M button for over 3 seconds to fast forward the setting.
- Press the S button to set the desired seconds. Each press increases seconds by one. Long press the S button for over 3 seconds to fast forward the setting.
- To clear the set time, press both M and S buttons simultaneously.
- Press the START/STOP button to begin the countdown.
- When the countdown reaches zero, the alarm will sound (or flash, depending on mode).

Image: Visual guide for fast-forwarding time settings using the M and S buttons.
2. Count-Up Mode (Stopwatch)
- Ensure the timer display shows 00:00. If not, press M and S simultaneously to clear the time.
- Press the START/STOP button to begin counting up from 00:00.
- Press START/STOP again to pause the count. Press it once more to resume.
- To reset the count-up timer to 00:00, press M and S simultaneously while the timer is paused.
3. Loud/Silent Mode Switch
The timer features a switch on the side to toggle between loud alarm and silent (visual flash) modes.
- Loud Mode: The timer will emit an audible alarm when the countdown finishes or when paused in count-up mode.
- Silent Mode: The timer will flash a red light quietly instead of sounding an alarm, ideal for quiet environments like classrooms or libraries.

Image: Depiction of the loud alarm and silent (visual flash) modes.
4. Memory Function
The timer retains the last set countdown time. After the alarm sounds or the timer is stopped, pressing the START/STOP button will recall the previous countdown setting, allowing for quick reuse without re-entering the time.
Maintenance
- Clean the timer with a soft, dry cloth. Do not use abrasive cleaners or immerse in water.
- Replace the AAA battery when the display becomes dim or the timer malfunctions.
- Store the timer in a cool, dry place when not in use for extended periods.
Troubleshooting
- Timer not turning on or display is dim: Check battery installation. Ensure the battery is inserted with correct polarity. Replace with a fresh AAA battery.
- Alarm not sounding: Verify the mode switch on the side is set to 'Loud' mode. If in 'Silent' mode, only a red light will flash.
- Buttons unresponsive: Remove and reinsert the battery to perform a soft reset. If the issue persists, replace the battery.
- Timer not adhering to metal surface: Ensure the surface is clean and flat. The magnet is strong, but heavy vibrations or uneven surfaces may affect adhesion.
Specifications
| Feature | Detail |
|---|---|
| Brand | Antonki |
| Model Number | Kitchen Timer 2 Pack |
| Material | Plastic |
| Product Dimensions | 2.68"D x 2.48"W x 0.63"H |
| Item Weight | 45 Grams (1.59 ounces) |
| Maximum Count | 99 minutes 59 seconds |
| Screen Size | 8 Centimeters |
| Battery Type | 1 x AAA (included) |
| Features | Countdown/Count-up, Loud/Silent Mode, Magnetic Back, Kickstand, Memory Function |
Warranty and Support
Antonki products are manufactured with quality and reliability in mind. For any questions, technical support, or warranty inquiries, please refer to the contact information provided with your purchase or visit the official Antonki website. Please retain your proof of purchase for warranty claims.


