1. Introduction and Safety Instructions
Thank you for choosing the Mienta CM31216A Fresh Brew Coffee Maker. This manual provides important information for the safe and efficient use of your appliance. Please read it thoroughly before first use and keep it for future reference.
Important Safety Precautions:
- Read all instructions before operating the appliance.
- Do not touch hot surfaces. Use handles or knobs.
- To protect against fire, electric shock, and injury to persons, do not immerse cord, plugs, or the appliance in water or other liquid.
- Close supervision is necessary when any appliance is used by or near children.
- Unplug from outlet when not in use and before cleaning. Allow to cool before putting on or taking off parts, and before cleaning the appliance.
- Do not operate any appliance with a damaged cord or plug, or after the appliance malfunctions or has been damaged in any manner.
- The use of accessory attachments not recommended by the appliance manufacturer may result in fire, electric shock, or injury to persons.
- Do not use outdoors.
- Do not let cord hang over edge of table or counter, or touch hot surfaces.
- Do not place on or near a hot gas or electric burner, or in a heated oven.
- Always attach plug to appliance first, then plug cord into the wall outlet. To disconnect, turn any control to "off", then remove plug from wall outlet.
- Do not use appliance for other than intended use.
- Scalding may occur if the lid is removed during the brewing cycle.
2. Product Overview
Familiarize yourself with the components of your Mienta Fresh Brew Coffee Maker.

Figure 2.1: The Mienta CM31216A Fresh Brew Coffee Maker, showcasing its main unit, water reservoir, and glass carafe.
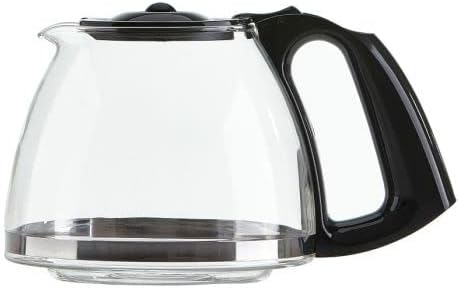
Figure 2.2: The glass carafe, designed to collect and serve brewed coffee.

Figure 2.3: The reusable permanent filter and the included dosing spoon for measuring coffee grounds.

Figure 2.4: The clear water level indicator, showing markings for up to 12 cups of coffee.

Figure 2.5: The illuminated On/Off switch located at the base of the coffee maker.
Components:
- Main Unit: Houses the heating element, water reservoir, and brewing mechanism.
- Water Reservoir: Integrated tank for water, with a clear level indicator.
- Filter Basket: Holds the permanent filter or disposable paper filter.
- Permanent Filter: Reusable filter for coffee grounds.
- Glass Carafe: 1.25 Liter capacity (up to 12 cups) for collecting brewed coffee.
- Dosing Spoon: For accurate measurement of coffee grounds.
- On/Off Switch: With an indicator light to show operation status.
- Warming Plate: Keeps the carafe warm after brewing.
- Anti-Drip System: Prevents dripping when the carafe is removed during brewing.
3. Setup and First Use
Unpacking:
- Carefully remove all packaging materials from the coffee maker.
- Ensure all components listed in the "Product Overview" section are present and undamaged.
- Dispose of packaging materials responsibly.
First Use Cleaning:
Before brewing coffee for the first time, it is recommended to clean the appliance to remove any manufacturing residues.
- Wash the glass carafe, permanent filter, and dosing spoon in warm, soapy water. Rinse thoroughly and dry.
- Fill the water reservoir with clean water up to the "MAX" level.
- Place the permanent filter (without coffee) into the filter basket.
- Place the empty carafe on the warming plate.
- Plug the coffee maker into a suitable electrical outlet.
- Press the On/Off switch to start a brewing cycle with only water.
- Allow the cycle to complete, then discard the water from the carafe.
- Repeat this process once more with fresh water.
Placement:
- Place the coffee maker on a stable, flat, heat-resistant surface.
- Ensure there is adequate ventilation around the appliance.
- Keep the coffee maker away from hot surfaces, open flames, and water sources.
4. Operating Instructions
Follow these steps to brew a fresh pot of coffee:
- Fill Water Reservoir: Open the lid of the water reservoir. Fill the carafe with the desired amount of fresh, cold water, then pour it into the water reservoir. Refer to the water level indicator for precise measurement (Figure 2.4). Do not exceed the "MAX" level.
- Add Coffee Grounds: Place the permanent filter into the filter basket. For optimal results, use approximately one level dosing spoon (provided) of medium-ground coffee for each cup of water. Adjust to your personal taste. Close the lid securely.
- Position Carafe: Ensure the empty glass carafe is correctly placed on the warming plate.
- Start Brewing: Plug the power cord into a wall outlet. Press the On/Off switch (Figure 2.5). The indicator light will illuminate, signifying that the brewing process has started.
- Brewing Cycle: Water will heat up and drip through the coffee grounds into the carafe. The anti-drip system allows you to temporarily remove the carafe during brewing to pour a cup, but replace it within 30 seconds to prevent overflow.
- Keep Warm Function: Once the brewing cycle is complete, the coffee maker will automatically switch to the "keep warm" function, maintaining the coffee's temperature for a period. The indicator light will remain on.
- Serve and Turn Off: Carefully remove the carafe to serve coffee. After serving, press the On/Off switch to turn off the appliance and unplug it from the outlet.
Note: For best flavor, do not keep coffee on the warming plate for extended periods. Freshly brewed coffee is always recommended.
5. Cleaning and Maintenance
Regular cleaning ensures optimal performance and extends the life of your coffee maker.
Daily Cleaning:
- Always unplug the coffee maker and allow it to cool completely before cleaning.
- Remove the permanent filter and discard used coffee grounds. Wash the permanent filter, filter basket, glass carafe, and dosing spoon in warm, soapy water. Rinse thoroughly and dry. These parts are generally top-rack dishwasher safe, but hand washing is recommended for longevity.
- Wipe the exterior of the coffee maker with a soft, damp cloth. Do not use abrasive cleaners or scouring pads.
- Never immerse the main unit, power cord, or plug in water or any other liquid.
Descaling (Mineral Deposit Removal):
Mineral deposits (limescale) can build up in your coffee maker over time, affecting performance and coffee taste. Descale your appliance every 2-4 weeks, depending on water hardness and frequency of use.
- Fill the water reservoir with a mixture of white vinegar and cold water (e.g., 1 part vinegar to 2 parts water) up to the "MAX" level.
- Place the empty carafe on the warming plate.
- Do not add coffee grounds or a filter.
- Turn on the coffee maker and let half of the solution brew through.
- Turn off the coffee maker and let it stand for at least 15 minutes to allow the solution to work.
- Turn the coffee maker back on and let the remaining solution brew through.
- Discard the vinegar solution from the carafe.
- Run 2-3 full brewing cycles with clean, cold water to rinse out any remaining vinegar taste or odor.
6. Troubleshooting
If you encounter issues with your coffee maker, refer to the following table for common problems and solutions.
| Problem | Possible Cause | Solution |
|---|---|---|
| Coffee does not brew. |
|
|
| Coffee is too weak. |
|
|
| Coffee overflows from filter basket. |
|
|
| Coffee tastes bad or burnt. |
|
|
7. Specifications
| Feature | Detail |
|---|---|
| Brand | Mienta |
| Model Number | CM31216A |
| Power / Wattage | 1000 Watts |
| Capacity | 1.25 Liters (approx. 12 cups) |
| Material | Metal, Polycarbonate |
| Color | Black |
| Special Features | Anti-drip system, Keep warm function, Permanent filter, Dosing spoon, Water level indicator |
| Item Weight | 1.91 Kilograms |
| Package Dimensions | 35 x 31.6 x 22.7 cm |
8. Warranty and Support
Mienta products are manufactured to high-quality standards. For information regarding your product's warranty, please refer to the warranty card included in the original packaging or contact Mienta customer support directly.
If you experience any issues or have questions about your Mienta CM31216A Fresh Brew Coffee Maker, please contact Mienta customer service for assistance. Contact details can typically be found on the Mienta official website or on your product's packaging.

