1. Introduction
Thank you for purchasing the HASTHIP® XROW - 600A Mini Air Dehumidifier. This compact and portable device is designed to efficiently remove excess moisture, dampness, and mold from the air in small areas such as bedrooms, kitchens, offices, wardrobes, and storage rooms. Its silent operation and automatic shut-off feature ensure a comfortable and hassle-free experience. Please read this manual thoroughly before operation to ensure proper use and maintenance.
2. Safety Information
Please observe the following safety precautions to prevent injury or damage to the unit:
- Always place the dehumidifier on a stable, level surface.
- Do not block the air inlet or outlet. Ensure adequate space around the unit for proper airflow.
- Do not immerse the unit, power cord, or plug in water or other liquids.
- Unplug the unit from the power outlet before cleaning or performing any maintenance.
- Keep out of reach of children and pets.
- Do not operate the unit if the power cord or plug is damaged.
- Use only the provided power adapter.
- Do not attempt to repair or disassemble the unit yourself. Contact qualified service personnel for repairs.
3. Product Overview
Features:
- Efficient humidity control for dry air.
- Silent operation, suitable for bedrooms and offices.
- Portable and compact design for easy movement.
- Automatic shut-off when the water tank is full.
- LED indicator light for full water tank.
- Simple one On/Off button operation.
- 500ML water tank capacity with removable tray.
- Absorbs approximately 250ML of moisture per day (at 30°C, 80% RH).
Components:
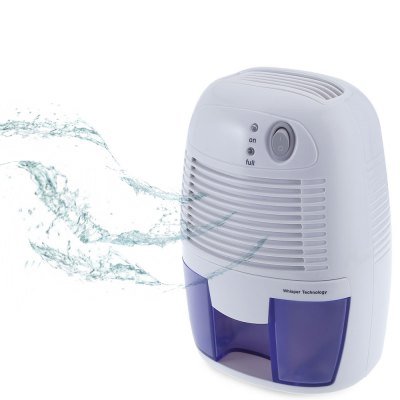
Figure 3.1: Front view of the HASTHIP XROW-600A Mini Air Dehumidifier, illustrating its compact design and the air purification process.
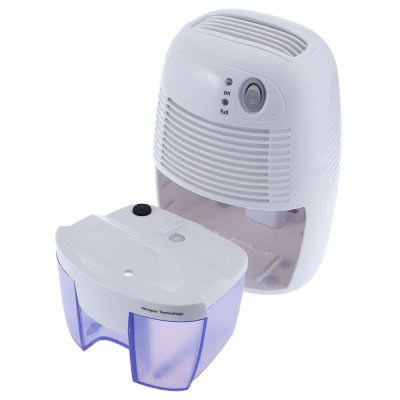
Figure 3.2: The dehumidifier with its 500ML water tank detached, demonstrating the easy removal for emptying.
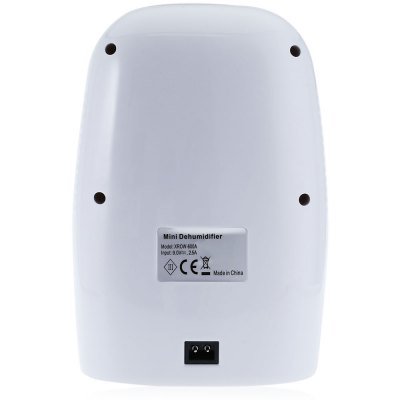
Figure 3.3: Rear view of the dehumidifier, highlighting the product label with model number XROW-600A and power specifications, along with the power input port.
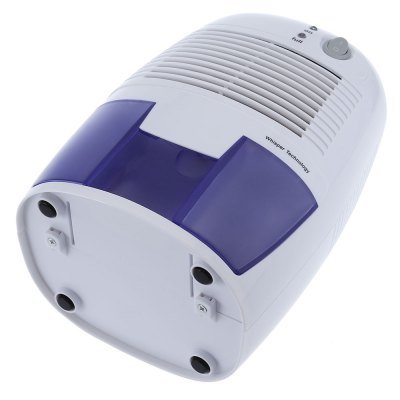
Figure 3.4: Underside of the dehumidifier, illustrating the four anti-slip feet for stable placement.
4. Setup
- Unpack the Dehumidifier: Carefully remove the dehumidifier and all accessories from the packaging. Retain the packaging for future storage or transport.
- Choose a Location: Place the dehumidifier on a firm, level surface in the desired area. Ensure there is at least 20 cm (8 inches) of space around the air inlet and outlet for optimal performance. Avoid placing it near heat sources or in direct sunlight.
- Connect Power: Insert the small end of the power adapter into the DC 9V input port on the back of the dehumidifier. Plug the other end of the power adapter into a suitable electrical outlet.
- Initial Check: Ensure the water tank is properly seated in the unit.
5. Operating Instructions
- Power On: Press the "On/Off" button located on the top of the unit. The "On" indicator light will illuminate, indicating that the dehumidifier is operating.
- Automatic Shut-off: The dehumidifier will automatically turn off when the water tank is full. The "Full" indicator light will illuminate.
- Emptying the Water Tank:
- Carefully pull out the water tank from the front of the unit.
- Pour out the collected water.
- Slide the empty water tank back into the unit until it clicks into place. The "Full" indicator light will turn off, and the unit will resume operation automatically.
- Power Off: Press the "On/Off" button again to turn off the dehumidifier. The "On" indicator light will turn off.
6. Maintenance
Regular maintenance ensures optimal performance and extends the lifespan of your dehumidifier.
Cleaning the Unit:
- Before cleaning, always unplug the dehumidifier from the power outlet.
- Wipe the exterior of the unit with a soft, damp cloth. Do not use abrasive cleaners or solvents.
- Clean the air inlet and outlet grilles regularly with a soft brush or vacuum cleaner to remove dust and debris.
Cleaning the Water Tank:
- Remove the water tank from the unit.
- Rinse the water tank with clean water. If necessary, use a mild detergent and a soft brush to clean any residue.
- Ensure the tank is thoroughly dry before reinserting it into the dehumidifier.
Storage:
- If storing the unit for an extended period, ensure the water tank is empty and clean.
- Clean the entire unit as described above.
- Store the dehumidifier in a cool, dry place, preferably in its original packaging.
7. Troubleshooting
| Problem | Possible Cause | Solution |
|---|---|---|
| Dehumidifier does not turn on. |
|
|
| Dehumidifier is running but not collecting water. |
|
|
| "Full" indicator light is on, but tank is not full. |
|
|
| Unit is noisy. |
|
|
8. Specifications
| Specification | Detail |
|---|---|
| Model | XROW - 600A |
| Water Tank Capacity | 500 ML |
| Fan | 80mm x 80mm Brushless Motor |
| Main Material | ABS (Acrylonitrile Butadiene Styrene) |
| Voltage | DC 9V |
| Power | 22W |
| Rated Current | 2.5A |
| Moisture Collection | Approx. 250ML per day (at 30°C, 80% RH) |
| Noise Level | Lower than 35dB |
| Area of Coverage | 10 square meters |
| Charging Cable Length | 1.5M |
| Product Dimensions (L x W x H) | 22.00 x 14.50 x 12.00 cm / 8.66 x 5.71 x 4.72 inches |
| Item Weight | 1.2 kg (1200 Grams) |
9. Warranty and Support
This HASTHIP® product is designed for reliability and performance. For any questions, technical support, or warranty claims, please refer to the contact information provided with your purchase receipt or visit the official HASTHIP website.
Included Components: 1 x Mini Dehumidifier, 1 x Power Adapter, 1 x English User Manual.


