1. Product Overview
This manual provides essential information for the installation, operation, and maintenance of the Saihisday Ignition Coil and CDI Box. This product is designed as a replacement component for specific Honda ATV models to restore or improve ignition system performance.

Image 1.1: Overview of the Saihisday Ignition Coil and CDI Box components.
1.1 Package Contents
- 1 x 12-volt single output Ignition Coil
- 1 x 6-pin male plug CDI Box (AC Fired)
1.2 Compatibility
This Ignition Coil and CDI Box set is compatible with the following Honda ATV models:
- Honda TRX250X FourTrax 250: 1987, 1988, 1989, 1990, 1991, 1992
- Honda FourTrax 250 TRX250X 2x4: 1991, 1992
- Honda FourTrax 250 TRX250R 2x4: 1988, 1989
Important: Please verify your vehicle's specific model and year to ensure compatibility before installation. Refer to your vehicle's service manual for exact component specifications.
2. Installation Guide
Installation of ignition system components requires basic mechanical knowledge and adherence to safety procedures. If you are unsure about any step, it is recommended to seek professional assistance.
2.1 Safety Precautions
- Always disconnect the vehicle's battery before working on electrical components.
- Ensure the engine is cool before beginning work.
- Wear appropriate personal protective equipment (PPE), such as gloves and eye protection.
- Work in a well-ventilated area.
2.2 Installation Steps (General)
The installation type for these components is Bolt-On or Screw-In. The CDI box features a 6-pin male plug connector.
- Locate Existing Components: Identify the original ignition coil and CDI box on your Honda ATV. Consult your vehicle's service manual for precise locations.
- Disconnect Wiring: Carefully disconnect all electrical connectors from the old ignition coil and CDI box. Note the routing of wires for reinstallation.
- Remove Old Components: Unbolt or unscrew the old ignition coil and CDI box from their mounting points.
- Install New CDI Box: Connect the new 6-pin male plug CDI box to the corresponding vehicle harness. Ensure the connection is secure. Mount the CDI box using existing mounting points.
- Install New Ignition Coil: Connect the new ignition coil to its electrical connector. Securely mount the ignition coil. Some users have noted that zip ties may be helpful to secure the coil if the original mounting is not a perfect fit.
- Connect Spark Plug Boot: Attach the spark plug boot from the new ignition coil securely to the spark plug.
- Reconnect Battery: Once all components are securely installed and connected, reconnect the vehicle's battery.
- Test System: Start the ATV and check for proper ignition and engine operation.

Image 2.1: Detail of the CDI Box connectors, showing the 6-pin male plug.
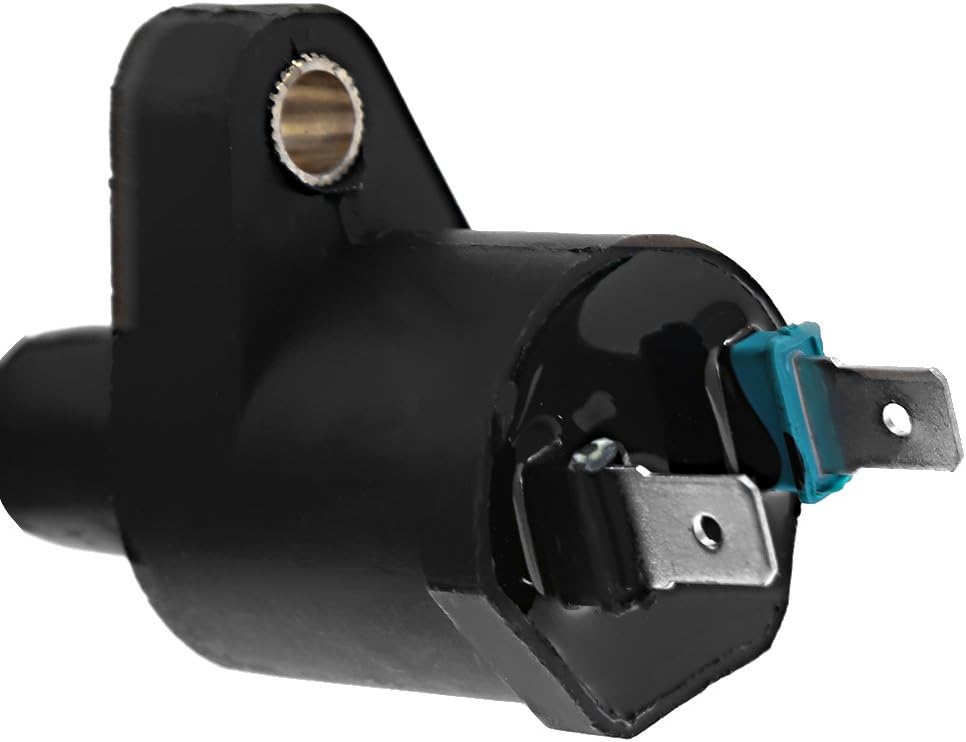
Image 2.2: Detail of the Ignition Coil's electrical connection point.
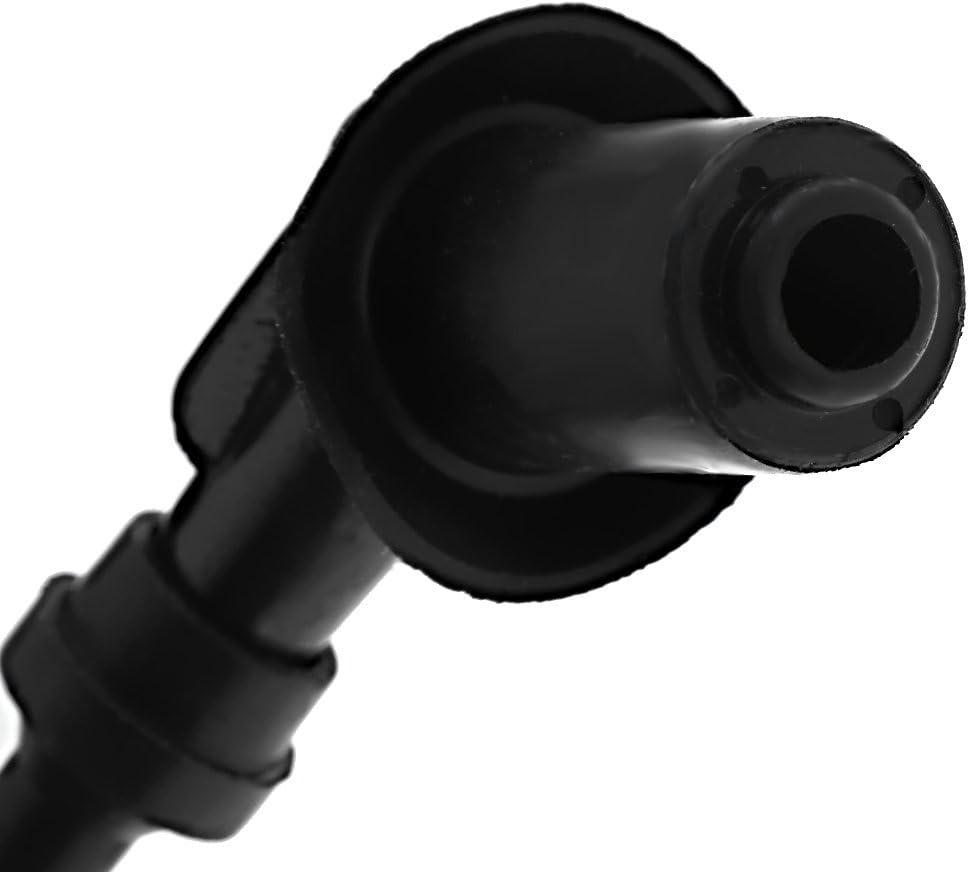
Image 2.3: Close-up view of the spark plug boot, which connects to the spark plug.
3. Operating Principles
The Ignition Coil and CDI Box are critical components of your ATV's ignition system. The CDI (Capacitor Discharge Ignition) box controls the timing of the spark, while the ignition coil steps up the battery voltage to create the high voltage necessary to fire the spark plug.
Once correctly installed, these components work in conjunction with the vehicle's magneto and other electrical systems to ensure consistent and reliable spark delivery to the engine's spark plug, facilitating combustion and engine operation.
This unit is an AC Fired CDI, meaning it receives its power directly from the stator's AC output, rather than the DC battery circuit.
4. Maintenance
Proper maintenance ensures the longevity and optimal performance of your ignition components.
- Regular Inspection: Periodically inspect the ignition coil, CDI box, and all associated wiring for signs of wear, corrosion, or damage.
- Clean Connections: Ensure all electrical connections are clean, dry, and free from corrosion. A dielectric grease can be applied to connectors to prevent moisture ingress.
- Secure Mounting: Verify that both the ignition coil and CDI box remain securely mounted to prevent vibration damage.
- Spark Plug Condition: A worn or fouled spark plug can put undue stress on the ignition coil. Ensure your spark plug is in good condition and gapped correctly according to your vehicle's specifications.
5. Troubleshooting
If you experience issues after installation, consider the following troubleshooting steps:
5.1 No Spark or Intermittent Spark
- Check Connections: Ensure all electrical connectors to the CDI box and ignition coil are fully seated and secure.
- Verify Grounding: Confirm that the ignition coil and CDI box have proper grounding.
- Test Components: If possible, test the resistance of the ignition coil and the output of the CDI box using a multimeter, comparing readings to your vehicle's service manual specifications.
- Inspect Wiring: Look for any frayed, cut, or pinched wires in the ignition system.
5.2 Specific Issues Reported by Users
- Reverse Light Stays On (1988 TRX250X): Some users have reported that on certain models, such as the 1988 Honda TRX250X, the reverse light may remain illuminated constantly after installing this CDI. A potential solution identified by users is to cut the solid grey wire leading to the CDI. This action is reported to cut the light while still allowing it to activate when in reverse. Proceed with caution and consult a professional if unsure.
- Not 1:1 Replacement / Bogging Issues: A few users have noted that this product might have a different timing curve compared to the factory unit, potentially leading to issues like the bike "hanging up on TDC of the compression stroke while starting" or "bogging issues at near top speed." If these symptoms occur, professional diagnosis and tuning may be required.
Note: If troubleshooting steps do not resolve the issue, it is recommended to consult a qualified ATV mechanic.
6. Specifications
| Feature | Specification |
|---|---|
| Brand | Saihisday |
| Model | Ignition Coil + CDI Box |
| Vehicle Service Type | ATV |
| Connector Gender | Male (6-pin for CDI) |
| Installation Type | Bolt-On or Screw-In |
| Manufacturer | Saihisday |
| UPC | 705020184586 |
| Automotive Fit Type | Vehicle Specific Fit |
| Item Weight | 7.9 ounces |
| Package Dimensions | 6.18 x 5.55 x 2.17 inches |
| Ignition Type | AC Fired |
7. Warranty and Support
For information regarding product warranty, returns, or technical support, please contact the seller or manufacturer directly. As specific warranty details are not provided in this manual, it is recommended to retain your purchase receipt and contact Saihisday customer service for any inquiries.
You can typically find contact information for Saihisday through the retailer where the product was purchased or by searching online for "Saihisday customer support".