1. Introduction
This manual provides comprehensive instructions for the HKC 32-inch 144Hz Curved Gaming Monitor, Model G32. Designed for an immersive gaming experience, this monitor features a 32-inch Full HD (1920x1080P) display with a 144Hz refresh rate and a curved panel. Please read this manual thoroughly before using the monitor to ensure proper setup and operation.
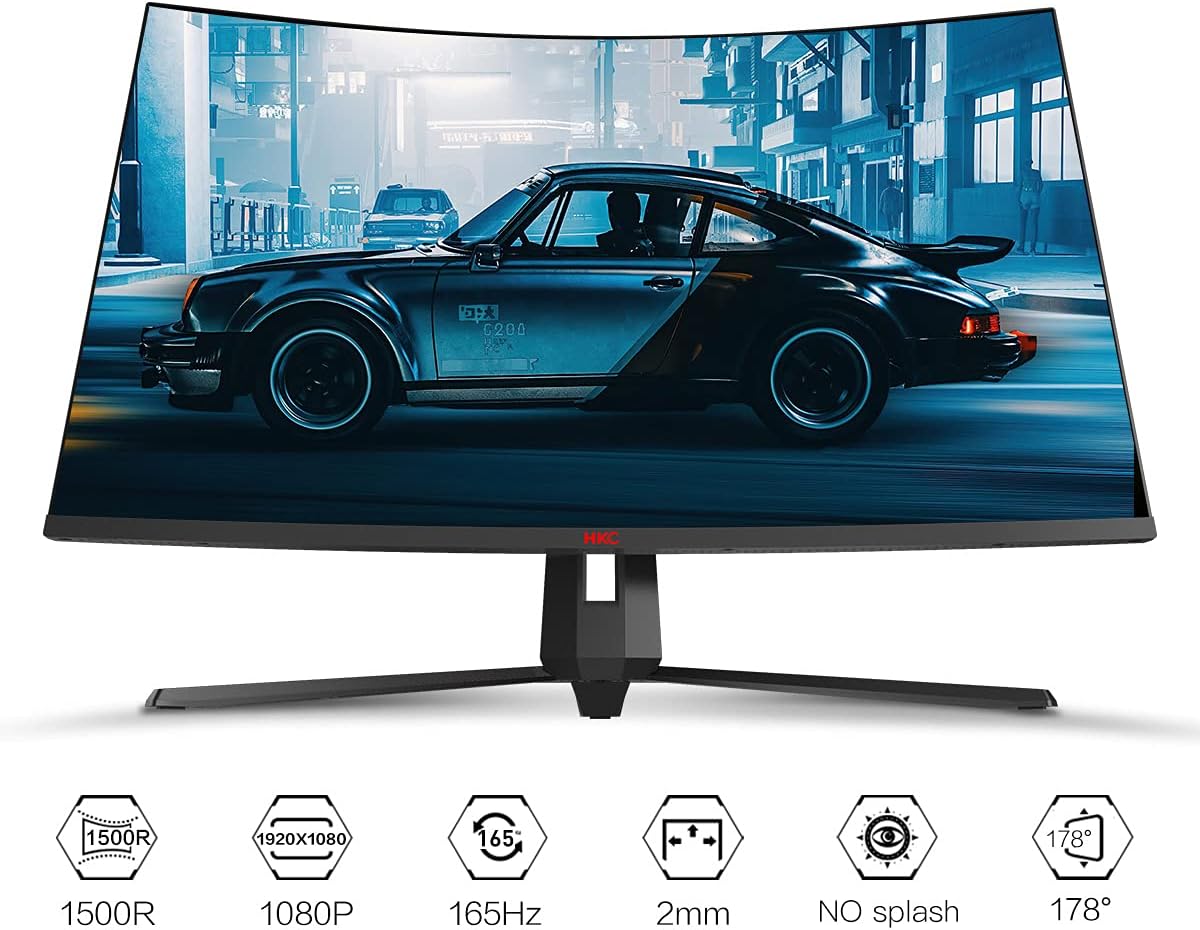
Figure 1.1: Front view of the HKC 32-inch Curved Gaming Monitor G32.
2. Safety Information
- Always disconnect the power cord from the electrical outlet before cleaning or if the monitor will not be used for an extended period.
- Do not expose the monitor to rain or moisture to avoid fire or shock hazards.
- Do not open the monitor casing. There are no user-serviceable parts inside. Refer all servicing to qualified service personnel.
- Place the monitor on a stable, flat surface to prevent it from falling.
- Ensure proper ventilation around the monitor. Do not block ventilation openings.
- Use only the power adapter and cables supplied by the manufacturer.
3. Package Contents
Verify that all items are present in your package:
- HKC 32-inch Curved Gaming Monitor (G32)
- Monitor Stand (Base and Neck)
- Power Adapter and Power Cord (Note: Power plug may be for Asian outlets; an adapter or North American power cord may be required for use in other regions.)
- DisplayPort (DP) Cable (Note: An HDMI cable is not typically included and may need to be purchased separately if HDMI connectivity is desired.)
- User Manual (this document)
4. Setup
4.1 Assembling the Monitor Stand
- Carefully remove the monitor from its packaging, keeping it protected on a soft surface.
- Attach the stand neck to the monitor back. Ensure it clicks securely into place or is fastened with screws if provided.
- Attach the stand base to the stand neck. Secure it with the provided screw(s).
- Place the assembled monitor on a stable, level desk or surface.
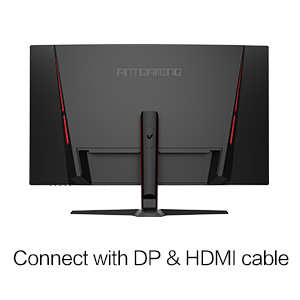
Figure 4.1: Illustration of monitor stand components.
4.2 Connecting to a Computer
- Power Connection: Connect the power cord to the monitor's power input, then plug the other end into a power outlet.
- Video Connection: Connect one end of the DisplayPort (DP) cable to the DP input on the monitor and the other end to the DP output on your computer's graphics card. If using HDMI, connect an HDMI cable (not included) to the HDMI input on the monitor and your computer.
- Audio (Optional): If your monitor has an audio output, you can connect external speakers or headphones.
Figure 4.2: Rear view of the monitor showing input ports.
Video 4.1: A general overview of the monitor's design and features, including views of the stand and rear ports. While the video may reference a 27-inch model, the design and connection principles are similar for the G32.
5. Operating the Monitor
5.1 Power On/Off
Press the power button, usually located on the bottom or back of the monitor, to turn it on or off. The power indicator light will illuminate when the monitor is on.
5.2 On-Screen Display (OSD) Menu
The OSD menu allows you to adjust various monitor settings. Use the buttons on the monitor (typically on the back or bottom right) to navigate the menu. Common settings include:
- Brightness/Contrast: Adjust image luminance.
- Color Settings: Modify color temperature, gamma, and individual RGB values.
- Input Select: Manually switch between DisplayPort and HDMI inputs.
- Game Settings: Access features like FreeSync, refresh rate, and game modes.
- OSD Settings: Adjust OSD language, transparency, and timeout.
5.3 Key Features
- 144Hz Refresh Rate: For smoother motion and reduced input lag in fast-paced games. Ensure your graphics card and cable support this refresh rate.
- AMD FreeSync Technology: Synchronizes the monitor's refresh rate with your AMD graphics card's frame rate to eliminate screen tearing and stuttering. Enable this feature in both the monitor's OSD and your graphics card settings.
- Low Blue Light Mode: Reduces blue light emissions to minimize eye strain during prolonged use. Activate this through the OSD menu.
- Game Modes (FPS/RTS): Pre-calibrated display settings optimized for specific game genres, enhancing visibility in dark areas or sharpening details.
- Curved Display: The 1500R curvature provides a more immersive viewing experience by matching the natural curve of the human eye.
- Optimized Colors: Supports a wide color gamut (e.g., DCI-P3 90%) for vibrant and accurate color reproduction.

Figure 5.1: Visual comparison of different refresh rates, demonstrating smoother motion at higher rates.

Figure 5.2: Illustration highlighting the 1500R curvature of the display.

Figure 5.3: Comparison of optimized colors (DCI-P3 90%) versus standard color display.
6. Maintenance
6.1 Cleaning the Screen
To clean the screen, gently wipe it with a soft, lint-free cloth. If necessary, dampen the cloth with a small amount of water or a non-ammonia, non-alcohol based screen cleaner. Do not spray cleaner directly onto the screen.
6.2 Cleaning the Exterior
Wipe the monitor's exterior with a soft, dry cloth. Avoid using abrasive cleaners or solvents that could damage the finish.
7. Troubleshooting
If you encounter issues with your monitor, refer to the following troubleshooting guide:
- No Power:
- Ensure the power cord is securely connected to both the monitor and a working electrical outlet.
- Check if the power adapter is functioning correctly.
- No Signal / Blank Screen:
- Verify that the video cable (DisplayPort or HDMI) is securely connected to both the monitor and your computer's graphics card.
- Ensure the correct input source is selected in the monitor's OSD menu.
- Confirm your computer is powered on and not in sleep mode.
- Note on HDMI: Some units of this model have been reported to include only DisplayPort and VGA inputs, despite product listings mentioning HDMI. If you require HDMI, please verify your monitor's physical ports.
- Image Flickering or Distortion:
- Check the video cable for damage or loose connections. Try a different cable if available.
- Adjust the refresh rate in your computer's display settings to match the monitor's supported rates (e.g., 144Hz).
- Disable or enable AMD FreeSync in the OSD and graphics card settings to see if it resolves the issue.
- Incorrect Resolution:
- Set your computer's display resolution to 1920 x 1080 for optimal image quality.
- OSD Menu Language is Incorrect:
- Navigate the OSD menu to find the 'Language' setting and select your preferred language. This may require some trial and error if the current language is unfamiliar.
8. Specifications
| Feature | Specification |
|---|---|
| Brand | HKC |
| Model Number | G32 |
| Screen Size | 32 Inches |
| Resolution | FHD 1080p (1920 x 1080) |
| Aspect Ratio | 16:9 |
| Refresh Rate | 144 Hz |
| Response Time | 4 Milliseconds |
| Contrast Ratio | 3000:1 |
| Brightness | 300 cd/m2 |
| Display Type | LED |
| Curvature | Curved (1500R) |
| Adaptive Sync | FreeSync |
| Connectivity Technology | DisplayPort, HDMI (Note: Actual ports may vary, some units may include VGA instead of HDMI) |
| Specific Uses | Gaming |
| Color | Black |
| Mounting Type | Wall Mount |
9. Warranty and Support
HKC monitors typically come with a manufacturer's warranty. Please refer to the warranty card included with your product or visit the official HKC website for detailed warranty terms and conditions. For technical support, product inquiries, or service requests, please contact HKC customer service through their official channels.
You can find more information and support on the HKC Store on Amazon.