Introduction
The Jaycar MP3209 is a 12VDC 8A Dimmer/Motor Speed Controller utilizing Pulse Width Modulation (PWM) technology. This controller is designed to efficiently vary the output from 0% to 100% for 12VDC devices such as pumps, motors, and lights. Unlike traditional resistance-based controllers, PWM ensures high efficiency and allows motors to maintain full torque even at very low speeds, preventing shuddering during start-up. Its internal circuitry is fully potted, and the control potentiometer is splash-proof, making it suitable for use in marine environments and other demanding conditions.
Safety Information
- Ensure the power supply is 12VDC and does not exceed 8 amps. Exceeding these limits can damage the controller and connected devices.
- Observe correct polarity when connecting the power supply and the load. Incorrect wiring can cause malfunction or damage.
- Disconnect power before making any connections or adjustments to prevent electrical shock.
- Do not expose the unit to excessive moisture or extreme temperatures beyond its intended operating conditions, despite its splash-proof design.
- If you are unsure about any wiring procedures, consult a qualified electrician or technician.
Product Overview
The Jaycar MP3209 controller features a compact design with clearly labeled input and output terminals, and a rotary knob for adjustment. The unit is housed in a durable casing with mounting tabs for secure installation.
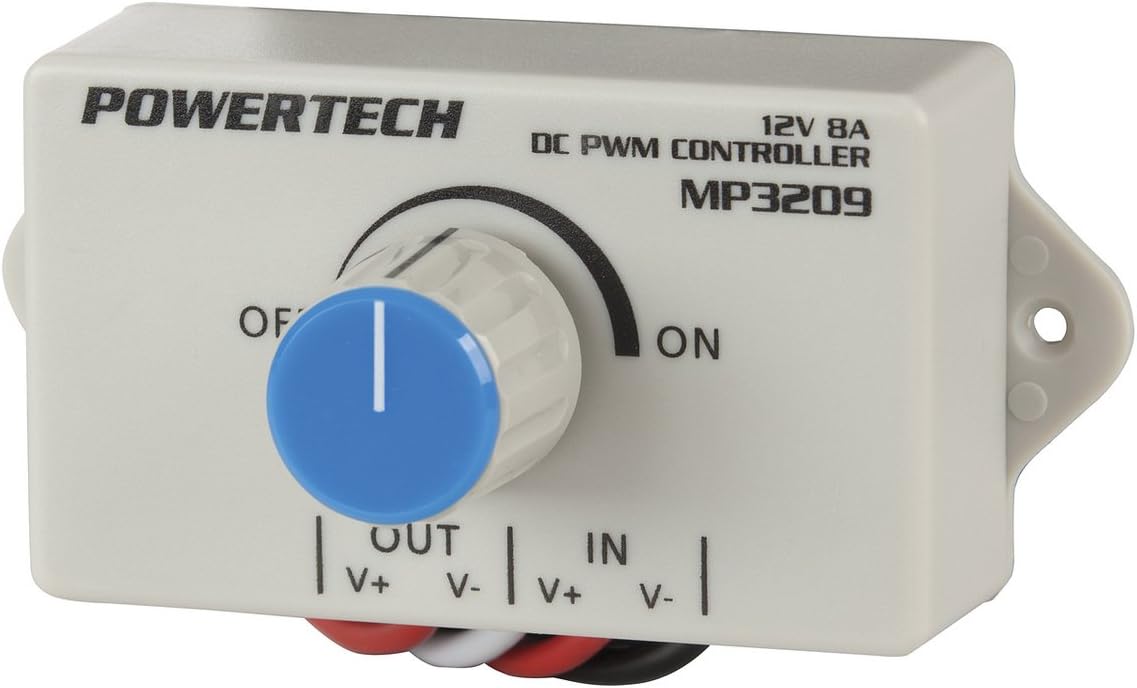
Image: The Jaycar MP3209 controller. Visible are the 'POWERTECH' brand, '12V 8A DC PWM CONTROLLER MP3209' model designation, a central rotary knob with 'OFF' and 'ON' markings, and clearly labeled 'OUT' (V+, V-) and 'IN' (V+, V-) wiring terminals at the bottom.
Setup Instructions
Follow these steps to correctly install and connect your MP3209 controller:
- Prepare Wiring: Ensure all power is disconnected from your 12VDC source and the device you intend to control.
- Identify Terminals: Locate the 'IN' terminals (V+ and V-) for the power supply and the 'OUT' terminals (V+ and V-) for the load (motor, pump, or light).
- Connect Power Input: Connect the positive (+) lead from your 12VDC power supply to the 'IN V+' terminal and the negative (-) lead to the 'IN V-' terminal. Ensure connections are secure and polarity is correct.
- Connect Load Output: Connect the positive (+) lead of your 12VDC motor, pump, or light to the 'OUT V+' terminal and the negative (-) lead to the 'OUT V-' terminal. Verify correct polarity.
- Secure Installation: Mount the controller in a suitable location using the integrated mounting tabs, ensuring it is protected from physical damage and excessive environmental exposure.
Operating Instructions
Once the controller is correctly wired and power is applied:
- Power On: Turn the rotary knob clockwise from the 'OFF' position. The connected device will begin to receive power.
- Adjust Output: Continue rotating the knob clockwise to increase the output (speed for motors, brightness for lights) or counter-clockwise to decrease it. The output can be varied smoothly from 0% to 100%.
- Power Off: To turn off the connected device, rotate the knob fully counter-clockwise to the 'OFF' position.
Maintenance
The MP3209 controller is designed for durability and requires minimal maintenance:
- Cleaning: Periodically wipe the exterior of the unit with a dry, soft cloth to remove dust and debris. Do not use abrasive cleaners or solvents.
- Inspection: Regularly check all wiring connections to ensure they remain secure and free from corrosion. Inspect the casing for any signs of damage.
- Environmental Protection: While splash-proof, avoid prolonged exposure to direct water spray or submersion.
Troubleshooting
If you encounter issues with your MP3209 controller, consider the following:
- No Power to Device:
- Check the 12VDC power supply to ensure it is active and providing the correct voltage.
- Verify all input and output wiring connections for correct polarity and secure contact.
- Ensure the control knob is turned past the 'OFF' position.
- Device Not Responding to Adjustment:
- Confirm the load (motor/light) is functioning correctly when connected directly to the 12VDC source.
- Check that the load's current draw does not exceed the controller's 8A limit.
- Intermittent Operation:
- Inspect wiring for loose connections or damaged insulation.
- Ensure the controller is not overheating due to excessive load or poor ventilation.
Specifications
| Feature | Specification |
|---|---|
| Operating Voltage | 12VDC |
| Maximum Current | 8 Amps |
| Control Type | Pulse Width Modulation (PWM) |
| Output Range | 0% to 100% |
| Length | 95.00mm |
| Width | 47.00mm |
| Height | 26.00mm |
| Special Features | Fully potted internal circuitry, splash-proof control potentiometer |
Warranty and Support
This product is covered by a standard manufacturer's warranty against defects in materials and workmanship. For specific warranty terms, duration, and to obtain technical support or service, please refer to the documentation provided with your purchase or visit the official Jaycar website. Keep your proof of purchase for warranty claims.