1. Introduction
Thank you for choosing the Ronseal Pump Sprayer. This manual provides essential information for the safe and effective use, maintenance, and troubleshooting of your new sprayer. Designed for applying fence treatments, garden solutions, and pest control products, this sprayer delivers accurate and even coverage. Please read these instructions carefully before first use and retain them for future reference.

Figure 1: Ronseal Pump Sprayer, fully assembled.
2. Safety Information
Always prioritize safety when operating any equipment. Failure to follow these safety guidelines may result in injury or damage to the sprayer.
- Read Chemical Labels: Always read and follow the instructions and safety warnings on the labels of any chemicals or liquids you intend to spray.
- Wear Protective Gear: Use appropriate personal protective equipment (PPE) such as gloves, eye protection, and respiratory masks as recommended by the chemical manufacturer.
- Do Not Over-Pressurize: Never exceed the maximum recommended pressure for the sprayer. Over-pressurizing can cause components to fail.
- Ventilate Area: Use the sprayer in well-ventilated areas to avoid inhaling fumes.
- Keep Away from Children and Pets: Store and operate the sprayer out of reach of children and animals.
- Inspect Before Use: Before each use, check the sprayer for any signs of damage, leaks, or worn parts. Do not use if damaged.
- Release Pressure Safely: Always release pressure from the sprayer before opening the tank or performing any maintenance.
3. Package Contents
Verify that all components are present in the package:
- Sprayer Tank (Green)
- Pump Assembly with Handle
- Hose
- Spray Lance with Nozzle
- Shoulder Strap
- Funnel Lid (Integrated into pump assembly)
4. Setup and Assembly
Follow these steps to assemble and prepare your Ronseal Pump Sprayer for use:
- Unpack Components: Carefully remove all parts from the packaging.
- Attach Hose: Connect one end of the hose to the outlet port on the sprayer tank and the other end to the handle of the spray lance. Ensure connections are secure to prevent leaks.
- Attach Shoulder Strap: Securely attach the shoulder strap to the designated loops on the sprayer tank. Adjust the strap length for comfortable carrying.
- Prepare for Filling: Unscrew the pump assembly from the tank by turning it counter-clockwise. The integrated funnel lid will assist in clean filling.
- Fill Tank: Pour the desired liquid into the tank, ensuring not to exceed the maximum fill line. The funnel lid helps prevent spills.
- Secure Pump Assembly: Carefully reinsert the pump assembly into the tank and screw it clockwise until it is tightly sealed. Ensure the O-ring is properly seated to prevent leaks and allow pressure build-up.
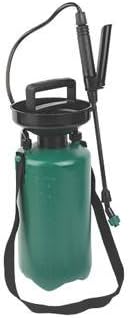
Figure 2: Sprayer components, showing the pump assembly and tank opening for filling.
5. Operating Instructions
Once assembled and filled, follow these steps to operate your pump sprayer:
- Build Pressure: With the pump assembly securely tightened, pump the handle up and down repeatedly. You will feel resistance as pressure builds inside the tank. Pump until you feel significant resistance, but do not over-pressurize.
- Begin Spraying: Aim the spray lance at the target area. Press the trigger on the lance handle to begin spraying.
- Adjust Nozzle: The nozzle at the end of the lance can be adjusted by twisting it to change the spray pattern from a fine mist to a direct stream.
- Maintain Pressure: If the spray weakens, pump the handle a few more times to restore pressure.
- Release Pressure After Use: After completing your task, always release any remaining pressure in the tank. This is typically done by pulling up the pressure release valve on the pump assembly or by holding the spray trigger until all pressure is dissipated.
- Empty and Clean: Never store the sprayer with chemicals inside. Empty any remaining liquid and clean the sprayer thoroughly as described in the Maintenance section.

Figure 3: Ronseal Pump Sprayer in a garden environment, demonstrating typical use.
6. Maintenance and Storage
Proper maintenance ensures the longevity and optimal performance of your sprayer.
- Clean After Each Use: After each use, empty any remaining liquid. Fill the tank with clean water and spray it through the lance until the tank is empty. This flushes out chemical residues. For stubborn residues, a mild detergent can be used, followed by a thorough rinse with clean water.
- Inspect Seals and O-rings: Regularly check all seals and O-rings for wear, cracks, or damage. Replace them if necessary to prevent leaks and maintain pressure.
- Lubricate Pump: Periodically apply a small amount of silicone grease or petroleum jelly to the pump piston O-ring to ensure smooth operation and a good seal.
- Clean Nozzle: If the nozzle becomes clogged, remove it and clean it with water. A small brush or pin can be used to clear blockages, but be careful not to damage the nozzle opening.
- Storage: Store the sprayer in a cool, dry place, away from direct sunlight and freezing temperatures. Ensure all pressure is released before storage. Do not store with chemicals inside.
7. Troubleshooting
Here are solutions to common issues you might encounter:
| Problem | Possible Cause | Solution |
|---|---|---|
| No pressure or low pressure | Loose pump assembly; Worn O-ring on pump; Clogged nozzle; Insufficient pumping | Tighten pump assembly; Replace O-ring; Clean nozzle; Pump more times |
| Liquid leaking from tank or hose | Loose connections; Damaged O-rings or seals; Cracked tank/hose | Tighten all connections; Inspect and replace damaged O-rings/seals; Replace damaged components |
| Uneven or inconsistent spray pattern | Clogged nozzle; Incorrect nozzle adjustment | Clean nozzle thoroughly; Adjust nozzle by twisting to achieve desired pattern |
| Pump handle is stiff or difficult to operate | Dry O-ring on pump piston; Debris in pump cylinder | Lubricate pump piston O-ring with silicone grease; Disassemble and clean pump cylinder |
8. Specifications
Key technical details for the Ronseal Pump Sprayer:
- Brand: Ronseal
- Model Number: 5838600510408
- Tank Volume: Approximately 1 Liter (Ltr)
- Color: Green
- Material: Plastic
- Power Source: Hand Powered
- Recommended Uses: Garden spraying, fence treatment, pest control
9. Warranty and Support
For information regarding warranty coverage or technical support, please refer to the product packaging or contact Ronseal customer service directly. Keep your purchase receipt as proof of purchase.
Contact Information: Please visit the official Ronseal website for the most up-to-date contact details for your region.