
1. Introduction
This manual provides instructions for the safe and effective operation and maintenance of your Hyperikon HyperCut52X-BDP 3-in-1 Plasma Cutter, TIG Welder, and Stick Welder. This unit features IGBT inverter technology and dual voltage compatibility (120V/240V) for versatile metal fabrication tasks.
2. Safety Information
Always prioritize safety when operating welding and cutting equipment. Failure to follow safety guidelines can result in serious injury or death.
- Electric Shock: Welding and plasma cutting can cause electric shock. Ensure proper grounding, wear dry gloves, and inspect cables for damage.
- Fumes and Gases: Welding and cutting produce fumes and gases that can be hazardous. Work in a well-ventilated area or use fume extraction.
- Arc Rays: Arc rays can burn eyes and skin. Always wear a welding helmet with appropriate shade, protective clothing, and gloves.
- Fire and Explosion: Sparks and hot metal can cause fires. Keep flammable materials away from the work area. Have a fire extinguisher readily available.
- Hot Parts: Equipment and workpieces become hot. Allow them to cool before handling.
- Noise: High noise levels can damage hearing. Wear hearing protection.
Read and understand all safety warnings and instructions before operating the unit.
3. Product Overview and Included Components
The Hyperikon HyperCut52X-BDP is a versatile machine designed for plasma cutting, TIG welding, and stick welding. Familiarize yourself with the main unit and its accessories.
Main Unit Front Panel
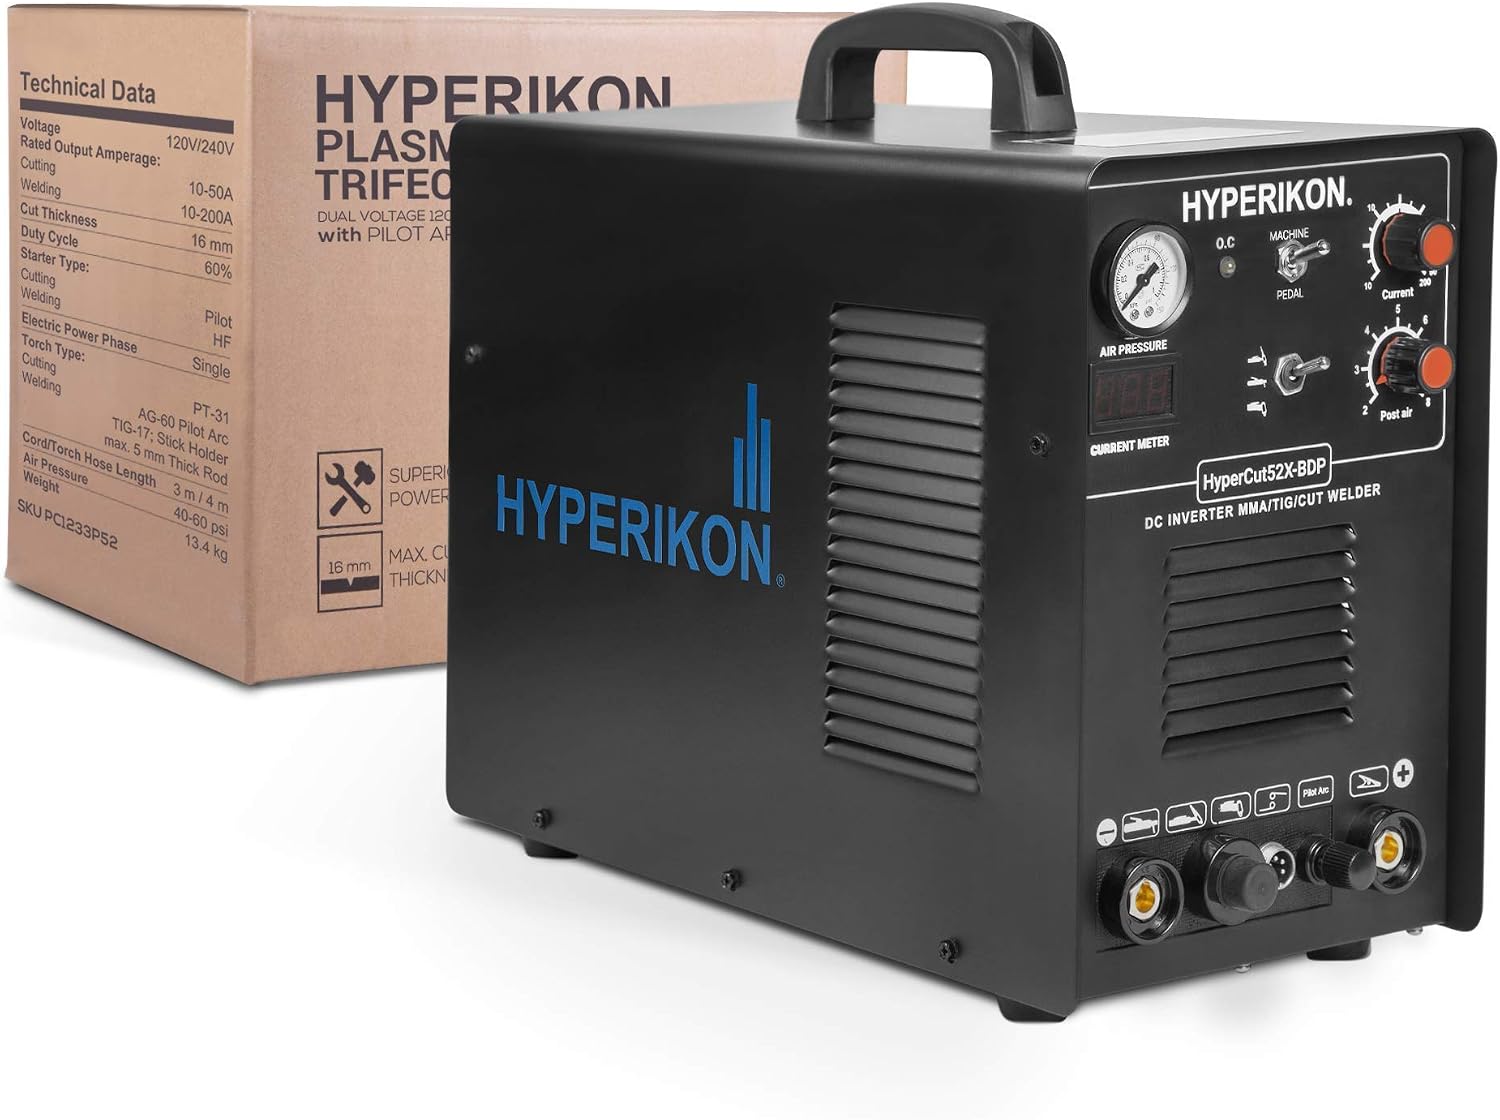
This image displays the front panel of the Hyperikon HyperCut52X-BDP unit. Key features include the digital current meter, air pressure gauge, mode selection switch (O.C., Machine, Pedal), current adjustment knobs, and connections for the plasma torch, TIG torch, and ground clamp. The model number HyperCut52X-BDP is clearly visible.
Main Unit Rear Panel

The rear panel of the unit features the main power switch (ON/OFF), a cooling fan for heat dissipation, the "AIR / GAS IN" port for connecting the air hose, and the "INPUT AC120V/240V" power connection. A power cable with a 240V plug is shown connected.
Included Accessories:
- AG-60 Pilot Arc Cutting Torch: For plasma cutting operations.
- TIG-17 Welding Torch: For TIG welding operations.
- Stick Holder: For MMA/Stick welding.
- Earth Clamp: For grounding the workpiece.
- Power Cable: For connecting to electrical supply.
- Air Hose: For connecting to an external air compressor.
- Air Regulator: To control air pressure.
- Spare Torch Parts: Consumables for plasma and TIG torches.
Plasma Cutting Torch and Consumables

This image shows the AG-60 pilot arc plasma cutting torch along with its essential consumables. These include electrodes, cutting nozzles, and ceramic shield cups, which are crucial for effective plasma cutting and require periodic replacement.
TIG Welding Torch and Consumables
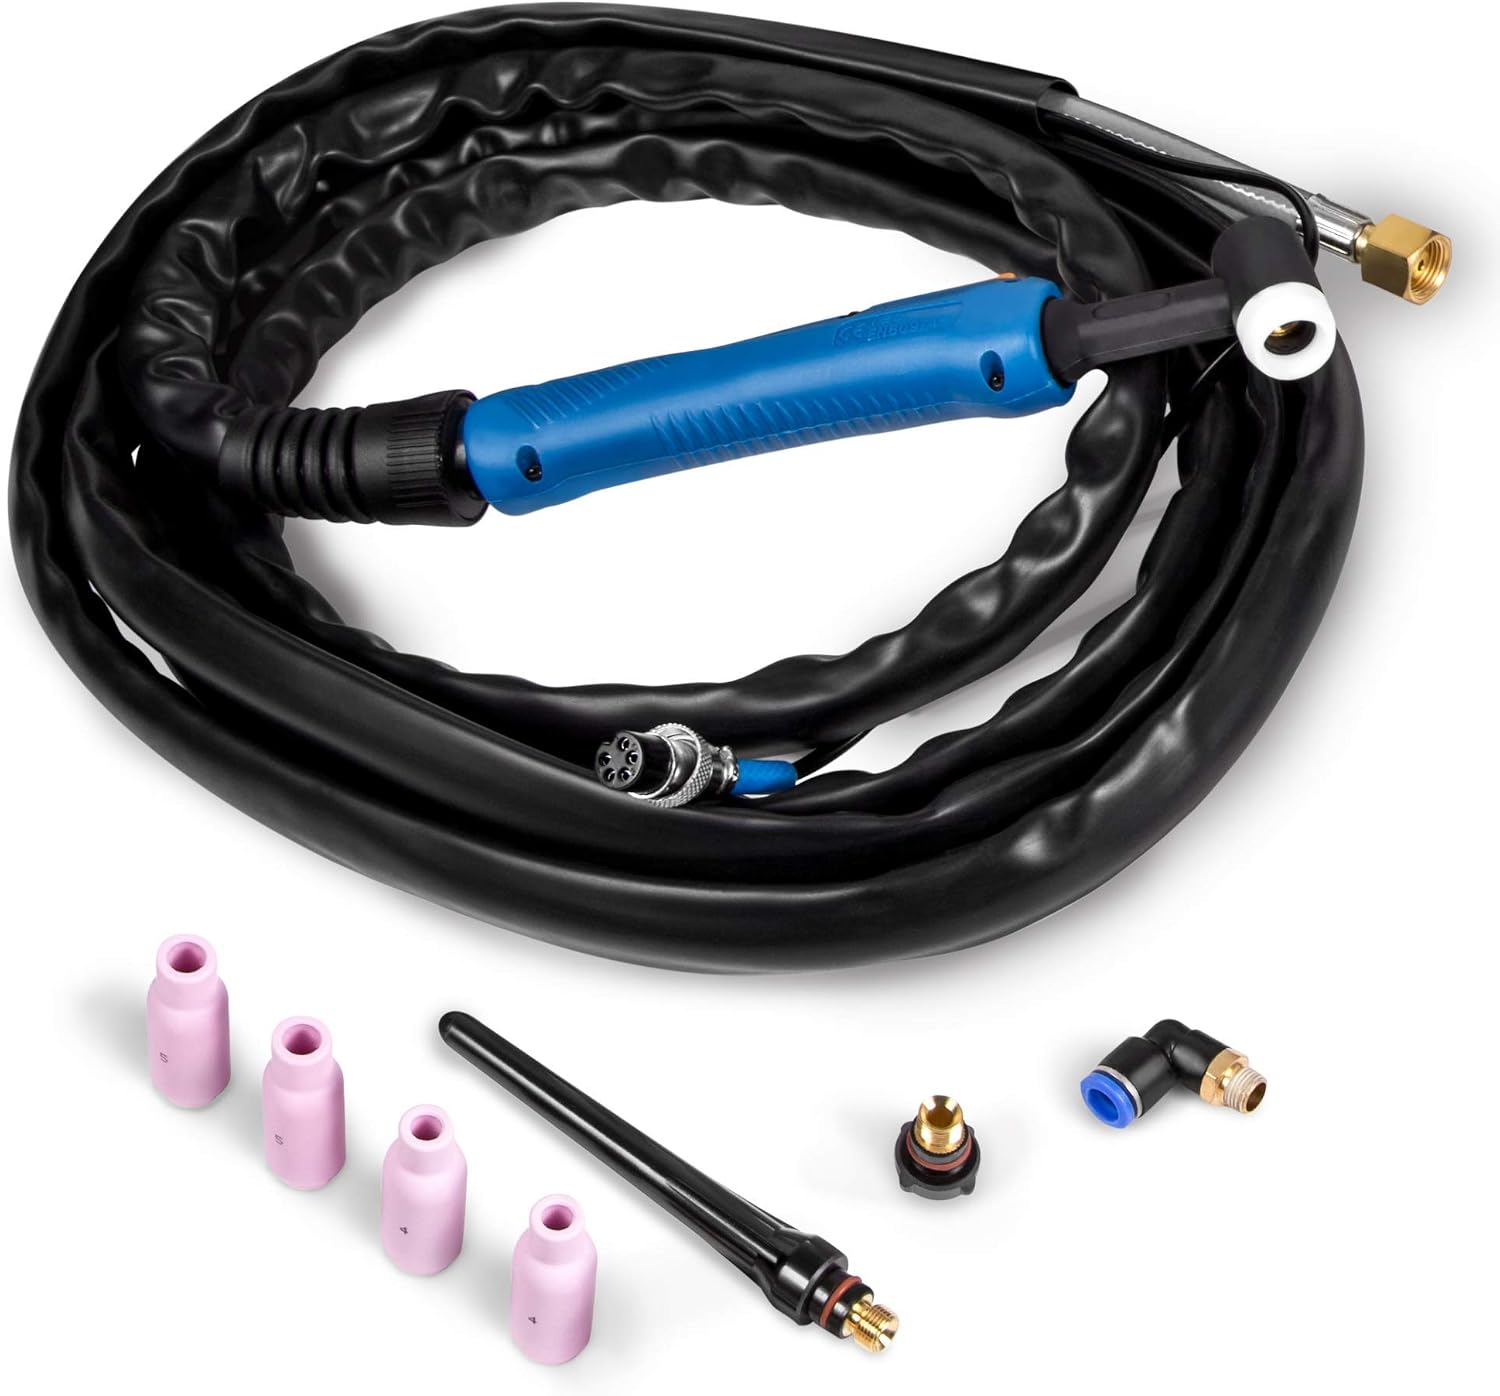
The TIG-17 welding torch is depicted here, accompanied by its ceramic nozzles (collet bodies and collets are implied) and a long back cap. These components are necessary for setting up the TIG torch for welding operations.
4. Setup Instructions
Follow these steps to set up your Hyperikon HyperCut52X-BDP unit before operation.
4.1 Power Connection
- Ensure the unit's power switch is in the "OFF" position.
- Connect the power cable to the "INPUT AC120V/240V" port on the rear of the machine.
- Plug the power cable into a suitable 120V or 240V power outlet. The unit automatically detects the voltage. Ensure the outlet can provide sufficient amperage for the desired operation.
4.2 Air/Gas Connection (for Plasma Cutting and TIG Welding)
- Attach the air regulator to the "AIR / GAS IN" port on the rear of the unit.
- Connect the air hose from your external air compressor (not included) to the air regulator.
- Ensure all connections are secure to prevent air leaks.
- Set the air pressure using the regulator to 40-60 PSI for optimal plasma cutting performance.
4.3 Torch and Ground Clamp Connection
- For Plasma Cutting: Connect the AG-60 plasma torch to the designated plasma torch connector on the front panel.
- For TIG Welding: Connect the TIG-17 torch to the designated TIG torch connector on the front panel.
- For Stick Welding: Connect the stick holder to the positive (+) terminal and the ground clamp to the negative (-) terminal for DCEN (Direct Current Electrode Negative) or vice-versa for DCEP (Direct Current Electrode Positive) depending on the electrode type.
- Connect the earth clamp cable to the designated ground terminal on the front panel. Securely attach the ground clamp to the workpiece or work table, ensuring good electrical contact.
5. Operating Instructions
This section details the operation of the Hyperikon HyperCut52X-BDP for its three primary functions.
5.1 General Operation
- After setup, turn the main power switch to "ON".
- Select the desired operating mode (Plasma, TIG, or MMA/Stick) using the mode selection switch on the front panel.
- Adjust the current (amperage) using the "Current" knob according to the material thickness and type. The digital display will show the set amperage.
- For plasma cutting, ensure the air pressure is set correctly (40-60 PSI).
5.2 Plasma Cutting (Pilot Arc)
The unit features a pilot arc for easier starting and cutting of painted or rusty metals.
- Select "Plasma" mode.
- Set the cutting current (10-50A) based on the material. For 14mm thickness, higher amperage will be required.
- Ensure proper air pressure (40-60 PSI).
- Position the plasma torch nozzle close to the workpiece.
- Press the torch trigger to initiate the pilot arc and begin cutting. Maintain a consistent travel speed for a clean cut.
- Adjust cutting speed and amperage to minimize dross residue.
Plasma Cutting in Action

This image illustrates the Hyperikon plasma cutter in use, demonstrating the cutting process on a metal workpiece. The operator is wearing appropriate personal protective equipment, including a welding helmet and gloves. The maximum cutting thickness of 14mm is highlighted.
5.3 TIG Welding
For precise welding of various metals.
- Select "TIG" mode.
- Set the welding current (10-200A) appropriate for the material and tungsten electrode size.
- Ensure proper shielding gas (e.g., Argon) is connected and flowing.
- Initiate the arc and perform welding as per standard TIG welding practices.
5.4 Stick Welding (MMA)
For general-purpose welding with coated electrodes.
- Select "MMA" (Stick) mode.
- Set the welding current (10-200A) based on the electrode type and diameter.
- Insert the electrode into the stick holder.
- Strike the arc and perform welding.
6. Maintenance
Regular maintenance ensures the longevity and optimal performance of your unit.
- Cleaning: Periodically clean the unit's exterior with a dry cloth. Use compressed air to blow out dust from inside the machine, especially around the cooling fan and vents. Ensure the unit is unplugged before cleaning.
- Torch Consumables: Inspect plasma torch electrodes, nozzles, and ceramic cups regularly. Replace them when worn to maintain cutting quality. For TIG welding, check tungsten electrodes for proper sharpening and replace ceramic nozzles as needed.
- Cables and Connections: Inspect all cables (power, torch, ground) for cuts, fraying, or loose connections. Repair or replace damaged cables immediately.
- Air Filter: If your air compressor has an air filter, clean or replace it as per the compressor's instructions to ensure clean air supply to the plasma cutter.
7. Troubleshooting
Refer to this section for common issues and their potential solutions.
| Problem | Possible Cause | Solution |
|---|---|---|
| No power to the unit. | Power switch off, power cable loose, circuit breaker tripped. | Ensure power switch is ON. Check power cable connection. Reset circuit breaker. |
| Plasma arc does not start or is weak. | Insufficient air pressure, worn consumables, poor ground connection, incorrect amperage setting. | Check air pressure (40-60 PSI). Replace plasma torch consumables. Ensure ground clamp is secure. Adjust amperage. |
| Welding arc is unstable or difficult to strike. | Poor ground connection, incorrect amperage, wrong electrode type/size, contaminated tungsten (TIG). | Verify ground connection. Adjust amperage. Use correct electrode. Clean or re-grind tungsten. |
| Unit overheats and shuts down. | Exceeded duty cycle, blocked ventilation, high ambient temperature. | Allow unit to cool down. Ensure clear airflow around the unit. Reduce workload or operate in a cooler environment. |
8. Technical Specifications
Product Dimensions

This diagram illustrates the physical dimensions of the Hyperikon HyperCut52X-BDP unit, indicating a length of 17 inches, a width of 8.1 inches, and a height of 14.2 inches. These measurements are important for planning workspace and storage.
- Model Number: HyperCut52X-BDP
- Part Number: PC1233P52
- Input Voltage: 120V/240V Dual Voltage
- Plasma Cutting Output Amperage: 10-50A
- TIG/MMA Welding Output Amperage: 10-200A
- Duty Cycle: 60%
- Max. Cutting Thickness: 14mm (for mild steel/aluminum)
- Air Pressure (Plasma): 40-60 PSI
- Insulation Class: F
- Protection Class: IP21s
- Technology: IGBT Inverter
- Product Dimensions: 43.18 x 20.57 x 36.07 cm (17 x 8.1 x 14.2 inches)
- Item Weight: 16.65 kg
9. Warranty Information
Hyperikon 3-Year Warranty

This image confirms the 3-year warranty provided by Hyperikon for the product, ensuring coverage for a significant period after purchase.
The Hyperikon HyperCut52X-BDP unit is covered by a 3-year unlimited warranty. This warranty covers defects in materials and workmanship under normal use. For warranty claims or service, please contact Hyperikon customer support.
10. Customer Support
For technical assistance, warranty inquiries, or to order replacement parts, please contact Hyperikon customer support through their official website or the retailer where the product was purchased. Have your model number (HyperCut52X-BDP) and purchase date ready when contacting support.
Online Resources: Visit the official Hyperikon website for additional product information, FAQs, and support resources.