1. Introduction
This manual provides essential information for the safe and effective use of your CAAT TOOLS SDS Drill Chuck. This chuck is designed as a replacement part for specific BOSCH SDS+ rotary hammer drills, enabling quick and secure bit changes. Please read this manual thoroughly before installation and operation.
2. Safety Instructions
Always observe general power tool safety guidelines when working with this drill chuck. Failure to do so may result in injury or damage to the tool.
- Disconnect Power: Always unplug the power tool from the power source before changing accessories, making adjustments, or performing maintenance.
- Wear Personal Protective Equipment (PPE): Use safety glasses, hearing protection, and gloves when operating power tools.
- Inspect Before Use: Before each use, inspect the drill chuck and the power tool for any signs of damage or wear. Do not use if damaged.
- Secure Workpiece: Ensure the workpiece is stable and secured before drilling.
- Correct Application: Use the drill chuck only for its intended purpose with compatible SDS+ drill bits.
- Keep Children Away: Do not allow children or untrained persons to operate power tools.
3. Product Overview
The CAAT TOOLS SDS Drill Chuck is a robust replacement component designed for specific BOSCH SDS+ rotary hammer drills. It facilitates quick and efficient changing of SDS+ drill bits.
3.1 Compatible Models
This SDS drill chuck is compatible with the following BOSCH hammer drill models:
- BOSCH GBH2-26
- BOSCH GBH2-26DFR
- BOSCH GBH2-28DFV
- BOSCH GBH4-32DFR
- BOSCH GBH3-28
- BOSCH GBH36VF (SDS+ 36V)
Note: This chuck is NOT compatible with the BOSCH GBH24VFR model.
3.2 Component Identification
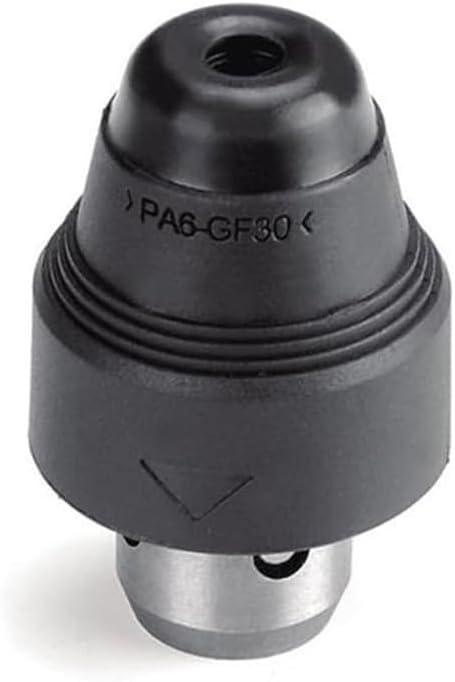


4. Setup and Installation
Installing the CAAT TOOLS SDS Drill Chuck is a straightforward process that typically requires no additional tools.
- Prepare the Drill: Ensure your BOSCH hammer drill is unplugged from the power source.
- Remove Existing Chuck (if applicable): If your drill has an existing chuck, follow your drill's manufacturer instructions to remove it. For DFR models, this usually involves pulling back the collar and twisting.
- Attach the New Chuck: Align the SDS+ end of the CAAT TOOLS chuck with the spindle of your hammer drill. Push the chuck firmly onto the spindle while twisting slightly until it clicks into place. Ensure the chuck is fully seated and secure.
- Verify Security: Gently pull on the chuck to confirm it is securely locked onto the drill spindle. It should not come off easily.
For visual guidance, refer to Figure 5 in the Product Overview section, which illustrates the chuck attached to a drill.
5. Operating Instructions
Once the SDS Drill Chuck is installed, you can proceed with inserting and removing SDS+ drill bits.
5.1 Inserting an SDS+ Drill Bit
- Select Bit: Choose the appropriate SDS+ drill bit for your task.
- Clean Bit Shank: Ensure the shank of the SDS+ drill bit is clean and free of debris. A light coating of grease on the shank can prolong chuck life and improve performance.
- Insert Bit: Push the SDS+ drill bit firmly into the chuck opening until it clicks into place. You should feel a slight spring-loaded resistance, and the bit will have a small amount of axial play (this is normal for SDS+ systems).
- Verify Security: Pull on the drill bit to ensure it is securely locked in the chuck. It should not pull out.
5.2 Removing an SDS+ Drill Bit
- Disconnect Power: Always unplug the power tool before removing bits.
- Retract Collar: Pull back the collar on the SDS Drill Chuck.
- Remove Bit: While holding the collar back, pull the drill bit straight out of the chuck.
6. Maintenance
Regular maintenance ensures the longevity and optimal performance of your SDS Drill Chuck.
- Cleaning: Periodically clean the chuck, especially the internal mechanism, to remove dust, dirt, and debris. Use compressed air or a brush.
- Lubrication: Apply a small amount of SDS+ grease to the shank of drill bits before insertion. This helps reduce wear on the chuck and bit.
- Inspection: Regularly inspect the chuck for signs of wear, cracks, or damage. Pay attention to the locking mechanism and the SDS+ interface. Replace the chuck if significant wear or damage is observed.
- Storage: Store the chuck in a clean, dry environment when not in use.
7. Troubleshooting
If you encounter issues with your SDS Drill Chuck, refer to the following common problems and solutions:
| Problem | Possible Cause | Solution |
|---|---|---|
| Chuck does not fit onto the drill. | Incompatible drill model. | Verify your drill model against the list of compatible models (Section 3.1). This chuck is specifically for DFR type SDS+ drills. |
| Drill bit does not lock into the chuck. | Debris in chuck or on bit shank; incorrect bit type; worn chuck mechanism. | Clean the chuck and bit shank. Ensure you are using an SDS+ bit. Inspect the chuck for damage; replace if necessary. |
| Drill bit is difficult to remove. | Debris or lack of lubrication; worn chuck mechanism. | Ensure the collar is fully retracted. Clean and lubricate the bit shank. If problem persists, inspect chuck for wear. |
| Excessive wobble or play in the drill bit. | Worn chuck or bit shank; incorrect bit insertion. | Ensure the bit is fully inserted and locked. Inspect both the chuck and the bit shank for wear. A small amount of axial play is normal for SDS+ bits. |
8. Specifications
- Product Type: SDS+ Drill Chuck
- Compatibility: BOSCH GBH2-26, GBH2-26DFR, GBH2-28DFV, GBH4-32DFR, GBH3-28, GBH36VF (Does NOT fit GBH24VFR)
- Material: Plastic, Iron
- Dimensions: Approximately 2.95 x 1.85 x 1.85 inches (75 x 47 x 47 mm)
- Item Weight: Approximately 7 ounces (0.2 Kilograms)
- Included Components: Drill Chuck
- Manufacturer: CAAT
- UPC: 761330525297
9. Warranty and Support
This CAAT TOOLS product is designed for durability and performance. For any questions regarding installation, operation, or troubleshooting that are not covered in this manual, please contact the seller or CAAT TOOLS customer support through the platform where the purchase was made.
Please retain your proof of purchase for any warranty claims. Specific warranty terms may vary by retailer or region.