
1. Introduction
This manual provides essential information for the proper setup, operation, and maintenance of your Hitec RCD Starlit Drone Transmitter (Mode 1). Please read this manual thoroughly before using the product to ensure safe and efficient operation. This transmitter is designed for controlling compatible drones and features a Mode 1 configuration, where the throttle control is on the right stick.
2. Setup
2.1 Unboxing and Component Check
Carefully remove all components from the packaging. Verify that all items are present:
- Starlit Drone Transmitter (Mode 1)
- Mobile Device Holder
- Instruction Manual (this document)
2.2 Battery Installation
The transmitter requires batteries for operation. Locate the battery compartment on the rear of the transmitter. Open the compartment cover, insert the required batteries (typically AA or a rechargeable pack, refer to packaging for specifics) ensuring correct polarity. Close the compartment cover securely.
2.3 Attaching the Mobile Device Holder
The included mobile device holder can be attached to the top of the transmitter for FPV (First Person View) or telemetry display. Align the holder with the designated slot on the transmitter and slide it into place until it clicks securely. Ensure it is firmly attached before placing a mobile device.
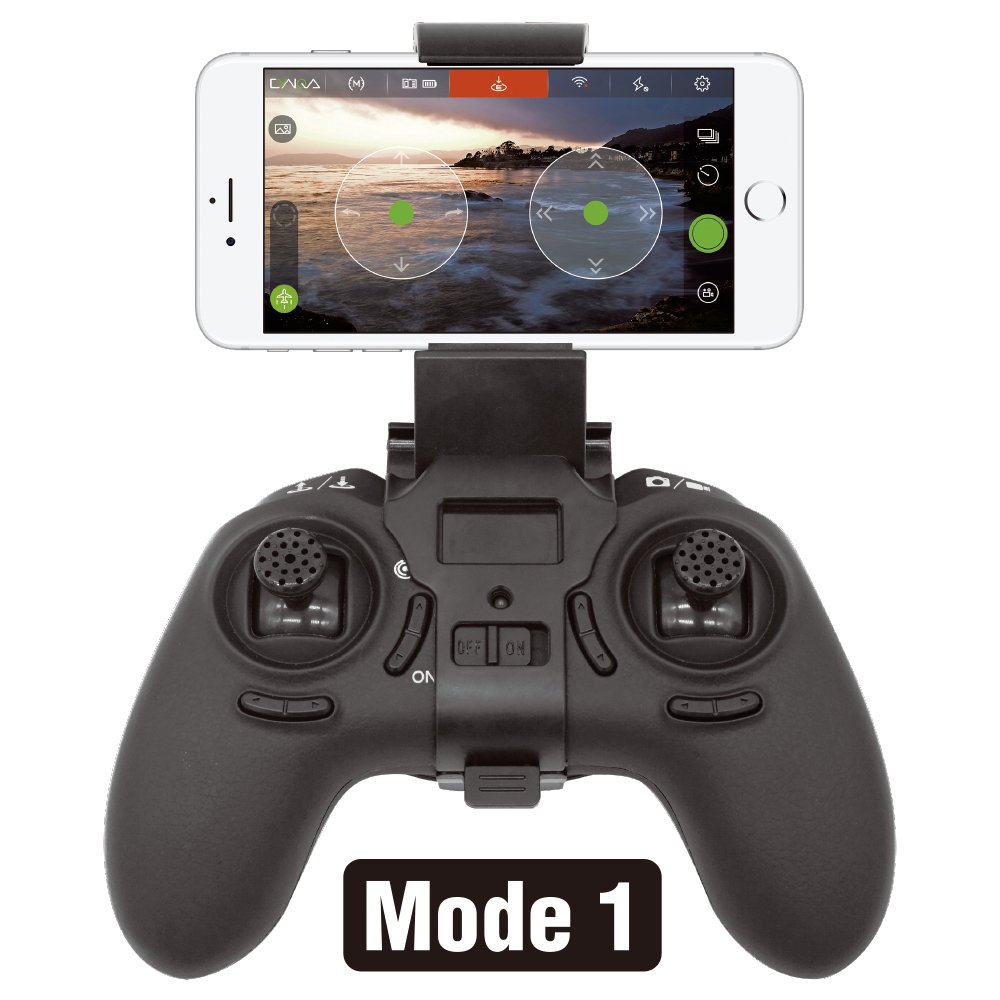
Figure 1: Hitec RCD Starlit Drone Transmitter (Mode 1) with its detachable mobile device holder. The image shows the main body of the transmitter with two control sticks, various buttons, and a small display screen. The mobile device holder is shown detached to the right.
2.4 Binding the Transmitter to Your Drone
Before first use, the transmitter must be bound to your compatible drone. The binding process typically involves:
- Power on your drone and place it in binding mode (refer to your drone's specific manual for instructions).
- While holding the binding button (if present, refer to transmitter diagram or specific instructions) on the transmitter, power on the transmitter.
- Observe the indicator lights on both the drone and the transmitter. A solid light usually indicates a successful bind.
- Once bound, power cycle both the drone and transmitter to confirm the connection.
If binding fails, repeat the steps, ensuring both devices are in close proximity and there are no strong interference sources.
3. Operating Instructions
3.1 Powering On/Off
To power on the transmitter, slide the 'ON/OFF' switch to the 'ON' position. The display will illuminate, and indicator lights will activate. To power off, slide the switch to the 'OFF' position. Always power on the transmitter before the drone and power off the drone before the transmitter.
3.2 Control Stick Functions (Mode 1)
The Starlit Transmitter operates in Mode 1 configuration:
- Right Stick:
- Vertical Movement (Up/Down): Controls Throttle (altitude).
- Horizontal Movement (Left/Right): Controls Rudder (yaw/rotation).
- Left Stick:
- Vertical Movement (Up/Down): Controls Elevator (pitch/forward-backward movement).
- Horizontal Movement (Left/Right): Controls Aileron (roll/sideways movement).
3.3 Trim Adjustments
Use the trim buttons located near each control stick to fine-tune the drone's stability. If the drone drifts without stick input, adjust the corresponding trim button in the opposite direction of the drift until stable flight is achieved. Make small adjustments and observe the drone's response.
3.4 Auxiliary Buttons and Switches
The transmitter features additional buttons and switches for various drone functions (e.g., headless mode, return-to-home, speed modes, camera control). Refer to your drone's manual for specific functions assigned to these controls.
4. Maintenance
4.1 Cleaning
Wipe the transmitter with a soft, dry cloth. For stubborn dirt, a slightly damp cloth can be used, but ensure no moisture enters the internal components. Do not use harsh chemicals or abrasive cleaners.
4.2 Storage
Store the transmitter in a cool, dry place away from direct sunlight and extreme temperatures. If storing for an extended period, remove the batteries to prevent leakage and damage.
4.3 Battery Care
Always use the recommended battery type. If using rechargeable batteries, follow the manufacturer's charging guidelines. Do not overcharge or completely discharge batteries, as this can reduce their lifespan.
5. Troubleshooting
| Problem | Possible Cause | Solution |
|---|---|---|
| Transmitter does not power on. | Dead or incorrectly installed batteries. | Check battery polarity. Replace with fresh batteries. |
| Drone does not respond to transmitter. | Not bound, out of range, or interference. | Perform binding procedure again. Ensure drone and transmitter are within operating range. Move away from sources of strong radio interference. |
| Drone drifts during flight. | Incorrect trim settings. | Adjust trim buttons to correct the drift. Calibrate drone's gyroscopes/accelerometers if necessary (refer to drone manual). |
| Mobile device holder is loose. | Not fully engaged or damaged. | Ensure the holder is slid completely into its slot until it locks. Inspect for damage. |
6. Specifications
- Brand: Hitec RCD
- Model: Starlit
- Control Mode: Mode 1 (Throttle/Rudder on Right Stick, Elevator/Aileron on Left Stick)
- ASIN: B07C97K96C
- Manufacturer: Hitec Multiplex Japan
- Compatibility: Designed for use with compatible drones (refer to drone's manual for transmitter compatibility).
7. Support and Contact Information
For further assistance, technical support, or warranty inquiries, please contact Hitec RCD customer service. Refer to the official Hitec RCD website or your product packaging for the most current contact details.
Online Resources: Visit the official Hitec RCD website for FAQs, firmware updates, and additional product information.