1. Introduction
This manual provides detailed instructions for the setup, operation, and maintenance of your Audix AP62 VX5 Dual Handheld Wireless Microphone System. Please read this manual thoroughly before operating the system to ensure proper functionality and to maximize its performance and longevity. The Audix AP62 system is designed for reliable wireless audio transmission in various applications, including musical performances and public speaking.
2. Safety Information
Always observe the following safety precautions to prevent electric shock, fire, or damage to the equipment:
- Do not expose the system to rain or moisture.
- Do not open the casing of the receiver or microphones; there are no user-serviceable parts inside. Refer all servicing to qualified service personnel.
- Use only the power adapter supplied with the system.
- Ensure proper ventilation around the receiver to prevent overheating.
- Dispose of batteries according to local regulations. Do not expose batteries to excessive heat.
3. Package Contents
Verify that all items listed below are included in your package:
- 1 x Audix R62 Dual Wireless Receiver
- 2 x Audix H60/VX5 Handheld Transmitters (Microphones)
- 2 x Microphone Clips
- 2 x Antenna Cables
- 1 x Power Supply Unit for Receiver
- 2 x XLR to 1/4" Audio Cables
- Rackmount Kit (brackets and screws)
- User Manual (this document)
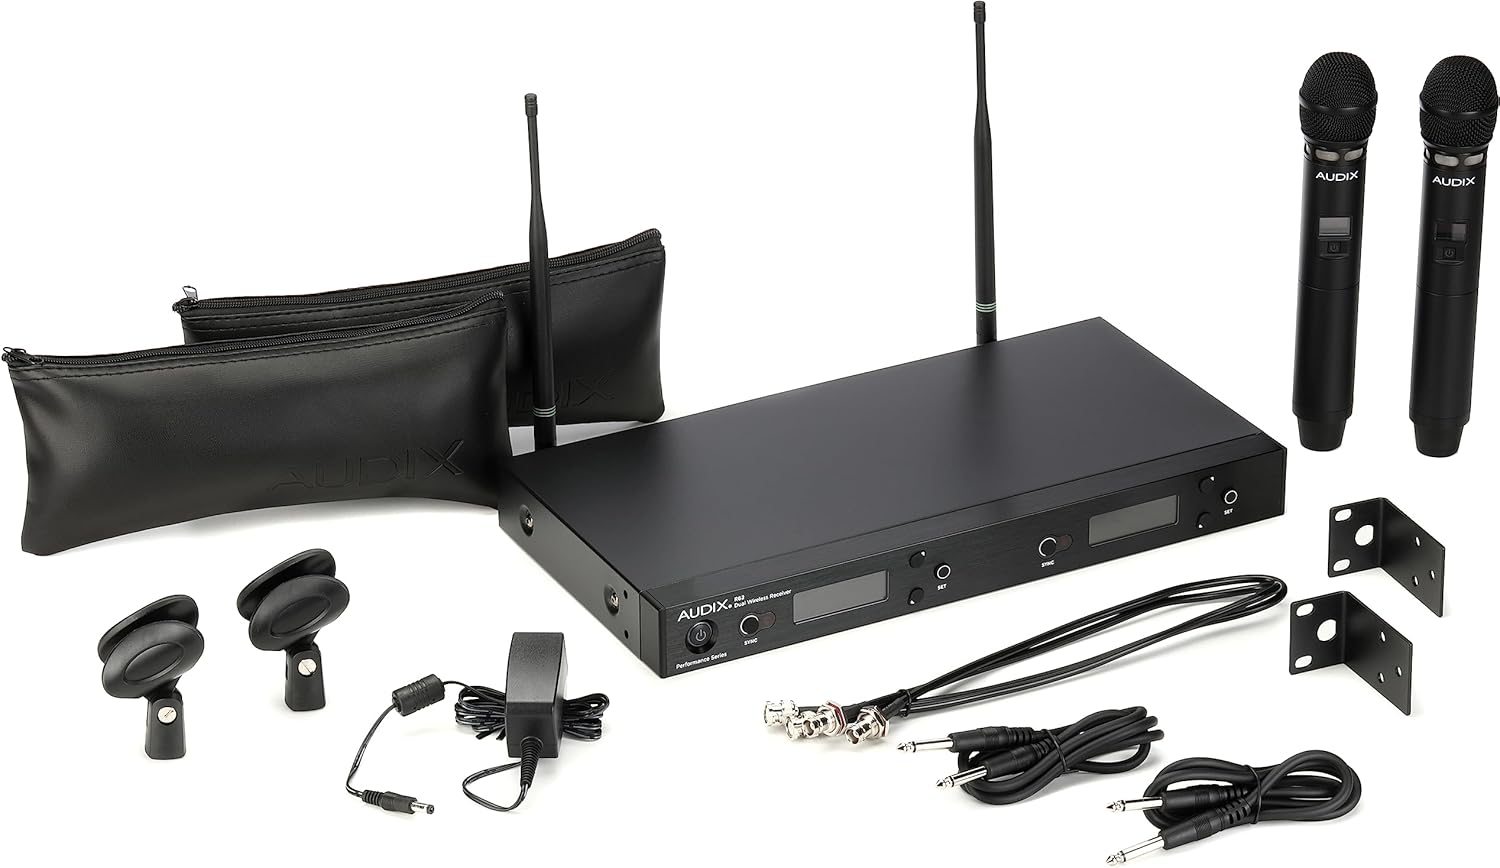
Image: All components of the Audix AP62 VX5 Dual Handheld Wireless Microphone System, including the receiver, two handheld microphones, cables, power supply, and accessories, laid out on a surface.
4. Product Overview
4.1 R62 Dual Wireless Receiver
The R62 receiver is the central unit of your wireless system, processing audio signals from the microphones and providing output to your sound system. It features a robust metal chassis and clear LCD displays for each channel.
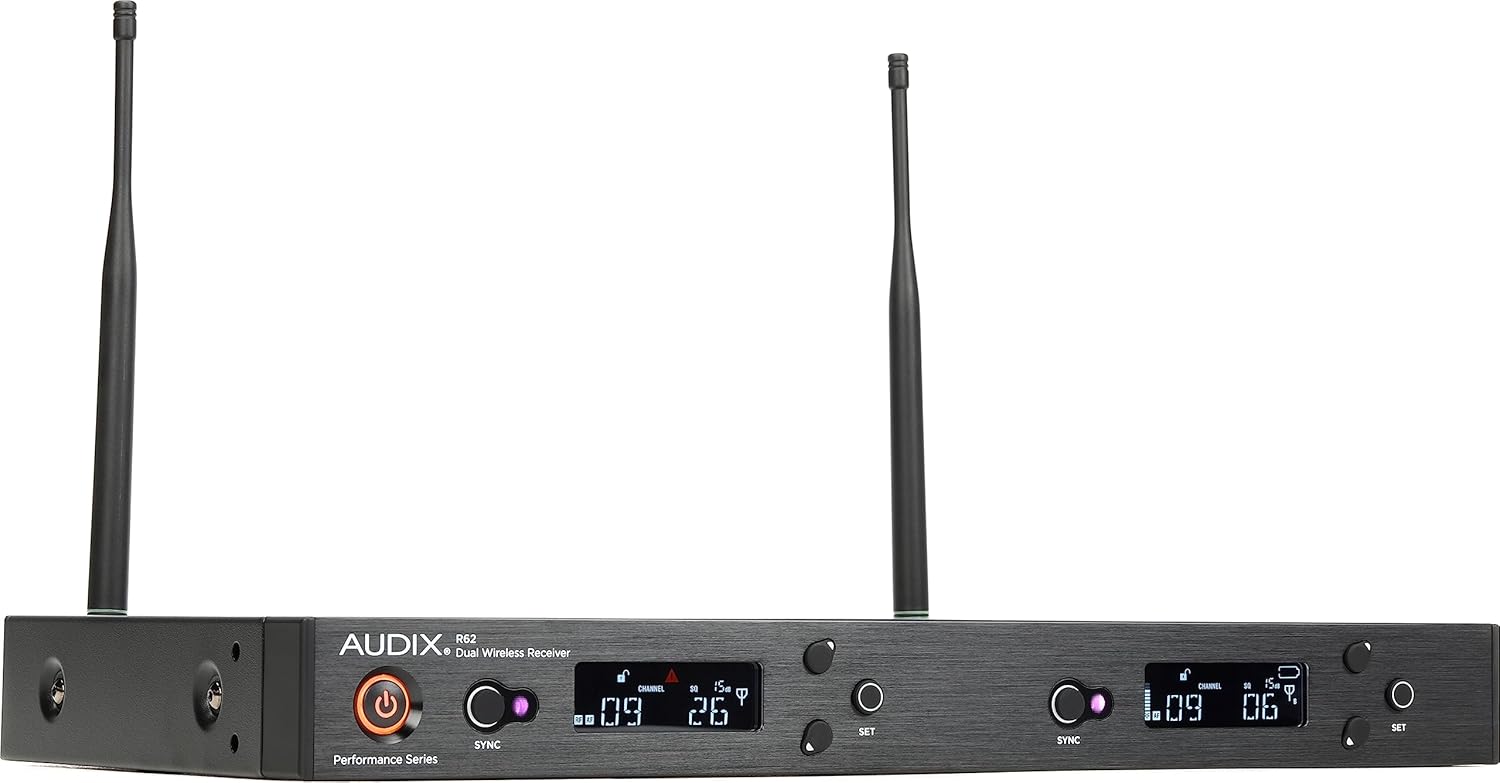
Image: Front view of the Audix R62 Dual Wireless Receiver, showing the power button, sync buttons, channel displays, and set buttons for both channels.
Front Panel Controls:
- Power Button: Turns the receiver on/off.
- Sync Button: Initiates the infrared sync process with the transmitter.
- LCD Display: Shows channel number, frequency, RF signal strength, and battery level for the corresponding microphone.
- SET Button: Navigates menus and confirms selections.
- Channel Up/Down Buttons: Adjust frequency or channel settings.
Rear Panel Connections:

Image: Rear view of the Audix R62 Dual Wireless Receiver, displaying antenna inputs, balanced XLR outputs for Left and Right channels, and the DC power input.
- Antenna Inputs (A & B): Connect the included antennas.
- Balanced XLR Outputs (Left & Right): Connect to a mixer or audio interface.
- DC Input: Connect the supplied power adapter.
4.2 H60/VX5 Handheld Transmitters (Microphones)
The H60/VX5 microphones are equipped with a VX5 condenser capsule, providing clear and detailed audio capture. They feature an integrated transmitter for wireless communication with the R62 receiver.

Image: Close-up view of the Audix H60/VX5 Handheld Microphone, showing the display screen, power button, and infrared sensor for syncing.
Microphone Features:
- Power Button: Press and hold to turn on/off.
- LCD Display: Shows frequency, channel, and battery status.
- Infrared (IR) Sensor: Used for syncing with the receiver.
- Battery Compartment: Located at the bottom, holds two AA batteries.
5. Setup
5.1 Receiver Placement and Connections
- Place the R62 receiver on a stable surface or install it in a standard 19-inch equipment rack using the provided rackmount kit. Ensure adequate ventilation.
- Connect the two included antennas to the ANTENNA A and ANTENNA B inputs on the rear of the receiver. Position them vertically for optimal reception.
- Connect the supplied power adapter to the DC input on the rear of the receiver and plug it into an AC power outlet.
- Connect the XLR outputs (LEFT and RIGHT) on the receiver to the corresponding inputs on your audio mixer or amplifier using the provided XLR to 1/4" cables or your own XLR cables.
5.2 Microphone Battery Installation
- Unscrew the bottom cap of each H60/VX5 handheld microphone to reveal the battery compartment.
- Insert two fresh AA batteries into each microphone, observing the correct polarity (+/-) as indicated inside the compartment.
- Screw the bottom cap back on securely.
5.3 Syncing Transmitters with Receiver
The AP62 system features a one-touch sync function for easy pairing:
- Turn on the R62 receiver by pressing the Power button.
- On the receiver, press the SYNC button for the channel you wish to pair (e.g., Channel 1). The display will show "SYNC" and the IR sensor will blink.
- Turn on the handheld microphone by pressing and holding its power button.
- Align the IR sensor on the microphone (located near the display) with the IR window on the receiver (next to the SYNC button) within a few inches.
- Hold them steady until the receiver display confirms successful pairing (e.g., by showing the microphone's battery level and RF signal). The microphone's display will also update to match the receiver's frequency/channel.
- Repeat the process for the second microphone and channel.

Image: The Audix R62 Dual Wireless Receiver positioned between two Audix H60/VX5 handheld microphones, illustrating the complete wireless system setup.
6. Operating Instructions
6.1 Powering On/Off
- Receiver: Press the Power button on the front panel.
- Microphone: Press and hold the power button on the microphone until the display illuminates (on) or turns off (off).
6.2 Adjusting Volume/Gain
Audio output levels are primarily controlled by your external mixer or amplifier. The receiver provides a fixed line-level output. Ensure the gain on your mixer input is set appropriately to avoid clipping or distortion.
6.3 Channel Selection and Frequency Scan
The R62 receiver features an auto-scan function to find clear frequencies:
- With the receiver powered on, press the SET button for the desired channel.
- Navigate through the menu options using the channel up/down buttons until you find the "SCAN" option.
- Press SET to initiate an automatic frequency scan. The receiver will search for the clearest available frequency.
- Once a clear frequency is found, the receiver will automatically set it.
- Perform the SYNC process (Section 5.3) again to update the microphone to the new frequency.
You can also manually select frequencies if needed, referring to the receiver's display and controls.
6.4 Using the Microphones
- Hold the microphone approximately 2-6 inches from your mouth for optimal vocal pickup.
- Avoid covering the microphone grille with your hand, as this can affect sound quality and wireless performance.
- Monitor the RF signal strength and battery level on the receiver's display during use.
7. Maintenance
7.1 Cleaning
- Wipe the receiver and microphones with a soft, dry cloth.
- For stubborn dirt, use a slightly damp cloth and then dry thoroughly.
- Do not use abrasive cleaners, solvents, or harsh chemicals.
- Periodically clean the microphone grille to remove debris.
7.2 Battery Replacement
Replace batteries in the handheld transmitters when the low battery indicator appears on the microphone's display or the receiver's display. Always use fresh, high-quality AA alkaline batteries for best performance. Refer to Section 5.2 for installation instructions.
7.3 Storage
When not in use for extended periods, remove batteries from the microphones to prevent leakage. Store the system in a cool, dry place, away from direct sunlight and extreme temperatures.
8. Troubleshooting
| Problem | Possible Cause | Solution |
|---|---|---|
| No sound from microphone | Microphone or receiver not powered on; Batteries dead; Microphone not synced; Receiver output not connected; Mixer input muted/low. | Ensure all devices are powered on. Replace batteries. Perform SYNC process (Section 5.3). Check audio cable connections. Verify mixer settings. |
| Intermittent signal or dropouts | Interference from other wireless devices; Out of range; Antennas improperly positioned; Low microphone battery. | Perform frequency scan (Section 6.3) to find a clear channel. Reduce distance between microphone and receiver. Ensure antennas are vertical and unobstructed. Replace microphone batteries. |
| Poor sound quality (static, distortion) | Interference; Gain levels too high on mixer; Microphone too close to mouth; Damaged microphone capsule. | Scan for a clear frequency. Adjust gain levels on your mixer. Maintain proper microphone distance. If problem persists, contact support. |
| Microphone won't sync | IR sensors not aligned; Batteries low; Receiver not in sync mode. | Ensure IR sensors are aligned and close. Replace batteries. Press SYNC button on receiver before attempting to sync. |
9. Specifications
| Feature | Specification |
|---|---|
| System Type | Dual Channel Wireless Microphone System |
| Model Number | AP62VX5 |
| Frequency Range | 2560 Tunable Frequencies (specific band varies by region) |
| Operating Range | Approximately 450 feet (line of sight) |
| Receiver Outputs | 2 x Balanced XLR |
| Microphone Type | Handheld Condenser (VX5 capsule) |
| Microphone Power | 2 x AA Batteries (per microphone) |
| Receiver Power | DC Power Adapter (included) |
| Dimensions (Receiver) | 18.5 x 11.05 x 6.4 inches (approximate, as per product data) |
| Weight (System) | 10.47 pounds (approximate, as per product data) |
10. Warranty and Support
10.1 Warranty Information
Audix products are designed and manufactured to the highest standards. For specific warranty terms and conditions, please refer to the warranty card included with your product or visit the official Audix website. Keep your proof of purchase for warranty claims.
10.2 Customer Support
If you encounter any issues not covered in the troubleshooting section or require further assistance, please contact Audix customer support. Contact information can typically be found on the official Audix website or on the product packaging.
For the latest information and support resources, please visit the official AUDIX website.