
Introduction
Thank you for choosing the Jowbeam A200 16-inch LED Traffic Safety Wand. This versatile device functions as both a powerful flashlight and a highly visible safety signal wand, ideal for traffic control, emergency signaling, and general work illumination. This manual provides essential information for the proper setup, operation, and maintenance of your device.
Product Features
- Ultra Bright Illumination: Provides powerful light output, capable of illuminating objects up to 1000 feet away.
- Long-Lasting Power: Operates for hours on 3 AAA batteries (not included).
- Powerful Magnetic Base: Features a strong magnet for secure attachment to metallic surfaces, allowing for hands-free operation.
- Five Lighting Modes: Includes High, Medium, Low, Strobe, and Flashing SOS modes for various applications.
- Durable Construction: Made from sturdy metal, resistant to deformation.
- Lotus-Shaped Head: Designed to protect the lens and can be used for emergency glass breaking or self-defense.
- Side-Positioned ON/OFF Button: Enables easy one-handed operation.
- Adjustable Focus: Allows switching between a wide-angle beam and a spotlight.
Package Contents
The Jowbeam A200 package typically includes:
- Jowbeam A200 LED Flashlight (2 units)
- Orange Traffic Wand Cone Attachment (2 units)
- Wrist Strap Lanyard (2 units)
Note: 3 AAA batteries are required per unit and are not included.
Setup
Battery Installation
- Unscrew the tail cap of the flashlight counter-clockwise.
- Insert three (3) AAA batteries into the battery holder, ensuring correct polarity (+/-) as indicated inside the holder.
- Place the battery holder into the flashlight body.
- Screw the tail cap back on clockwise until it is securely tightened.
Image: Jowbeam A200 Battery Installation

A hand demonstrates inserting AAA batteries into the battery holder, which is then placed inside the flashlight. This image illustrates the correct procedure for battery installation.
Attaching the Traffic Wand Cone
- Ensure the flashlight is off.
- Align the threaded end of the orange traffic wand cone with the head of the flashlight.
- Gently screw the cone onto the flashlight head clockwise until it is firmly attached. Do not overtighten.
Image: Jowbeam A200 with Traffic Wand Cone Attached

This image displays the Jowbeam A200 flashlight with the orange traffic wand cone securely attached, highlighting the threaded connection and the magnetic base at the tail end.
Operation
Power On/Off and Mode Selection
- To turn the device ON, press the side-positioned power button.
- Each subsequent press of the power button will cycle through the available lighting modes: High > Medium > Low > Strobe > Flashing SOS.
- To turn the device OFF, continue pressing the power button until the light extinguishes, or hold the button down for approximately 2 seconds.
Image: Jowbeam A200 Flashlight Mode

The Jowbeam A200 flashlight is shown emitting a strong white light, demonstrating its use as a standard flashlight.
Image: Jowbeam A200 in Traffic Wand Mode

This image illustrates the Jowbeam A200 being used as a traffic signal wand with its orange cone attachment, held by a person wearing a safety vest.
Adjusting Focus (Flashlight Mode Only)
When the orange cone attachment is removed, the flashlight head can be extended or retracted to adjust the beam focus:
- Push the flashlight head IN for a wider, floodlight beam.
- Pull the flashlight head OUT for a narrower, spotlight beam.
Using the Magnetic Base
The powerful magnet located at the tail end of the flashlight allows for hands-free use. Simply attach the magnetic base to any ferrous metal surface. This is particularly useful for:
- Vehicle maintenance (attaching to the hood or chassis).
- Area illumination (attaching to metal poles, beams, or doors).
- Emergency signaling (attaching to a vehicle for roadside visibility).
Image: Jowbeam A200 Magnetic Base in Use
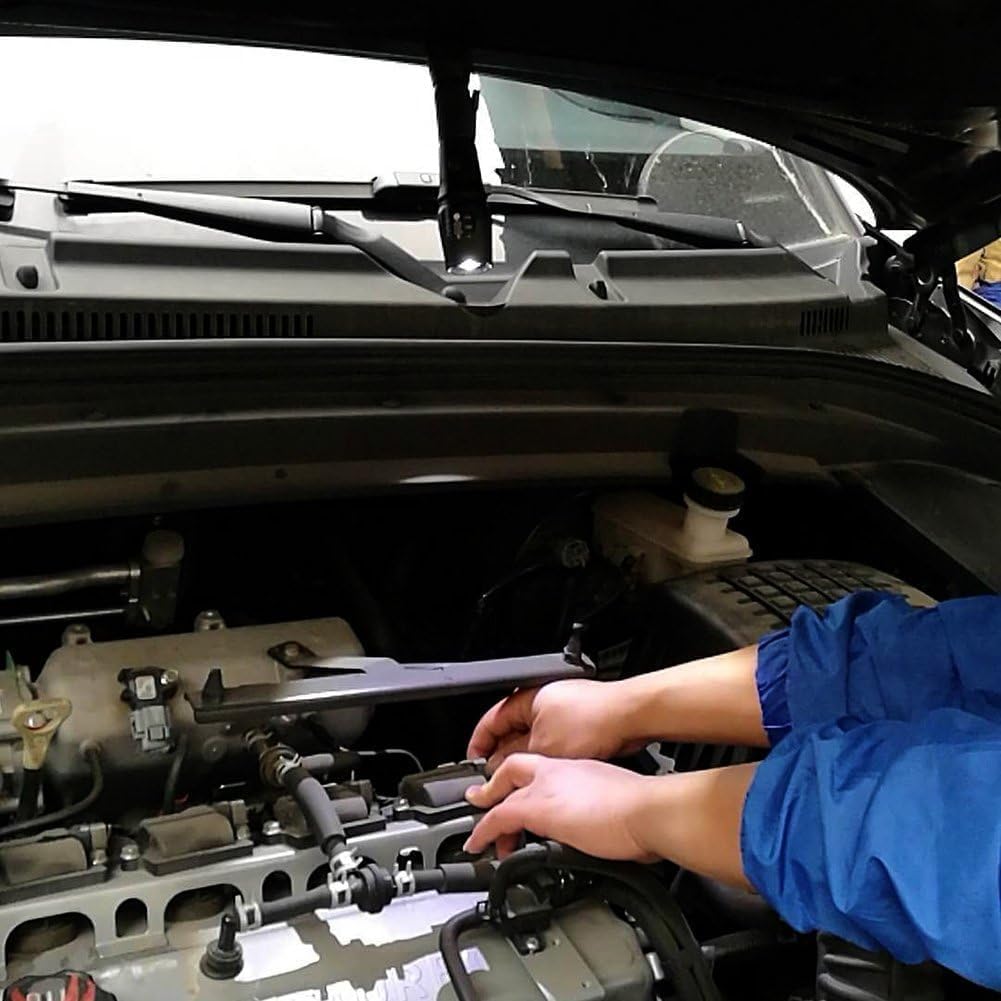
The Jowbeam A200 traffic wand is shown attached to a metal surface using its magnetic base, illustrating its hands-free functionality for various tasks.
Maintenance
- Cleaning: Wipe the device with a soft, damp cloth. Do not use abrasive cleaners or solvents.
- Battery Replacement: Replace all three AAA batteries simultaneously when the light becomes dim or stops working. Do not mix old and new batteries, or different types of batteries.
- Storage: If storing the device for an extended period, remove the batteries to prevent leakage and damage. Store in a cool, dry place.
- Water Resistance: The device is designed for general outdoor use but is not submersible. Avoid prolonged exposure to heavy rain or submersion in water.
Troubleshooting
| Problem | Possible Cause | Solution |
|---|---|---|
| Light does not turn on. | Dead or incorrectly installed batteries. | Replace batteries with new ones, ensuring correct polarity. |
| Light is dim or flickers. | Low battery power. Loose connections. | Replace batteries. Ensure tail cap is tightened. |
| Cone attachment is loose. | Not screwed on properly. | Ensure the cone is fully and securely screwed onto the flashlight head. |
Specifications
- Model: A200
- Brand: Jowbeam
- Item Weight: 15.5 ounces
- Product Dimensions: 1.34 x 1.34 x 16.34 inches
- Color: Orange (cone), Black (flashlight body)
- Material: Plastic (cone), Metal (flashlight body)
- Power Source: Battery (3 x AAA, not included)
- Voltage: 4.5 Volts
- Type of Bulb: LED
- Mounting Type: Magnet Mount
Image: Jowbeam A200 Product Dimensions

This diagram provides detailed measurements for the Jowbeam A200 flashlight and its orange cone attachment, illustrating the overall length and diameter of each component.
Warranty and Support
For any issues, questions, or support needs regarding your Jowbeam A200 LED Traffic Safety Wand, please contact the manufacturer directly. Refer to the product packaging or the official Jowbeam website for specific warranty details and customer service contact information.