1. Introduction
Thank you for choosing the Everest DVR-015 Car Camera. This device is designed to record video and audio while driving, providing a record of your journeys. Please read this manual carefully before using the product to ensure proper operation and to maximize its lifespan.
Package Contents
- Everest DVR-015 Car Camera
- Suction Cup Mount
- USB Cable
- Car Charger
- User Manual
- Warranty Certificate
2. Product Overview
The Everest DVR-015 features a 2.4-inch LCD screen, 6 IR LEDs for enhanced night vision, and a 120-degree wide-angle lens. It supports video recording at 1280x720 resolution at 30 frames per second, with 4X digital zoom capability. The device also includes a motion sensor for automatic recording activation.
Device Layout
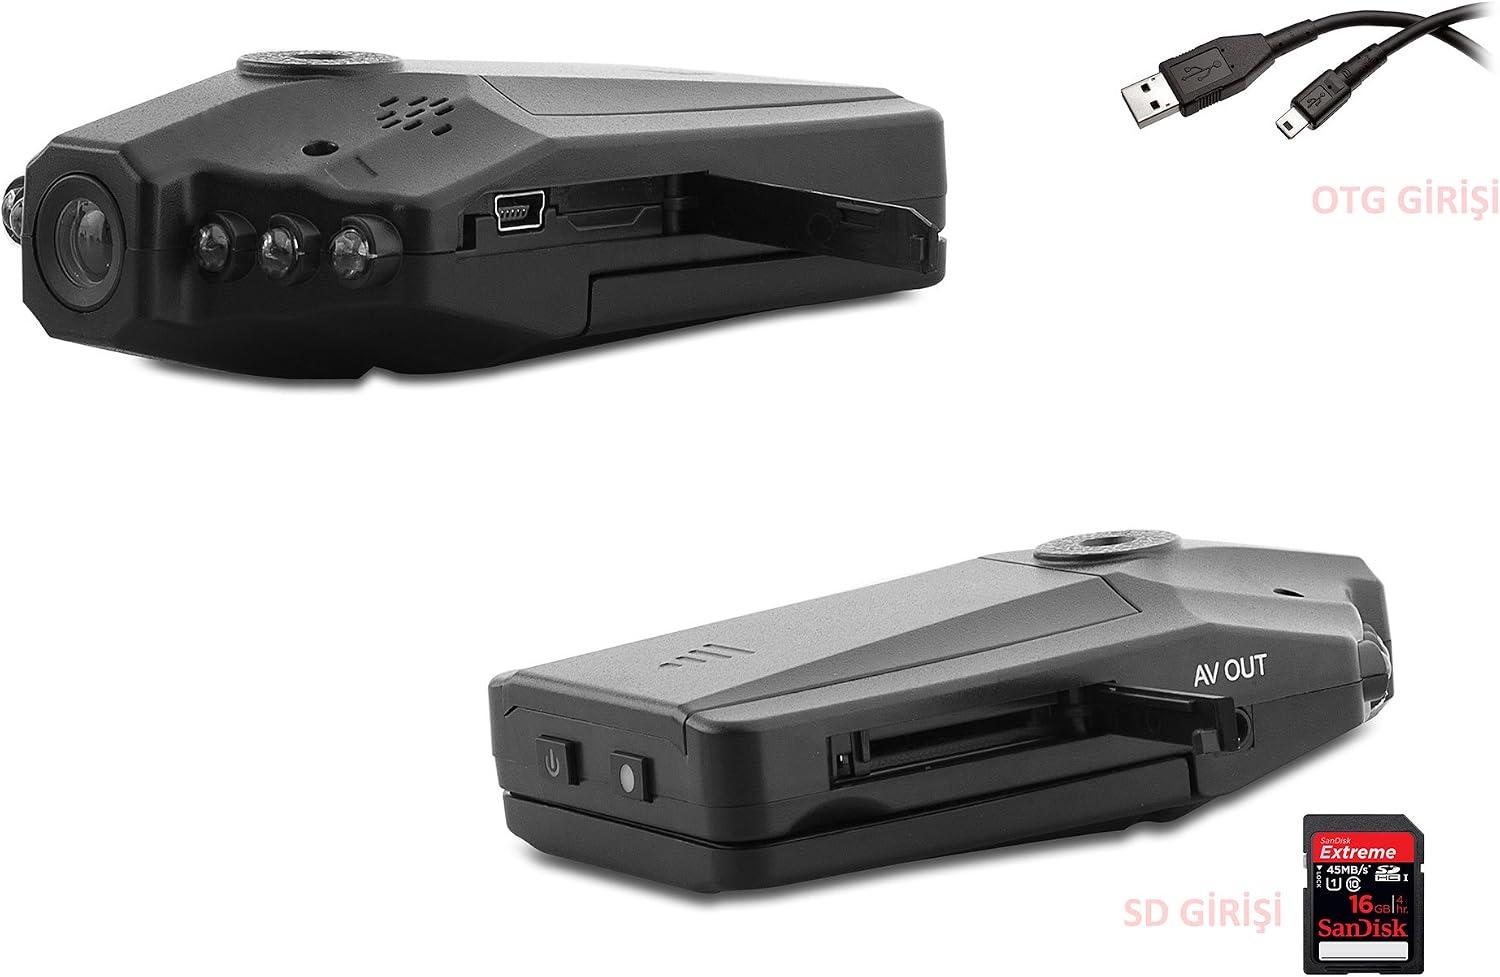
Figure 2.1: Front and side view of the Everest DVR-015 car camera with its suction cup mount. The camera features a lens, IR LEDs, and a 2.4-inch LCD screen for live view and playback.
- Lens: Captures video footage.
- IR LEDs: Provide illumination for night vision recording.
- 2.4" LCD Screen: Displays live view, recorded videos, and menu options.
- Control Buttons: (MENU, DOWN, UP, MODE) For navigation and function selection.
- Suction Cup Mount: For securing the camera to the windshield.

Figure 2.2: Side view of the Everest DVR-015, highlighting the USB 2.0 port, AV OUT port, and the MicroSD card slot. A USB cable and a MicroSD card are depicted alongside for reference.
- USB 2.0 Port: For connecting to a computer to transfer files or for power.
- AV OUT Port: For connecting to an external display.
- MicroSD Card Slot: Insert a MicroSD card (not included) for video storage.
- Power Button: To turn the device on/off.
3. Setup
3.1 Battery Installation
The DVR-015 uses a rechargeable battery. Ensure the battery is properly installed before first use.

Figure 3.1: Rear view of the Everest DVR-015 with the battery compartment cover removed, revealing the BL-5C battery slot. Ensure correct polarity when inserting the battery.
- Open the battery compartment cover on the back of the device.
- Insert the BL-5C battery, ensuring the contacts align correctly.
- Close the battery compartment cover.
- Connect the car charger to the device and your vehicle's 12V power outlet to fully charge the battery before initial use.
3.2 MicroSD Card Installation
A MicroSD card (Class 10 or higher, up to 32GB recommended) is required for recording video. The card is not included in the package.
- Locate the MicroSD card slot on the side of the device (refer to Figure 2.2).
- Gently insert the MicroSD card into the slot until it clicks into place. Ensure the correct orientation.
- To remove, gently push the card in until it clicks, then release, and it will eject.
3.3 Mounting the Camera
Use the provided suction cup mount to secure the camera to your vehicle's windshield.
- Clean the area on your windshield where you intend to mount the camera.
- Attach the camera to the suction cup mount.
- Press the suction cup firmly against the windshield and flip the lever to secure it.
- Adjust the camera angle to ensure a clear view of the road ahead, avoiding obstruction of your driving view.
- Connect the car charger to the camera and your vehicle's 12V power outlet. Route the cable safely to avoid interference with driving controls.
4. Operating Instructions
4.1 Power On/Off
- Automatic: When connected to the car charger, the camera will automatically power on and start recording when the vehicle engine starts. It will power off automatically when the engine is turned off.
- Manual: Press and hold the Power button (refer to Figure 2.2) for a few seconds to manually turn the device on or off.
4.2 Recording Video
- Once powered on, the camera typically starts recording automatically. A recording indicator (e.g., a red dot or flashing icon) will appear on the screen.
- To manually start/stop recording, press the "OK" button (often the central button or a dedicated record button, if available, otherwise it might be the MODE button in video mode).
4.3 Menu Navigation
Use the control buttons (MENU, DOWN, UP, MODE) to navigate through the device's settings.
- MODE Button: Switches between video recording mode, photo mode, and playback mode.
- MENU Button: Accesses the settings menu for the current mode. Press again to exit.
- UP/DOWN Buttons: Navigate through menu options or zoom in/out during recording.
- OK Button (or similar): Confirms selection in the menu or starts/stops recording/takes a photo.
4.4 Key Features
- Motion Detection: When enabled in the settings, the camera will automatically start recording if it detects movement in front of the lens while parked.
- Night Vision (IR LEDs): The 6 IR LEDs automatically activate in low-light conditions to improve video clarity during night recording.
- Loop Recording: Older files are automatically overwritten when the memory card is full, ensuring continuous recording. Adjust loop recording duration in settings.
- G-Sensor (Impact Detection): If an impact is detected, the current video file will be locked to prevent it from being overwritten by loop recording.
- Date/Time Stamp: Recorded videos will have a date and time stamp for evidential purposes. Ensure the date and time are set correctly in the settings.
4.5 Playback
- Press the MODE button to switch to playback mode.
- Use the UP/DOWN buttons to browse through recorded video files.
- Press the OK button to play the selected video.
- Press the MENU button to access playback options (e.g., delete file).
5. Maintenance
- Cleaning: Use a soft, dry cloth to clean the camera body. For the lens and screen, use a microfiber cloth specifically designed for optics. Do not use abrasive cleaners or solvents.
- Storage: If not using the camera for an extended period, store it in a cool, dry place away from direct sunlight. Remove the battery if storing for very long periods.
- MicroSD Card: Periodically format the MicroSD card (at least once a month) within the camera's settings to ensure optimal performance and prevent data corruption. Back up important files before formatting.
- Temperature: Avoid exposing the camera to extreme temperatures, which can damage the battery and internal components.
6. Troubleshooting
| Problem | Possible Cause | Solution |
|---|---|---|
| Camera does not power on. | Low battery; faulty power connection; damaged battery. | Charge the battery; check car charger connection; replace battery if necessary. |
| Recording stops unexpectedly. | Full MicroSD card; slow MicroSD card; power interruption. | Format MicroSD card; use a Class 10 or higher card; ensure stable power supply. |
| Video footage is blurry or unclear. | Dirty lens; protective film still on lens; incorrect focus (if adjustable). | Clean the lens; remove any protective film; ensure lens is clear. |
| Motion detection not working. | Feature disabled in settings; insufficient movement. | Enable motion detection in the menu; test with clear movement. |
| Cannot transfer files to computer. | Faulty USB cable; incorrect USB mode selected on camera. | Try a different USB cable; ensure camera is in "Mass Storage" or "PC Camera" mode. |
7. Specifications
| Feature | Detail |
|---|---|
| Model | DVR-015 |
| Brand | Everest |
| Display | 2.4 inch LCD Screen |
| Video Resolution | 1280x720 (720P) |
| Frame Rate | 30fps |
| Viewing Angle | 120 degrees |
| Infrared LEDs | 6 IR LEDs for Night Vision |
| Digital Zoom | 4X |
| Storage | MicroSD Card (up to 32GB, Class 10 recommended) |
| Interface | USB 2.0, AV OUT |
| Special Features | Motion Sensor, Loop Recording, G-Sensor, Date/Time Stamp |
| Weight | 0.28 Kilogram |
| Country of Origin | China |
8. Warranty and Support
The Everest DVR-015 Car Camera comes with a warranty certificate included in the package. Please refer to the warranty certificate for specific terms and conditions regarding coverage and duration.
For technical support or service inquiries, please contact your retailer or the official Everest support channels. Keep your purchase receipt and warranty certificate for any claims.