1. Introduction
This manual provides detailed instructions for the installation, operation, and maintenance of your ASUS Prime H370M-Plus motherboard. The ASUS Prime H370M-Plus is designed to support 8th generation Intel Core processors, offering a robust platform for personal computing. It features 5X Protection III for hardware safeguards, FanXpert 4 Core for cooling control, support for multiple GPUs via CrossFireX, and high-speed data transfer with dual M.2 slots and USB 3.1 Gen2 connectivity.
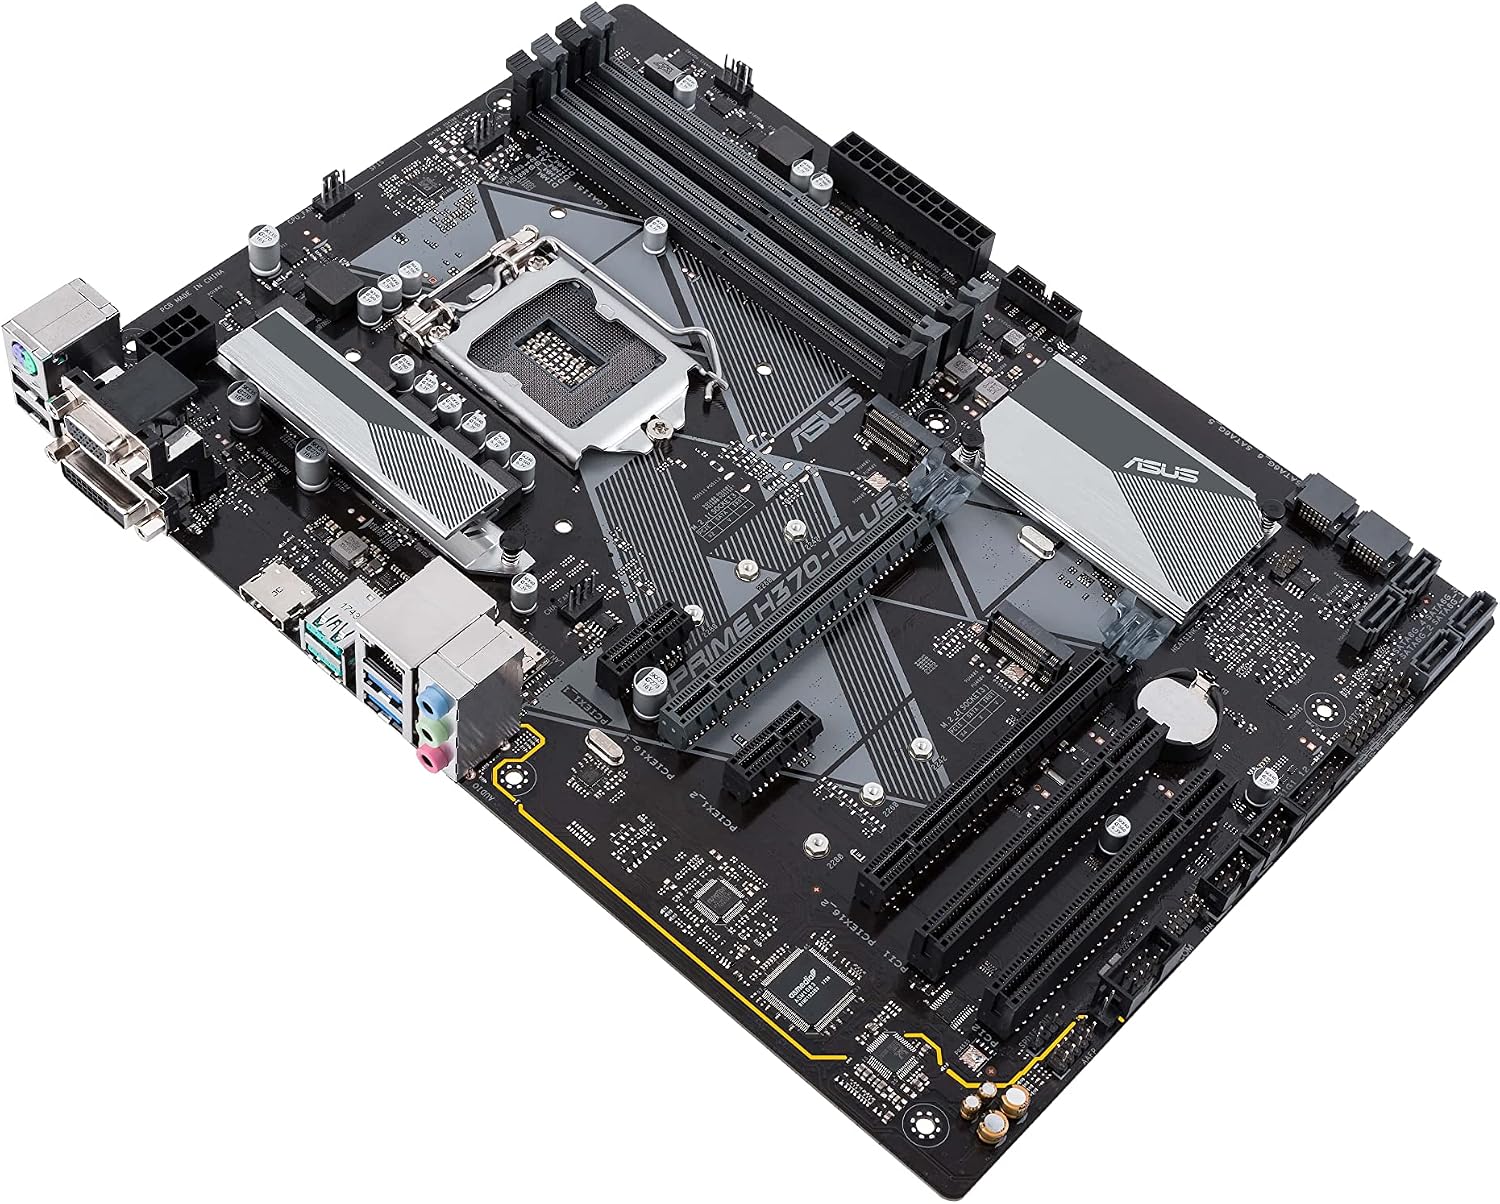
Figure 1: Top-down view of the ASUS Prime H370M-Plus motherboard. This image displays the central LGA1151 CPU socket, four DDR4 RAM slots, multiple PCIe slots, dual M.2 slots, and various I/O ports and headers.
2. Package Contents
Verify that all items are present in your product package:
- ASUS Prime H370M-Plus Motherboard
- User Manual
- Software Drivers CD/DVD
- Warranty Card
3. Setup and Installation
3.1 Safety Precautions
- Always disconnect the power cord from the wall outlet before touching any components.
- Wear an anti-static wrist strap or frequently touch a grounded metal object to discharge static electricity.
- Handle the motherboard by its edges to avoid damaging components.
3.2 Installing the CPU
Carefully open the CPU socket lever. Align the triangular mark on the CPU with the mark on the socket. Gently place the CPU into the socket without forcing it. Close the lever to secure the CPU.
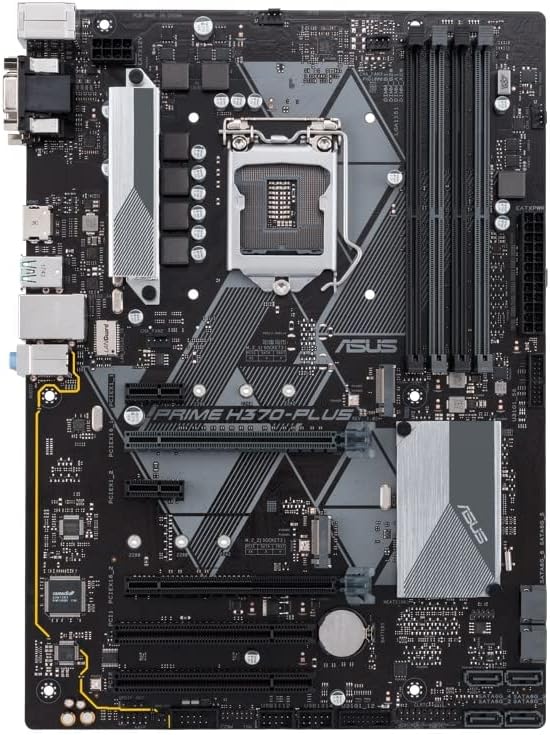
Figure 2: Close-up view of the LGA1151 CPU socket. Note the orientation key (triangle) for correct CPU placement.
3.3 Installing the CPU Cooler
Apply thermal paste to the CPU if not pre-applied on the cooler. Mount the CPU cooler according to its manufacturer's instructions, ensuring even pressure. Connect the CPU fan cable to the CPU_FAN header on the motherboard.
3.4 Installing RAM Modules
Open the clips on both ends of the DIMM slots. Align the notch on the DDR4 memory module with the key in the DIMM slot. Press down firmly on both ends of the module until the clips snap into place. For dual-channel operation, refer to the motherboard manual for recommended slot configurations (e.g., A2 and B2).
3.5 Mounting the Motherboard
Install standoffs in your PC case that correspond to the Micro ATX form factor. Carefully place the motherboard onto the standoffs, aligning the screw holes. Secure the motherboard with screws.
3.6 Connecting Power Supply
Connect the 24-pin ATX main power connector and the 8-pin ATX 12V power connector from your power supply to the corresponding ports on the motherboard.
3.7 Installing M.2 Storage Devices
The motherboard features dual M.2 slots. Insert the M.2 SSD into the slot at an angle, then push it down and secure it with the provided screw.

Figure 3: Angled view of the motherboard, showing the location of the dual M.2 slots and PCIe expansion slots.
3.8 Connecting SATA Devices
Connect SATA data cables from your storage drives (HDDs, SSDs, optical drives) to the SATA 6Gb/s ports on the motherboard. Connect SATA power cables from your power supply to these devices.
3.9 Connecting Front Panel Headers
Connect the power switch, reset switch, HDD LED, and power LED cables from your PC case to the corresponding pins on the front panel header (F_PANEL). Refer to the motherboard's detailed diagram for correct pin assignments.
3.10 Installing Expansion Cards
Insert graphics cards or other PCIe expansion cards into the appropriate PCIe x16 or PCIe x1 slots. Ensure they are fully seated and secured with the case's retention mechanism.
4. Operating Instructions
4.1 Initial Boot and BIOS/UEFI Access
After assembling your system, connect a monitor, keyboard, and mouse. Power on the system. To enter the BIOS/UEFI setup utility, repeatedly press the DEL or F2 key during the Power-On Self-Test (POST) process. The BIOS/UEFI allows you to configure system settings, boot order, and monitor hardware status.
4.2 Operating System Installation
Insert your operating system installation media (USB drive or DVD). Access the BIOS/UEFI to set the boot priority to your installation media. Follow the on-screen prompts to install your operating system.
4.3 Driver Installation
After installing the operating system, install the necessary drivers for the motherboard components. Use the provided driver CD/DVD or download the latest drivers from the official ASUS support website. Key drivers include chipset, audio, LAN, and integrated graphics (if applicable).
5. Maintenance
5.1 Cleaning
Regularly clean dust from your computer case and motherboard components using compressed air. Ensure the system is powered off and unplugged before cleaning. Avoid using liquid cleaners directly on components.
5.2 BIOS/UEFI Updates
Periodically check the ASUS support website for BIOS/UEFI updates. Updates can improve system stability, compatibility, and performance. Follow the instructions provided by ASUS for safe BIOS flashing procedures.
5.3 Driver Updates
Keep your system drivers updated to ensure optimal performance and compatibility with new software and hardware. Download drivers only from the official ASUS website or component manufacturers' websites.
6. Troubleshooting
6.1 No Power / No POST (Power-On Self-Test)
- Ensure all power cables (24-pin ATX, 8-pin ATX 12V) are securely connected to the motherboard.
- Verify that the CPU and RAM are correctly installed. Try reseating them.
- Check that the power supply is functioning correctly.
- Remove all non-essential components (e.g., graphics card, extra storage drives) and attempt to boot with only the CPU, one RAM stick, and the CPU cooler.
6.2 System Instability / Crashes
- Check CPU and GPU temperatures to ensure they are within safe operating limits.
- Verify that RAM modules are compatible and correctly installed. Run a memory diagnostic tool.
- Ensure all drivers are up-to-date.
- Check for BIOS/UEFI updates that might address stability issues.
6.3 Peripheral Detection Issues
- Ensure USB devices are connected to functional ports.
- For SATA devices, check data and power cable connections. Verify they are enabled in BIOS/UEFI.
- For M.2 devices, ensure they are properly seated and secured. Check BIOS/UEFI settings for M.2 slot configuration, as some slots may share bandwidth with SATA ports.
For further assistance, refer to the comprehensive troubleshooting section in the official ASUS user manual or contact ASUS technical support.
7. Specifications
| Feature | Detail |
|---|---|
| Brand | ASUS |
| Model Name | PRIME H370M-PLUS/CSM |
| CPU Socket | LGA 1151 |
| Compatible Processors | 8th Generation Intel Core |
| Chipset Type | Intel H370 |
| RAM Memory Technology | DDR4 |
| Memory Clock Speed | 2400 MHz |
| Memory Slots Available | 4 |
| RAM Memory Maximum Size | 1 GB (Note: This value is from product data and may not reflect typical motherboard capacity.) |
| Graphics Card Interface | Integrated |
| Total USB Ports | 6 |
| Total Number of HDMI Ports | 1 |
| System Bus Standard Supported | SATA 3 |
| Item Weight | 0.7 Kilograms |
8. Warranty and Support
8.1 Product Warranty
The ASUS Prime H370M-Plus motherboard comes with a 3-year warranty. Please retain your proof of purchase for warranty claims. For detailed warranty terms and conditions, refer to the warranty card included in your package or visit the official ASUS support website.
8.2 Technical Support
For technical assistance, driver downloads, or further product information, please visit the official ASUS support website. You can find FAQs, troubleshooting guides, and contact information for customer service.
Official ASUS Support: https://www.asus.com/support/