Introduction
Thank you for choosing the Michelin 12294A Digital Programmable Tire Pressure Gauge. This device is designed for accurate and convenient measurement of tire pressure, ensuring optimal vehicle performance and safety. Please read this manual thoroughly before use.
Package Contents
- 1 x Michelin 12294A Digital Programmable Tire Pressure Gauge
- 2 x Lithium-metal batteries (pre-installed or included)

Image: The Michelin 12294A Digital Programmable Tire Pressure Gauge, showing its digital display and control buttons.
Setup
Battery Installation
The device requires 2 Lithium-metal batteries. These are typically included or pre-installed. If replacement is needed:
- Locate the battery compartment cover, usually on the back or side of the unit.
- Open the cover.
- Insert the batteries, ensuring correct polarity (+/-).
- Close the battery compartment cover securely.
Powering On/Off
- To power on, press the Power button (often marked with a circle and vertical line symbol).
- The backlit LCD display will illuminate.
- The device will automatically power off after a period of inactivity to conserve battery life.
Operating Instructions
Measuring Tire Pressure
- Ensure the tire is cold for the most accurate reading.
- Remove the valve cap from the tire.
- Press the nozzle of the gauge firmly onto the tire valve stem. A good seal is crucial for an accurate reading.
- The digital display will show the tire pressure.
- Remove the gauge from the valve stem. The reading will hold on the display for a short period.
- Replace the valve cap.
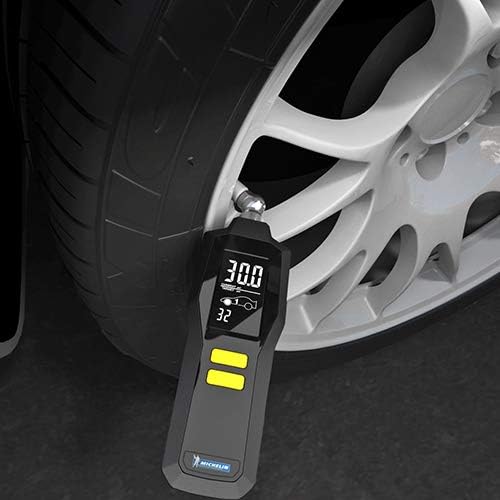
Image: The Michelin 12294A gauge being used to measure pressure on a car tire valve.
Changing Measurement Units
The gauge supports measurements in PSI, KPA, BAR, and kg/cm². To cycle through units, press the Unit button (often the same as the power button or a dedicated button). The current unit will be displayed on the screen.
Programming Tire Pressures
This gauge can be programmed with target front and rear tire pressures for up to two vehicles. Refer to your vehicle's owner's manual or the sticker on the driver's side door jamb for recommended tire pressures.
- With the gauge powered on, press and hold the Program button (often an arrow button or a dedicated 'SET' button) until the programming mode is activated.
- Use the Up/Down arrow buttons to adjust the target pressure for the front tires of Vehicle 1.
- Press the Program button again to switch to the rear tires of Vehicle 1, then adjust.
- Repeat the process for Vehicle 2 if desired.
- The gauge will save the settings automatically after a few seconds of inactivity or by pressing the Program button to exit.
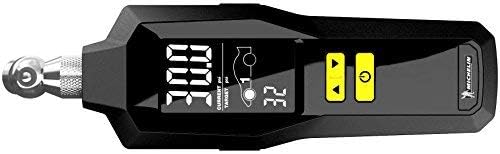
Image: A close-up view of the gauge's digital display, showing current pressure and programmable target pressure settings.
Using the Integrated Flashlight
The gauge features an integrated flashlight to assist in locating the tire valve in low-light conditions. To activate the flashlight, press the Flashlight button (refer to device markings, often combined with another function or a dedicated button).
Using the Bleed Valve
If a tire is over-inflated, the built-in bleed valve allows for controlled release of air. While the gauge is attached to the valve stem and displaying pressure, gently press the Bleed Valve button (if present, often a small button near the nozzle) to release air until the desired pressure is reached.
Maintenance
- Cleaning: Wipe the gauge with a soft, dry cloth. Do not use abrasive cleaners or immerse the device in water.
- Storage: Store the gauge in a cool, dry place, away from direct sunlight and extreme temperatures.
- Battery Replacement: If the display becomes dim or the device does not power on, replace the batteries. Dispose of old batteries according to local regulations.
Troubleshooting
| Problem | Possible Cause | Solution |
|---|---|---|
| No display/Device does not power on | Dead or incorrectly installed batteries. | Check battery polarity or replace batteries. |
| Inaccurate reading | Poor seal with valve stem; tire not cold; gauge malfunction. | Ensure a firm, airtight seal. Measure when tires are cold. If issues persist, contact support. |
| Air leaks when measuring | Gauge not properly seated on valve stem. | Press the gauge firmly and squarely onto the valve stem. |
Specifications
| Brand | MICHELIN |
| Model Number | 12294A |
| Model Name | Pressure Gauge |
| Product Weight | 100 g |
| Product Dimensions | 9.3 x 3.3 x 2 cm |
| Batteries | 2 Lithium-metal (included) |
| Measurement Units | PSI, KPA, BAR, kg/cm² |
| Accuracy | +/- 1% |
| Material | Metal core, ribbed plastic exterior |
| Thread Type | Schrader |
Warranty and Support
This Michelin product is manufactured to high-quality standards. For warranty information or technical support, please refer to the documentation included with your purchase or visit the official Michelin automotive accessories website. Keep your proof of purchase for warranty claims.


