
Introduction
Thank you for choosing the OCT17 Wooden Wood Clock. This digital alarm clock features an LED display, showing time, date, and temperature. It also includes adjustable brightness and a sound control function. This manual provides detailed instructions for setup, operation, and maintenance to ensure optimal performance of your device.
Package Contents
- OCT17 Wooden Wood Clock (Bamboo)
- USB Power Cable
- AC Adapter
- User Manual

Image: USB power cable and AC adapter. The cable connects to the clock for power, and the adapter plugs into a wall outlet.
Product Overview
Familiarize yourself with the clock's components and controls.

Image: Front view of the OCT17 Wooden Wood Clock. The LED display shows the time, in this example, 18:50.

Image: Rear view of the clock. This shows the control panel with buttons for ALARM, ENTER, TIME, RST, a +/- scroll wheel, an ON/OFF switch, a DC5V power input, and two USB output ports (5V/1A).
Control Buttons:
- ALARM: Used to set and activate/deactivate alarms.
- ENTER: Confirms settings and switches display modes.
- TIME: Used to set the current time and date.
- +/- Scroll Wheel: Adjusts values (e.g., hours, minutes, year).
- RST: Resets the clock to factory defaults.
- ON/OFF Switch: Controls the sound control function.
Ports:
- DC5V Input: Connects the USB power cable for main power.
- USB Output (5V/1A): Two ports for charging external devices.
Setup
1. Power Connection:
- Connect the small end of the USB power cable to the DC5V input port on the back of the clock.
- Connect the larger USB end of the cable to the provided AC adapter.
- Plug the AC adapter into a standard wall outlet. The clock display will illuminate.
2. Battery Backup (Optional):
The clock requires 1 CR2025 Lithium Ion battery (not included) for memory backup. This battery preserves time and alarm settings during a power outage, but the display will not be active.
- Locate the battery compartment on the back of the clock.
- Insert one CR2025 battery, ensuring correct polarity (+/-).
- Close the battery compartment securely.
Operating Instructions
1. Setting Time and Date:
- Press the TIME button. The year will begin to flash.
- Use the +/- Scroll Wheel to adjust the year.
- Press ENTER to confirm and move to the next setting (Month, Day, Hour, Minute).
- Repeat steps 2 and 3 for Month, Day, Hour, and Minute.
- After setting minutes, press ENTER to select 12-hour or 24-hour format. Use the +/- Scroll Wheel to choose.
- Press ENTER to save all time and date settings.
2. Setting Alarms:
The clock supports up to three independent alarms (A1, A2, A3).
- Press the ALARM button. "A1" will appear, and the alarm hour will flash.
- Use the +/- Scroll Wheel to set the alarm hour.
- Press ENTER to confirm and set the alarm minute.
- Use the +/- Scroll Wheel to set the alarm minute.
- Press ENTER to activate or deactivate the alarm (ON/OFF). Use the +/- Scroll Wheel to select.
- Press ALARM again to set A2, then A3, or to exit alarm setting mode.
When an alarm sounds, press any button to snooze for 5 minutes. To turn off the alarm completely, press and hold the ALARM button until "OFF" is displayed for that alarm.
3. Display Modes:
The clock can cycle through Time, Date, and Temperature, or display only the time.
- DP-1 Mode: Press ENTER once. The display will cycle between Time, Date, and Temperature.
- DP-2 Mode: Press ENTER again. The display will show only the Time.
4. Brightness Adjustment:
The clock offers three levels of brightness (L1, L2, L3).
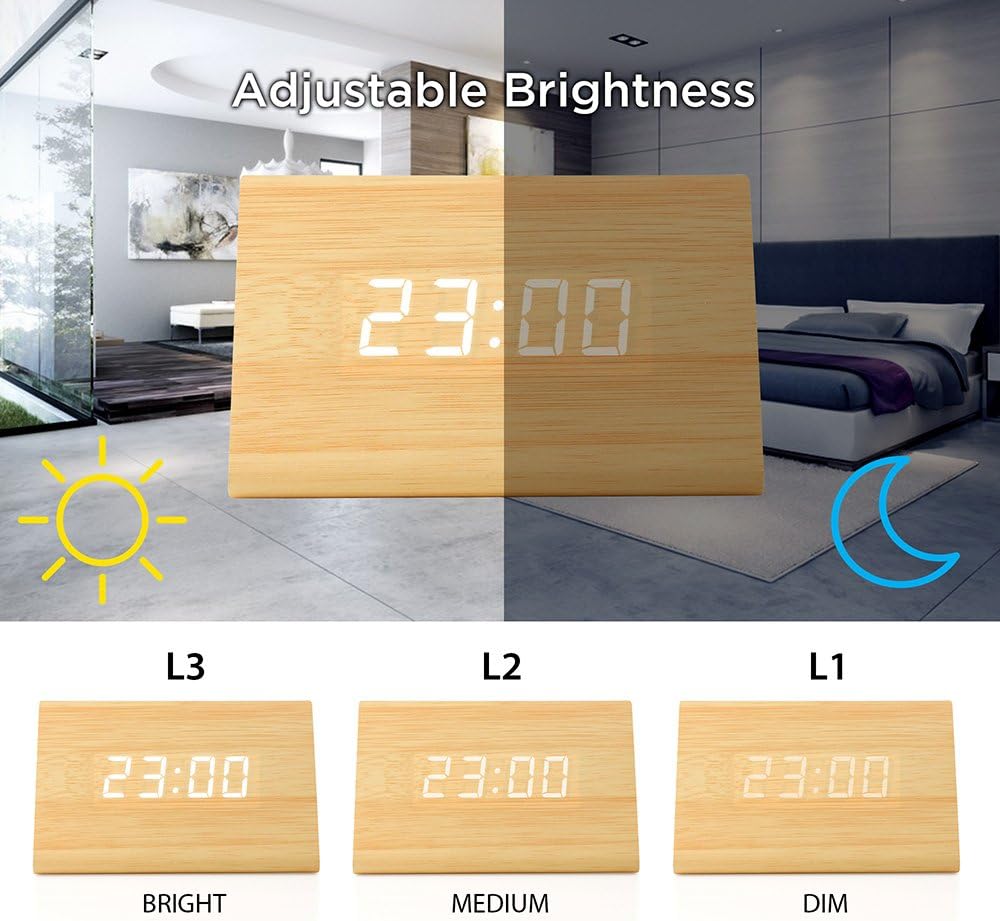
Image: Illustration of adjustable brightness. L1 is dim, L2 is medium, and L3 is bright.
- In normal time display mode, press and hold the ENTER button for 3 seconds. "L3" (brightest) will appear.
- Use the +/- Scroll Wheel to cycle through L3 (Bright), L2 (Medium), and L1 (Dim).
- Press ENTER to confirm your selection.
5. Sound Control Function:
When enabled, the display will turn off after a short period of inactivity. It can be reactivated by sound (e.g., a clap or tap).

Image: Diagram showing the sound control function. A sound louder than 60dB (like a clap or voice) will activate the clock display from standby mode.
- Locate the ON/OFF switch on the back of the clock.
- Slide the switch to ON to enable sound control. The display will turn off after approximately 10 seconds of silence.
- Slide the switch to OFF to keep the display continuously on.
6. USB Charging Ports:
The two USB output ports (5V/1A) on the back of the clock can be used to charge small electronic devices, such as smartphones or tablets. Ensure the clock is connected to its main power source for this function.
Maintenance
- Clean the clock surface with a soft, dry cloth.
- Avoid using abrasive cleaners or solvents, as these may damage the wood finish or display.
- Keep the clock away from direct sunlight, high temperatures, and high humidity.
Troubleshooting
| Problem | Possible Cause | Solution |
|---|---|---|
| Display is off or blank. | No power, sound control enabled, or battery backup only. |
|
| Alarm does not sound. | Alarm not set or deactivated. |
|
| Time is incorrect. | Time not set correctly or power interruption without battery backup. |
|
| Display is too bright/dim. | Brightness level needs adjustment. |
|
Specifications
- Brand: OCT17
- Model: 10516
- Color: Bamboo
- Display Type: Digital LED
- Material: Wood (Bamboo)
- Power Source: Corded Electric (DC 5V)
- Battery Backup: 1 x CR2025 Lithium Ion battery (not included)
- Product Dimensions: Approximately 4.75"W x 2.75"H x 3.1"D (based on image)
- Special Features: Alarm, Time, Date, Temperature Display, Adjustable Brightness, Sound Control, USB Charging Ports (2x 5V/1A)

Image: Dimensions of the clock. The clock measures approximately 4.75 inches in width, 2.75 inches in height, and 3.1 inches in depth.
Warranty and Support
For warranty information or technical support, please refer to the product packaging or contact OCT17 customer service through the retailer where the product was purchased. Keep your purchase receipt for warranty claims.