Introduction
This manual provides detailed instructions for the assembly, operation, maintenance, and troubleshooting of your Teraves REDBUD L-Shaped Desk. Please read this manual thoroughly before beginning assembly or use to ensure proper setup and safe operation.
The Teraves REDBUD L-Shaped Desk is designed to create a functional and attractive workspace. Its L-shaped corner design maximizes space, offering ample room for multiple monitors, a PC gaming setup, or essential home office supplies. Constructed from P2 class particle board with perfect edge technology and a thicker steel frame, this desk ensures strength and durability. It also features adjustable leg pads for stability on uneven surfaces.
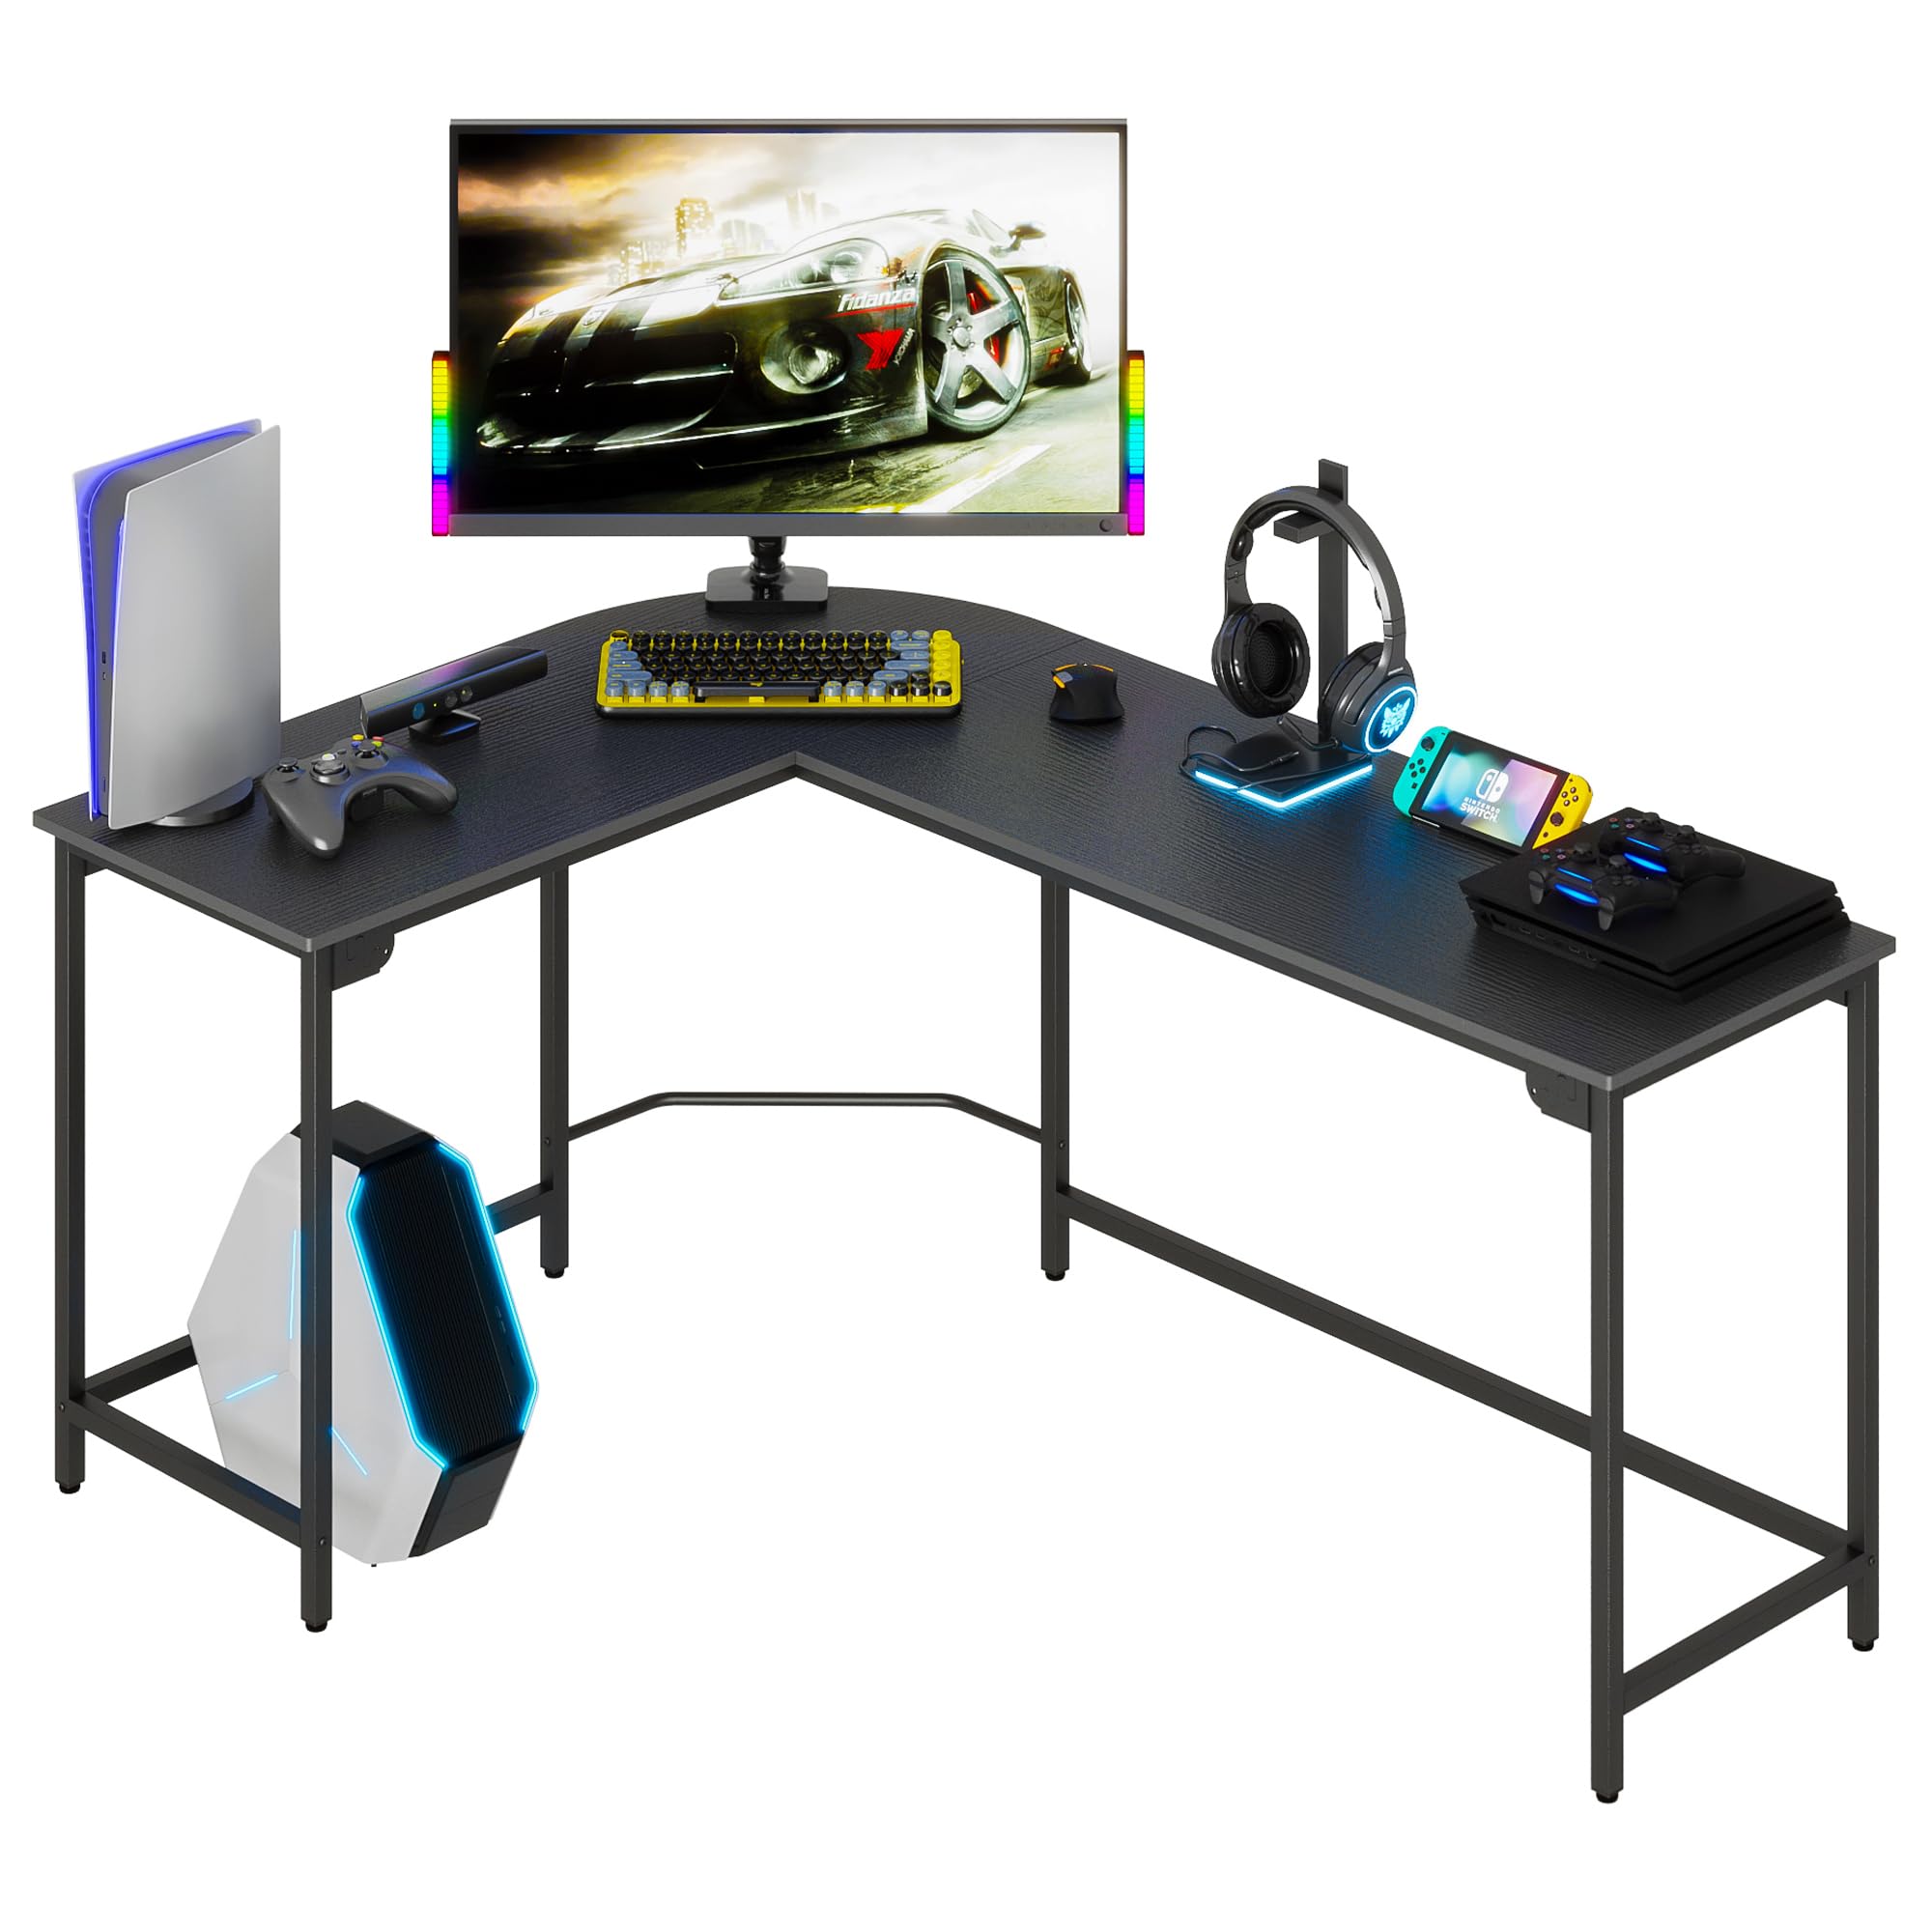
Image: Teraves REDBUD L-Shaped Desk in a modern office setting.
Safety Information
- Always assemble the desk according to the provided instructions.
- Do not exceed the maximum weight limit of 450 lbs (204 kg).
- Use the adjustable leg pads to ensure stability on uneven floors and carpets.
- Be cautious when using the footrest bar to avoid injury.
- Always supervise children when they are near the desk.
Package Contents
Before assembly, verify that all components are present and undamaged. If any parts are missing or damaged, please contact customer support.
- 1 x L-shaped desk frame components
- 1 x L-shaped desktop panels
- 1 x CPU stand
- All necessary assembly tools (Allen wrench, screwdriver)
- Hardware kit (screws, adjustable leg pads, M-Style buckles)
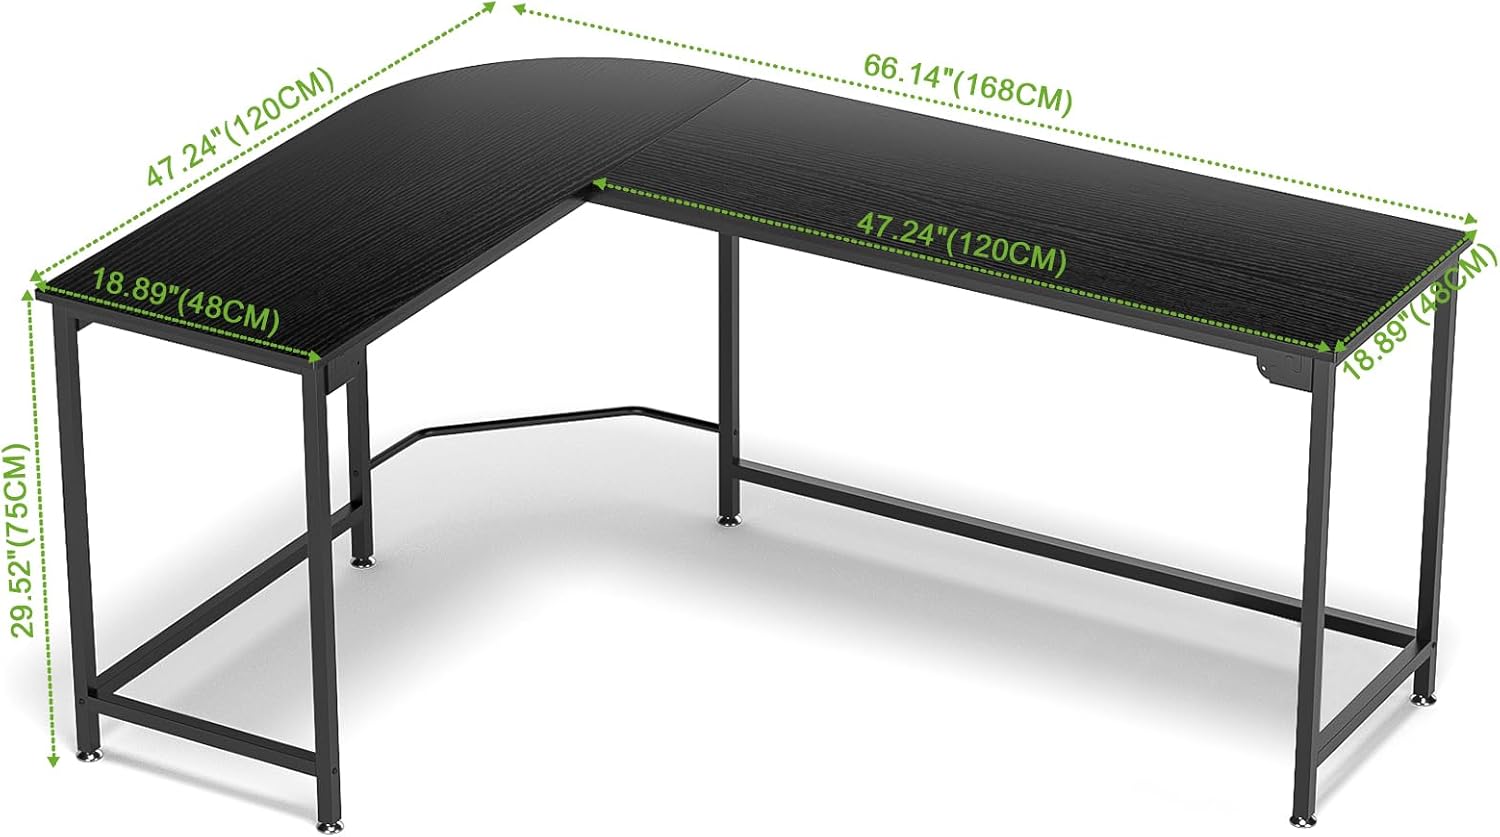
Image: Diagram showing the dimensions of the Teraves REDBUD L-Shaped Desk.
Setup and Assembly
Assembly is designed to be straightforward. It is recommended that two people assemble the desk for ease and safety.
Step-by-Step Assembly
- Place the Frame: Arrange the metal frame components on a clean, flat surface according to the instructions. The M-Style buckle design allows for easy connection of the frame pieces.
- Secure Frame Connectors: Screw the connectors one by one to fix the frame. Ensure all connections are snug but do not fully tighten until the desktop is in place.
- Connect Crossbars: Install the two crossbars to the corner sections of the frame. These provide additional stability.
- Assemble the Desktop: Carefully place the desktop panels onto the assembled frame. Align the screw holes.
- Fix the Desktop: Screw the screws between the desktop and the frame. Important Tip: Do not tighten the screws completely at first. Leave some leeway to adjust the panels for proper alignment. Once both panels are correctly aligned, tighten all screws securely.
- Install CPU Stand: The CPU stand uses self-tapping screws (Type C, M5x12mm). There are no pre-drilled holes on the board for these screws; the screws create their own holes for a secure fit.
- Adjust Leg Pads: If the ground is uneven, adjust the height of the table by rotating the adjustable leg pads at each corner until the desk is stable and level.
Assembly Video Guide
Video: Official assembly guide for the Teraves L-Shaped Desk, demonstrating step-by-step installation.
Video: Detailed assembly and troubleshooting tips for the Teraves L-Shaped Desk, including screw identification and panel alignment.

Image: Close-up of the desk's M-Style buckle design, adjustable leg pads, and footrest bar.
Operating Instructions
Utilizing the L-Shaped Design
The L-shaped design provides a generous surface area, allowing for efficient organization of your workspace. You can comfortably place multiple monitors, a laptop, keyboard, mouse, and other peripherals, optimizing your setup for productivity or gaming.
Adjustable Leg Pads
The desk is equipped with adjustable leg pads. To ensure maximum stability, especially on uneven flooring or carpet, rotate these pads clockwise or counter-clockwise to level the desk. This prevents wobbling and ensures a steady work surface.
Integrated Footrest Bar
A humanized footrest bar is integrated into the design, providing comfort during long periods of sitting. Utilize this feature to support your feet and improve posture.
Removable CPU Stand
The included CPU stand is removable, offering flexibility in placing your computer tower. It can be positioned under either side of the desk to suit your setup preferences.

Image: Teraves REDBUD L-Shaped Desk configured for a gaming setup.

Image: Diagram illustrating how a file cabinet can fit under the Teraves REDBUD L-Shaped Desk.
Maintenance
To maintain the appearance and longevity of your Teraves REDBUD L-Shaped Desk, follow these simple care instructions:
- Wipe the desk surfaces with a dry cloth regularly to remove dust and debris.
- Avoid using harsh chemicals or abrasive cleaners, as these can damage the finish.
- Periodically check all screws and connections to ensure they remain tight. Re-tighten if necessary.
- Protect the desktop from excessive moisture and direct heat.
Troubleshooting
Panels Not Aligning Correctly
If the desktop panels do not align perfectly during assembly, ensure that all screws connecting the frame and panels are not fully tightened until both panels are in their correct position. Once aligned, proceed to tighten all screws securely. This allows for minor adjustments during the initial setup.
Difficulty with Screws or Screw Holes
Ensure you are using the correct screw types for each part. The manual specifies different screw lengths (e.g., M6x35mm for plank fixation, M6x40mm for metal frame connections). For the CPU stand, self-tapping screws (M5x12mm) are used, which create their own holes in the board; no pre-drilled holes are present for these specific screws. If a screw seems difficult to insert, do not force it. Verify you have the correct screw and are aligning it properly. A rubber mallet can be helpful for gently tapping components into place, but avoid excessive force.
Desk is Wobbly
Check that all frame connections and desktop screws are tightened. Adjust the individual leg pads at the bottom of each leg by rotating them until the desk is stable and does not wobble on your floor surface.
Specifications
| Feature | Detail |
|---|---|
| Brand | Teraves |
| Model Number | REDBUD |
| Shape | L-Shape |
| Product Dimensions (D x W x H) | 44.09" x 66.14" x 29.52" (111.99cm x 168cm x 75cm) |
| Color | Black |
| Style | Modern |
| Base Material | Metal |
| Top Material Type | Engineered Wood |
| Finish Type | Powder Coated |
| Special Feature | Ergonomic, Adjustable Leg Pads |
| Included Components | 1 x L-shaped desk, 1 x CPU stand |
| Maximum Weight Recommendation | 450 Pounds (204 kg) |
| Required Assembly | Yes |
| Recommended Number of People for Assembly | 2 |
| Item Weight | 46.3 Pounds (21 kg) |
Warranty and Support
Manufacturer Warranty
The Teraves REDBUD L-Shaped Desk comes with a 1-year limited warranty from the manufacturer, FurnitureR. This warranty covers defects in materials and workmanship under normal use. Please retain your proof of purchase for warranty claims.
Customer Support
For any questions, missing parts, or assistance with assembly or troubleshooting, please contact Teraves customer support. Refer to your purchase documentation for specific contact details or visit the official Teraves store on Amazon.


