Introduction
Thank you for purchasing the Zoook ZB-ROCKER BEATBOX PRO. This extreme sound machine is designed to deliver powerful audio with integrated DJ mixer capabilities and dynamic light effects. It features multiple connectivity options including Bluetooth, USB, FM radio, and AUX input, along with inputs for microphones and guitars. Please read this manual carefully to understand the product's features and ensure proper operation and maintenance.

Image: Front and side view of the Zoook ZB-ROCKER BEATBOX PRO, highlighting its robust design and illuminated speaker.
What's in the Box
Carefully unpack your Zoook ZB-ROCKER BEATBOX PRO and ensure all items listed below are present and in good condition.
- Zoook Rocker Beatbox Pro Unit
- Wireless Microphone
- Remote Control
- User Manual (this document)
- Certificate of Authenticity
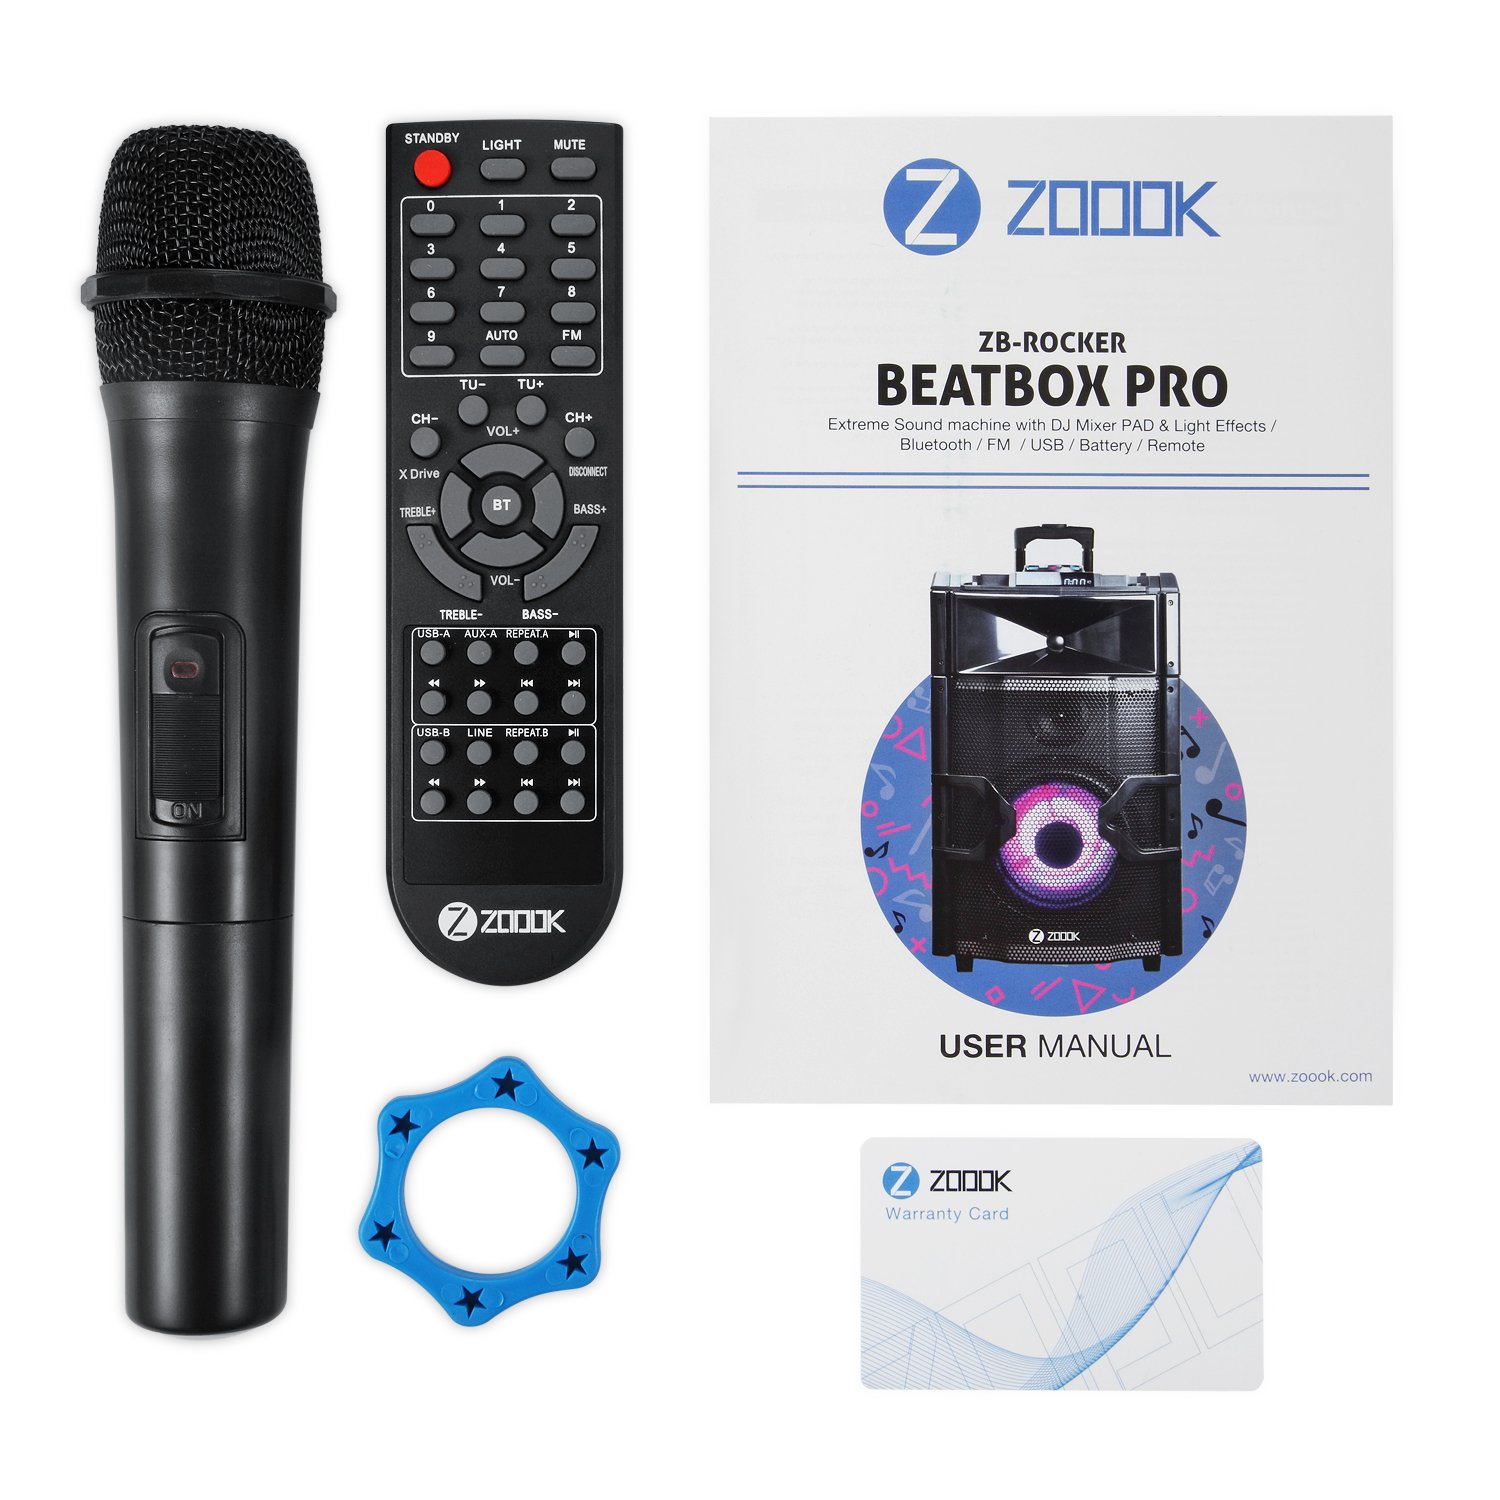
Image: All items included in the product packaging: the main unit, wireless microphone, remote control, user manual, and certificate.
Product Overview
Control Panel
The top panel of the ZB-ROCKER BEATBOX PRO features various controls and input ports for comprehensive audio management and DJ functions.

Image: Detailed view of the top control panel, illustrating the layout of inputs, volume controls, and the central DJ scratch pad.
- USB A / USB B Ports: For connecting USB storage devices for audio playback.
- AUX IN (L/R): Stereo RCA inputs for connecting external audio sources.
- MIC Input: 6.3mm jack for wired microphones.
- GUITAR Input: 6.3mm jack for connecting a guitar.
- MIC VOL / GUITAR VOL: Rotary knobs to adjust microphone and guitar input volumes.
- ECHO: Rotary knob to adjust echo effect for microphone.
- DJ Mixer PAD: Central scratch wheel and buttons for DJ effects (Scratch, Reverb, Beat Box, Yeah).
- Input A / Input B Controls: Volume faders and track navigation buttons for respective USB/Bluetooth inputs.
- MENU / PHONES MODE: Buttons for navigating settings and headphone output mode.
- VOLUME/MULTI: Main volume control and multi-function knob.
- Display Screen: Shows current mode, track information, and settings.
Rear Panel
The rear panel includes the power input, master power switch, and additional connectivity options.

Image: Back view of the unit, detailing the power connection area and warning labels.
- AC CHARGING/STANDBY/NORMAL: Power input for charging and operation.
- Master Power Switch: To turn the unit completely ON or OFF.
Setup
- Unpacking: Remove the ZB-ROCKER BEATBOX PRO and all accessories from the packaging.
- Placement: Place the unit on a stable, flat surface. Ensure adequate ventilation around the unit.
- Charging: Before first use, connect the power cable to the AC input on the rear panel and plug it into a power outlet. Allow the unit to charge fully. The charging indicator on the control panel will show the charging status.
- Power On: Flip the Master Power Switch on the rear panel to the "ON" position. Then, press the power button on the top control panel to turn on the unit.

Image: The unit shown with its retractable handle extended, demonstrating its portability for easy setup in various locations.
Operating Instructions
Power On/Off
- To turn on the unit, ensure the rear master switch is ON, then press the power button on the top panel.
- To turn off, press and hold the power button on the top panel, then flip the rear master switch to OFF for complete power disconnection.
Bluetooth Mode
- Press the "MODE" button on the control panel or remote until "Bluetooth" appears on the display.
- The unit will enter pairing mode, indicated by a flashing Bluetooth icon.
- On your mobile device, enable Bluetooth and search for "ZB-ROCKER BEATBOX PRO".
- Select the device to pair. Once connected, a confirmation sound will play, and the Bluetooth icon will stop flashing.
- You can now stream audio from your device to the ZB-ROCKER BEATBOX PRO.
USB Playback
- Insert a USB flash drive into either the USB A or USB B port.
- The unit will automatically switch to USB mode and begin playing compatible audio files. If not, press the "MODE" button to select USB.
- Use the "Input A" or "Input B" controls (play/pause, next/previous track) to manage playback for the respective USB port.
FM Radio
- Press the "MODE" button until "FM" appears on the display.
- Press the "Play/Pause" button to initiate an automatic scan for FM stations. The unit will save all found stations.
- Use the "Next/Previous Track" buttons to navigate through the saved FM stations.
AUX Input
- Connect an external audio device (e.g., smartphone, MP3 player, laptop) to the AUX IN (L/R) ports using an appropriate RCA cable.
- Press the "MODE" button until "AUX" appears on the display.
- Audio from the connected device will now play through the ZB-ROCKER BEATBOX PRO. Control playback from your external device.
Microphone and Guitar Inputs
- Plug your wired microphone into the "MIC Input" jack.
- Plug your guitar into the "GUITAR Input" jack.
- Adjust the "MIC VOL" and "GUITAR VOL" knobs to set the desired volume levels for each input.
- Use the "ECHO" knob to add an echo effect to the microphone.
- For the wireless microphone, ensure it is powered on and paired according to its own instructions.
DJ Mixer PAD & Light Effects
- DJ Effects: Use the central DJ Mixer PAD and its associated buttons (Scratch, Reverb, Beat Box, Yeah) to apply real-time sound effects to your music.
- Light Effects: The unit features integrated RGB LED lighting. Use the "LIGHT" button on the remote control to cycle through different light modes or turn them off.
Remote Control
The included IR remote control provides convenient access to various functions from a distance, including power, mode selection, volume adjustment, track control, FM tuning, and light effects.

Image: Close-up of the remote control, detailing its buttons for various functions.
Maintenance
- Cleaning: Use a soft, dry cloth to clean the exterior of the unit. Do not use abrasive cleaners or solvents.
- Storage: When not in use for extended periods, store the unit in a cool, dry place away from direct sunlight and extreme temperatures.
- Battery Care: To prolong battery life, avoid fully discharging the battery frequently. Charge the unit regularly, even if not in active use.
- Ventilation: Ensure the ventilation openings are not blocked to prevent overheating.
Troubleshooting
| Problem | Possible Cause | Solution |
|---|---|---|
| No power | Unit not charged; Master power switch off; Power cable loose. | Charge the unit; Ensure master power switch is ON; Check power cable connection. |
| No sound | Volume too low; Incorrect mode selected; Device not connected properly. | Increase volume; Select correct input mode (Bluetooth, USB, AUX, FM); Check cable connections. |
| Bluetooth not pairing | Unit not in pairing mode; Device too far; Interference. | Ensure unit is in Bluetooth pairing mode; Move device closer; Restart both devices. |
| Microphone/Guitar not working | Volume too low; Cable not fully inserted; Microphone/Guitar faulty. | Adjust MIC/GUITAR VOL knobs; Ensure cables are securely connected; Test with another microphone/guitar. |
| Remote control not working | Batteries depleted; Obstruction between remote and unit; Remote not pointed correctly. | Replace remote batteries; Remove obstructions; Point remote directly at the unit's IR receiver. |
Specifications
| Brand | Zoook |
| Model Number | BEATBOX PRO |
| Connectivity Technology | AUX, Bluetooth, USB, Wireless |
| Color | Black |
| Compatible Devices | AUX-In Devices (Smartphone, MP3 Player, Laptop), DJ Mixer, Guitar, Microphone |
| Mounting Type | Floor Standing |
| Power Source | Battery Powered |
| Audio Input | Guitar, Microphone, Auxiliary |
| Special Features | User Friendly, Portable, Battery Backup, RGB LED Lighting, DJ Mixer, DJ Pro Effects (Scratch / Reverb / Beat Box / Yeah), LED Disco Woofers, Guitar Input, AUX-In, MIC Input, Dual USB Ports, FM Radio, Wireless Microphone, IR Remote, HQ Powerful Amplifier with Xdrive Mode, Scratch Wheel, Tone Control |
Warranty and Support
Your Zoook ZB-ROCKER BEATBOX PRO comes with a Certificate of Authenticity and a warranty card. Please refer to the warranty card for detailed information regarding warranty terms and conditions. For technical support, service, or further inquiries, please visit the official Zoook website or contact their customer service department.
Official Zoook Website: www.zoook.com