Introduction
This manual provides detailed instructions for the installation, operation, and maintenance of your Bristan TRD Rise C Traditional Rigid Shower Kit. Please read these instructions carefully before installation and retain them for future reference. Ensure all components are present and undamaged before proceeding.
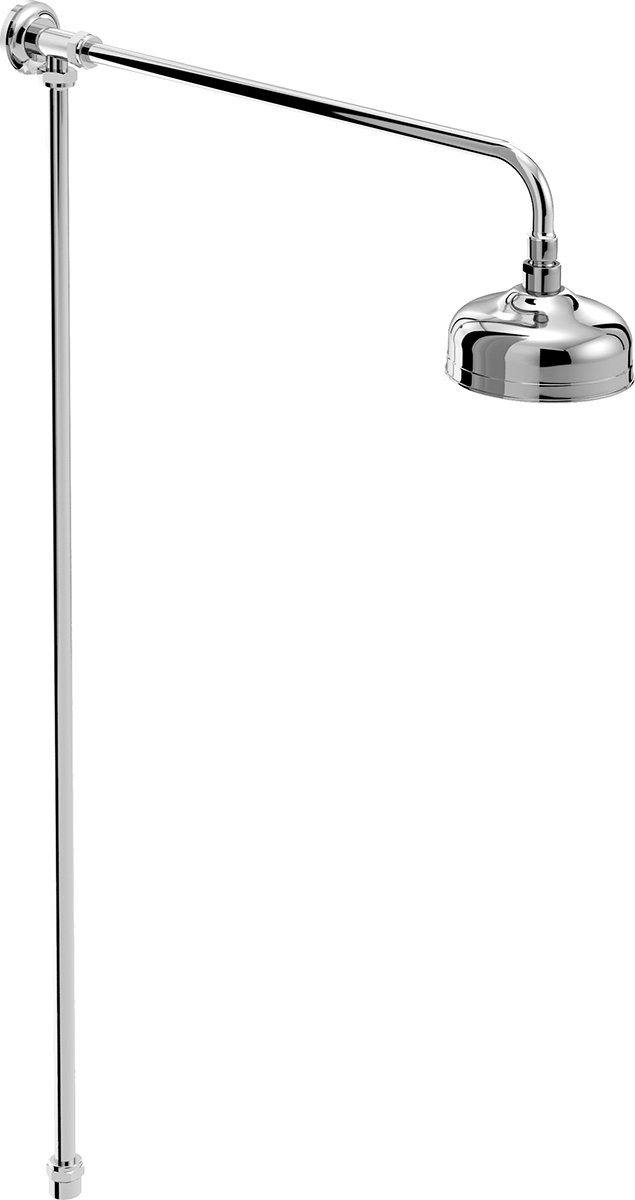
Image: Bristan TRD Rise C Traditional Rigid Shower Kit in chrome. This image displays the complete shower kit, highlighting its traditional design and chrome finish.
Safety Information
- Always turn off the main water supply before commencing any installation or maintenance work.
- If you are unsure about any part of the installation, consult a qualified plumber.
- Wear appropriate personal protective equipment (PPE) during installation, such as safety glasses and gloves.
- Ensure all connections are watertight to prevent leaks.
- Do not use abrasive cleaners or materials that could damage the chrome finish.
Package Contents
Please verify that all the following components are included in your package:
- 1 x Shower Kit (main assembly)
- 1 x Fixing Kit (includes screws, wall plugs, and seals)
- 1 x Instruction Manual (this document)
If any parts are missing or damaged, please contact Bristan customer support.
Setup and Installation
This section outlines the steps for installing your Bristan TRD Rise C Traditional Rigid Shower Kit. Professional installation is recommended.
Tools Required:
- Drill
- Spirit Level
- Measuring Tape
- Pencil
- Adjustable Spanner
- Screwdriver
- Sealant (silicone)
Installation Steps:
- Prepare the Installation Area: Ensure the wall surface is clean, dry, and capable of supporting the shower kit. Turn off the main water supply.
- Mark Fixing Points: Position the shower kit against the wall at the desired height. Use a pencil to mark the drilling points for the wall brackets. Use a spirit level to ensure correct alignment.
- Drill Holes: Drill holes at the marked points using an appropriate drill bit for your wall type. Insert the wall plugs provided in the fixing kit.
- Attach Wall Brackets: Secure the wall brackets to the wall using the screws provided. Do not overtighten.
- Connect Water Supply: Connect the hot and cold water supply pipes to the shower mixer unit. Ensure all connections are sealed with PTFE tape or appropriate sealant to prevent leaks.
- Mount Shower Kit: Carefully attach the main shower kit assembly to the wall brackets. Ensure it is securely seated.
- Install Shower Head: Attach the rigid riser and shower head to the main unit. Hand-tighten connections, then use a spanner for a final snug fit, being careful not to overtighten.
- Test for Leaks: Turn on the main water supply slowly and check all connections for leaks. If leaks are detected, turn off the water, tighten the connections, and re-test.
- Apply Sealant: Apply a bead of silicone sealant around the base of the wall brackets and any other points where water could ingress, if necessary.
Operation
The Bristan TRD Rise C Traditional Rigid Shower Kit is designed for straightforward operation.
- Water Flow Control: Use the main handle on the mixer unit to turn the water flow on or off and adjust its intensity.
- Temperature Control: The temperature is controlled by a separate handle. Rotate it to achieve the desired water temperature. Always test the water temperature before stepping into the shower.
- Diverter (if applicable): If your model includes a diverter, use it to switch water flow between the main shower head and any additional outlets (e.g., a hand shower, if installed separately).
Maintenance
Regular cleaning and maintenance will ensure the longevity and optimal performance of your shower kit.
- Cleaning the Finish: Clean the chrome surfaces regularly with a soft cloth and warm soapy water. Rinse thoroughly and dry with a soft cloth to prevent water spots. Do not use abrasive cleaners, scouring pads, or chemical-based cleaning agents, as these can damage the chrome plating. The chrome plating conforms to BS EN 248:2002 standards.
- Cleaning the Shower Head: Periodically remove the shower head and clean any limescale deposits from the nozzles. Many shower heads feature rub-clean nozzles for easy maintenance. For stubborn deposits, soak the shower head in a descaling solution designed for bathroom fixtures.
- Checking for Leaks: Regularly inspect all connections for any signs of leaks. Address any leaks promptly to prevent water damage.
- Filter Cleaning (if applicable): Some mixer units may have internal filters. Refer to the specific mixer unit's manual for instructions on how to access and clean these filters.
Troubleshooting
This section provides solutions to common issues you might encounter with your shower kit.
| Problem | Possible Cause | Solution |
|---|---|---|
| Low Water Flow |
|
|
| Water Leaks from Connections |
|
|
| Inconsistent Water Temperature |
|
|
If the problem persists after attempting these solutions, please contact Bristan customer support or a qualified plumber.
Specifications
| Model Number | TRD RISE C |
| Brand | Bristan |
| Color/Finish | Chrome |
| Material | Brass |
| Dimensions (L x W x H) | 56.7 x 1.9 x 113.5 cm |
| Weight | 600 grams |
| Number of Handles | 3 |
| Compliance | Chrome plated in accordance with BS EN 248:2002 |
| International Article Code | 05014868045252 |
Warranty and Support
Bristan products are manufactured to high standards and are backed by a manufacturer's warranty. For specific warranty details, please refer to the warranty card included with your product or visit the official Bristan website.
For technical assistance, spare parts, or service inquiries, please contact Bristan customer support:
- Website: www.bristan.com (Please check for local country-specific websites)
- Contact Information: Refer to the Bristan website for up-to-date contact numbers and email addresses for your region.
When contacting support, please have your model number (TRD RISE C) and proof of purchase readily available.