1. Introduction
This manual provides instructions for the safe and effective use of the Performance Tool W2972 Automotive Digital Multimeter. This device is designed for standard electrical testing on automotive systems and general electrical components, offering functions such as voltage, resistance, current, tachometer, and dwell measurements.
2. Safety Information
Read all safety warnings and instructions before operating this device. Failure to follow these instructions may result in electric shock, fire, or serious injury.
- Always use the provided UL-listed test leads and probes.
- The multimeter features overload protection on all ranges; however, avoid exceeding the maximum input values specified for each function.
- Exercise caution when working with live electrical circuits.
- Proposition 65 Warning: This product may contain chemicals known to the State of California to cause cancer and birth defects or other reproductive harm. Wash hands after handling.
3. Product Overview
The Performance Tool W2972 is a digital automotive multimeter featuring an extra-large, easy-to-read LCD display. It is equipped with UL-listed test leads for reliable and safe measurements.
Key Features:
- Digital Automotive Multimeter functionality.
- Measures and sets typical automotive functions including tachometer (RPM) and dwell.
- Extra-large, easy-to-read LCD display.
- UL-listed test leads, measuring 42 inches (3.5 feet) long.
- Automatic reverse polarity indication.
- Overload protection on all ranges.
Components:

Image Description: A front-angled view of the Performance Tool W2972 Digital Multimeter. The device is green with a black rotary dial, a large LCD screen, and input jacks at the bottom. A kickstand is visible at the back.
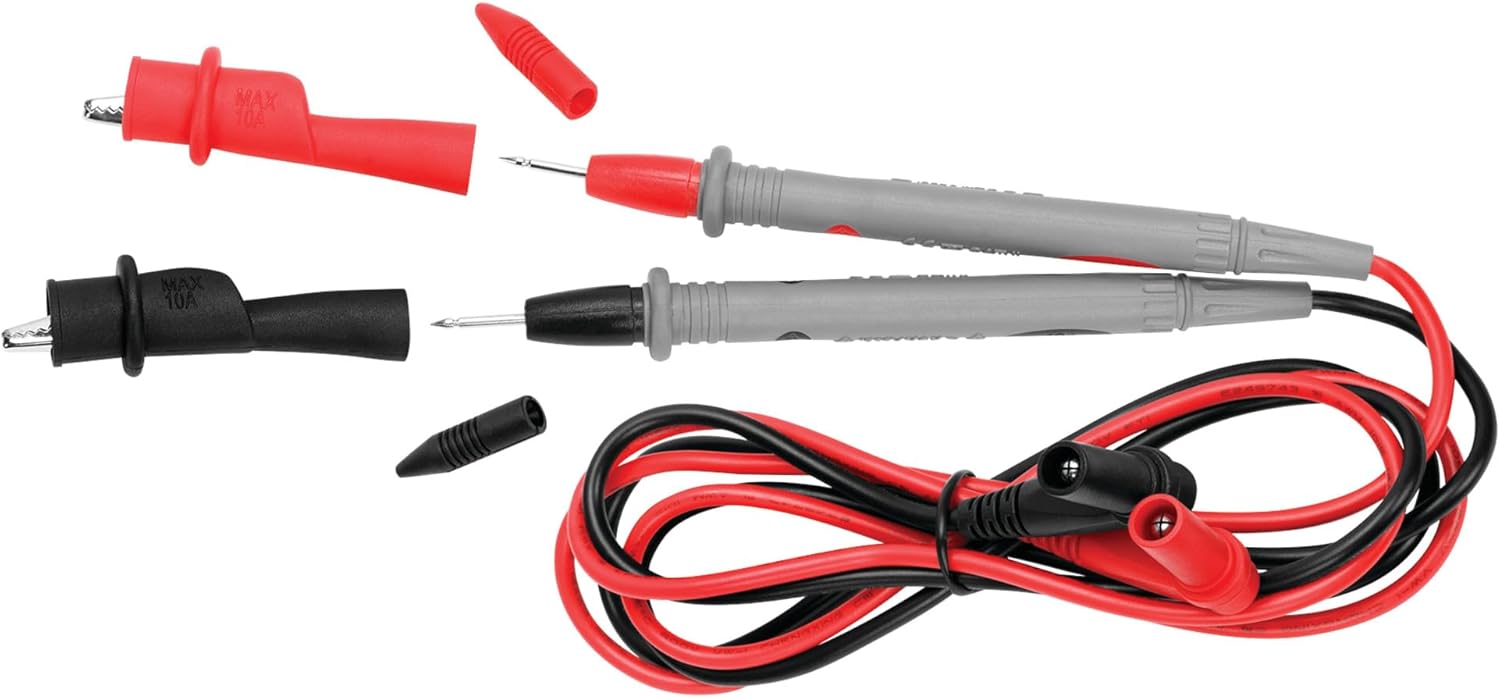
Image Description: The red and black UL-listed test leads for the Performance Tool W2972 Multimeter. The leads are coiled, and the probes with removable caps are shown detached from the main lead body.
4. Setup
4.1 Battery Installation
The Performance Tool W2972 requires two AAA batteries, which are included. To install or replace batteries:
- Locate the battery compartment cover on the back of the multimeter.
- Use a screwdriver to remove the screw securing the cover.
- Insert two AAA batteries, observing the correct polarity (+/-) as indicated inside the compartment.
- Replace the cover and secure it with the screw.
4.2 Connecting Test Leads
Connect the test leads to the appropriate input jacks on the multimeter:
- Insert the black test lead into the COM (common) jack.
- Insert the red test lead into the VΩmA jack for voltage, resistance, and low current measurements.
- For high current measurements (up to 10A), insert the red test lead into the 10A MAX FUSED jack.
5. Operating Instructions
The rotary dial on the front of the multimeter is used to select the desired measurement function and range.
5.1 General Operation
- Turn the rotary dial to the desired function (e.g., V for voltage, Ω for resistance, A for current).
- Connect the test probes to the circuit or component being tested.
- Read the measurement on the large LCD display. The multimeter features automatic reverse polarity indication.
- Press the HOLD button to freeze the current reading on the display. Press again to release.
5.2 Automotive Specific Functions
The W2972 is equipped with specific settings for automotive diagnostics, including tachometer (RPM) and dwell measurements.

Image Description: A Performance Tool W2972 Multimeter displaying a voltage reading while connected to a car battery in an engine bay. A person wearing blue gloves is using the test probes.

Image Description: A Performance Tool W2972 Multimeter displaying a resistance reading while connected to a small green circuit board. A person wearing blue gloves is using the test probes.
Tachometer (RPM) Measurement:
- Turn the rotary dial to the RPMx10 setting.
- Select the appropriate cylinder setting (4CYL, 6CYL, 8CYL) for the engine being tested.
- Connect the red test lead to the negative terminal of the ignition coil or the tachometer test point, and the black lead to a good ground.
- Start the engine and read the RPM value on the display. Multiply the reading by 10 for the actual RPM.
Dwell Measurement:
- Turn the rotary dial to the DWELL setting.
- Select the appropriate cylinder setting (4CYL, 6CYL, 8CYL) for the engine being tested.
- Connect the red test lead to the negative terminal of the ignition coil or the dwell test point, and the black lead to a good ground.
- Start the engine and read the dwell angle on the display.
Voltage Testing (Starting, Charging, Fuel Delivery Systems):
- Select the appropriate DC Voltage (V–) range.
- Connect the red test lead to the positive point of the circuit (e.g., battery positive terminal, alternator output) and the black test lead to a good ground.
- Read the voltage on the display.
Diode Function:
- Turn the rotary dial to the diode symbol (→|–).
- Connect the red test lead to the anode and the black test lead to the cathode of the diode.
- A forward voltage drop will be displayed for a good diode. Reverse the leads; an open circuit (OL) should be displayed.
6. Maintenance
6.1 Fuse Replacement
The multimeter is protected by a fuse. If the current measurement function stops working, the fuse may need replacement.
- The multimeter uses a F0.5AL250V 5X20mm fuse.
- To replace the fuse, open the battery compartment cover as described in Section 4.1.
- Carefully remove the old fuse and insert a new fuse of the correct type and rating.
- Replace the cover and secure it with the screw.
6.2 Cleaning
Wipe the multimeter casing with a damp cloth. Do not use abrasive cleaners or solvents.
7. Troubleshooting
- No display or faint display: Check battery installation and charge. Replace batteries if necessary.
- Incorrect readings: Ensure test leads are properly connected and the correct function/range is selected. Verify the component being tested is functioning correctly.
- Current measurement not working: Check and replace the fuse (refer to Section 6.1).
- RPM/Dwell readings inconsistent or zero: Ensure proper connection to the ignition system and correct cylinder setting. Verify engine is running smoothly.
8. Specifications
| Specification | Detail |
|---|---|
| Model | W2972 |
| Brand | Performance Tool |
| Measurement Type | Multimeter |
| Power Source | Battery Powered (2 AAA batteries, included) |
| Fuse Type | F0.5AL250V 5X20mm |
| Test Lead Length | 42 inches (3.5 feet) |
| Item Weight | 16 ounces (1 pound) |
| Product Dimensions (L x W x H) | 6.5 x 2 x 10.6 inches |
9. Warranty and Support
This Performance Tool W2972 Automotive Digital Multimeter comes with a 1-year limited warranty. For warranty claims or technical support, please refer to the contact information provided with your purchase or visit the official Performance Tool website.


