
1. Introduction
This manual provides essential information for the safe and effective installation, operation, and maintenance of your FLYPIG Universal 7 Gallon Generator Fuel Tank. This fuel tank is designed as a replacement or upgrade for various 5-8KW generators, including Honda EC6500, EM6500, EM6500SX, EM5500, EM5000S, EB5000, EB5000X, and EB6500 models. Please read all instructions carefully before use.
2. Safety Information
WARNING: Failure to follow these safety instructions may result in fire, explosion, serious injury, or death.
- Always handle fuel in a well-ventilated area, away from ignition sources, open flames, or sparks.
- Do not overfill the fuel tank. Leave 5 to 7% expansion space inside the tank for safety.
- Ensure the fuel cap is securely tightened after refueling to prevent spills and vapor leaks.
- Inspect the fuel tank and all connections regularly for leaks, cracks, or damage. Replace damaged components immediately.
- Keep fuel away from children and pets.
- Wear appropriate personal protective equipment (PPE) when handling fuel or performing maintenance.
- Dispose of old fuel and fuel-related waste according to local regulations.
3. Package Contents
Verify that all items listed below are present and undamaged upon unpacking:
- 1x Fuel Tank (7 Gallon / 26.5 Liters)
- 1x Gas Cap (Chrome)
- 1x Fuel Gauge
- 1x Fuel Filter
- 1x Fuel Petcock (Fuel Valve)
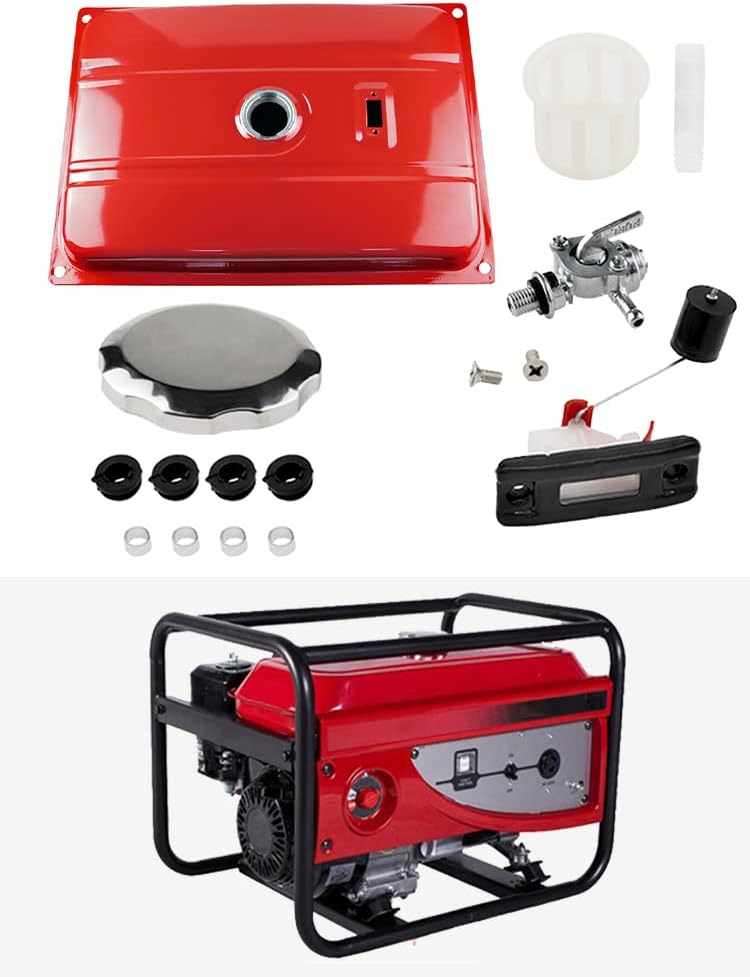
Image: The FLYPIG Universal 7 Gallon Generator Fuel Tank shown with its complete set of included components: the red fuel tank, chrome gas cap, fuel gauge, fuel filter, and fuel petcock.
4. Product Features and Specifications
4.1 Key Features
- Capacity: Approximately 7 Gallons (26.5 Liters). Note: Actual usable capacity may be slightly less due to the tank's irregular shape and the need for expansion space.
- Compatibility: Universal fit for many 5-8KW generators, including specific Honda models (EC6500, EM6500, EM6500SX, EM5500, EM5000S, EB5000, EB5000X, EB6500).
- Complete Assembly: Includes gas cap, gas gauge, fuel filter, and fuel petcock for a comprehensive replacement or upgrade.
- Material: Durable metal construction.
- Finish: Red exterior with chrome gas cap.
4.2 Dimensions
| Measurement | Value |
|---|---|
| Overall Length (center hole to center hole) | Approx. 23 3/8 inches (595 mm) |
| Overall Width (center hole to center hole) | Approx. 16 1/4 inches (415 mm) |
| Height | Approx. 6 inches (120 mm) |
| Fuel Cap Opening Diameter | Approx. 69 mm |
| Item Weight | 10.63 pounds (4.83 kg) |
| Package Dimensions | 26.75 x 20 x 7.75 inches |

Image: Technical drawing illustrating the key dimensions of the fuel tank, including length, width, and height.

Image: Detailed close-up views of the fuel tank's features, including the fuel cap opening, the slot for the fuel gauge, and the mounting holes.
5. Installation
This section provides general guidance for installing the fuel tank. Specific generator models may require slight variations. Always refer to your generator's service manual for detailed instructions.
5.1 Preparation
- Ensure the generator is turned off, cooled down, and disconnected from any power source.
- Drain any remaining fuel from the old tank into an approved container.
- Remove the old fuel tank and associated components (fuel lines, petcock, gauge).
5.2 Assembly and Mounting
- Install the new fuel petcock (fuel valve) onto the tank. Ensure any included gaskets or seals are properly seated to prevent leaks.
- Insert the fuel gauge into its designated slot on the tank.
- Connect the fuel filter to the fuel line, then attach the fuel line to the petcock. Ensure all connections are secure and free of leaks.
- Carefully position the new fuel tank onto the generator frame. Align the mounting holes on the tank with the corresponding points on the generator.
- Secure the tank using appropriate bolts, washers, and nuts. Tighten fasteners evenly to prevent stress on the tank.
- Double-check all connections for tightness and proper routing of fuel lines.

Image: Top view of the red fuel tank, showing the fuel cap opening and the fuel gauge slot, ready for component installation.
6. Operation
Once the fuel tank is installed, follow these steps for safe operation:
- Refueling: With the generator off and cooled, slowly add fresh, clean gasoline to the tank. Do not fill completely; leave space for expansion. Securely fasten the chrome gas cap.
- Fuel Valve: Ensure the fuel petcock is in the 'ON' position before starting the generator to allow fuel flow. Turn to 'OFF' when the generator is not in use or during transport.
- Monitoring Fuel Level: Use the integrated fuel gauge to monitor the fuel level during operation.
Video: This video provides a visual overview of the FLYPIG Universal 7 Gallon Generator Fuel Tank, showcasing its design, key features, and included accessories.
7. Maintenance
Regular maintenance ensures the longevity and safe operation of your fuel tank.
- Inspection: Periodically inspect the tank for signs of corrosion, dents, or leaks. Check fuel lines and connections for cracks or deterioration.
- Cleaning: Keep the exterior of the tank clean. Avoid using harsh chemicals that could damage the paint or material.
- Fuel Filter: The included fuel filter helps prevent debris from entering the engine. Inspect and clean or replace the fuel filter as part of your generator's routine maintenance schedule.
- Storage: If storing the generator for an extended period, drain the fuel tank or use a fuel stabilizer to prevent fuel degradation and tank corrosion.
8. Troubleshooting
This section addresses common issues you might encounter.
| Problem | Possible Cause | Solution |
|---|---|---|
| Fuel Leakage | Loose connections, damaged gaskets, cracked tank/hose | Tighten all connections. Inspect and replace damaged gaskets, hoses, or the tank if necessary. |
| No Fuel Flow to Engine | Fuel petcock in 'OFF' position, clogged fuel filter, kinked fuel line | Ensure petcock is 'ON'. Clean or replace fuel filter. Check fuel line for obstructions. |
| Inaccurate Fuel Gauge Reading | Faulty gauge, debris obstructing float | Inspect gauge for damage. Remove and clean if obstructed. Replace if faulty. |
9. Warranty and Support
Specific warranty information for the FLYPIG Universal 7 Gallon Generator Fuel Tank is not provided in this manual. For warranty details, technical support, or replacement parts, please contact the manufacturer or your point of purchase. Always provide your product model number (EC6500) and UPC (699987807988) when seeking support.