1. Introduction
Thank you for choosing the V-TAC LED Floodlight VT-20-W. This manual provides essential information for the safe installation, operation, and maintenance of your new LED floodlight. Please read these instructions carefully before installation and retain them for future reference.

Image 1.1: V-TAC LED Floodlight VT-20-W (Front View)
This image shows the V-TAC LED Floodlight VT-20-W from the front, highlighting its compact design and LED array.
2. Safety Information
WARNING: Always disconnect power before installation or maintenance.
- Installation should be performed by a qualified electrician.
- Ensure the power supply voltage matches the product's requirements (AC 220-240V, 50Hz).
- Do not operate the floodlight if the housing or cable is damaged.
- This product is designed for outdoor use (IP65 rated). Ensure all connections are waterproof.
- Do not stare directly into the LED light source when illuminated.
- Keep away from flammable materials.
- Ensure proper grounding.
3. Package Contents
The package includes the following items:
- 1 x V-TAC LED Floodlight VT-20-W
- Instruction Manual (this document)

Image 3.1: Product Packaging
This image displays the retail packaging for the V-TAC LED Floodlight, indicating key features like 20W power, 100° beaming angle, 1600lm brightness, and 30,000H long life.
4. Product Overview and Features
The V-TAC LED Floodlight VT-20-W is a high-performance outdoor lighting solution.
Key Features:
- Power: 20 Watts
- Color Temperature: 6400K (Cool White)
- Luminous Flux: 1600 Lumens
- Beaming Angle: 100°
- Body Material: Die-cast Aluminum
- Ingress Protection (IP) Rating: IP65 (Water and Dust Resistant)
- Energy Efficiency: Up to 85% energy saving compared to traditional lighting.
- Long Lifespan: Approximately 30,000 hours.
- Efficient Heat Sink: Designed to prevent overheating and prolong lamp lifespan.
- SMD LEDs: Utilizes Surface Mounted Device (SMD) LEDs for efficient illumination.
Dimensions:
The floodlight has compact dimensions suitable for various outdoor installations.
- Length: 15.3 cm
- Width: 13.2 cm
- Depth: 2.7 cm
- Weight: 400 g
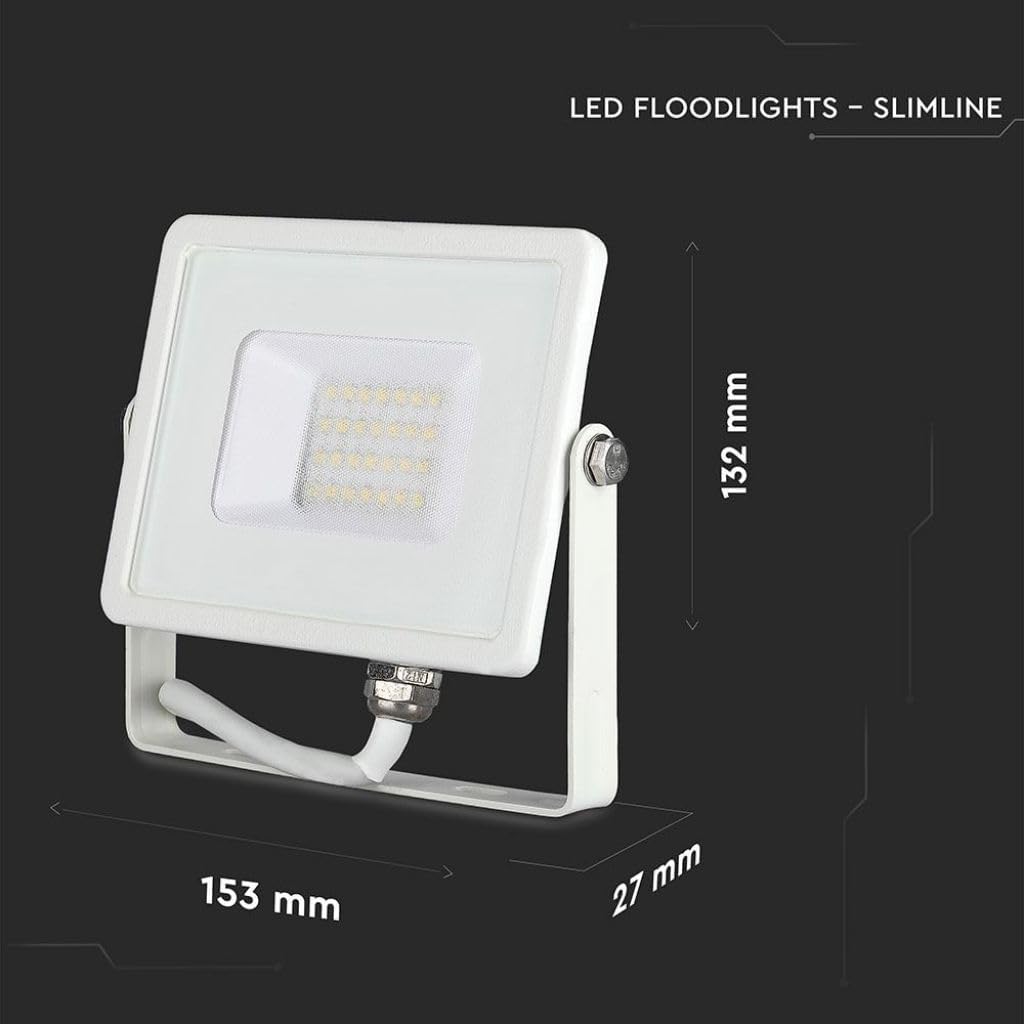
Image 4.1: Product Dimensions
This image illustrates the physical dimensions of the V-TAC LED Floodlight, showing a length of 153 mm, a height of 132 mm, and a depth of 27 mm.

Image 4.2: IP65 Rating
This image highlights the IP65 rating of the floodlight, indicating its resistance to water and dust, making it suitable for outdoor use.
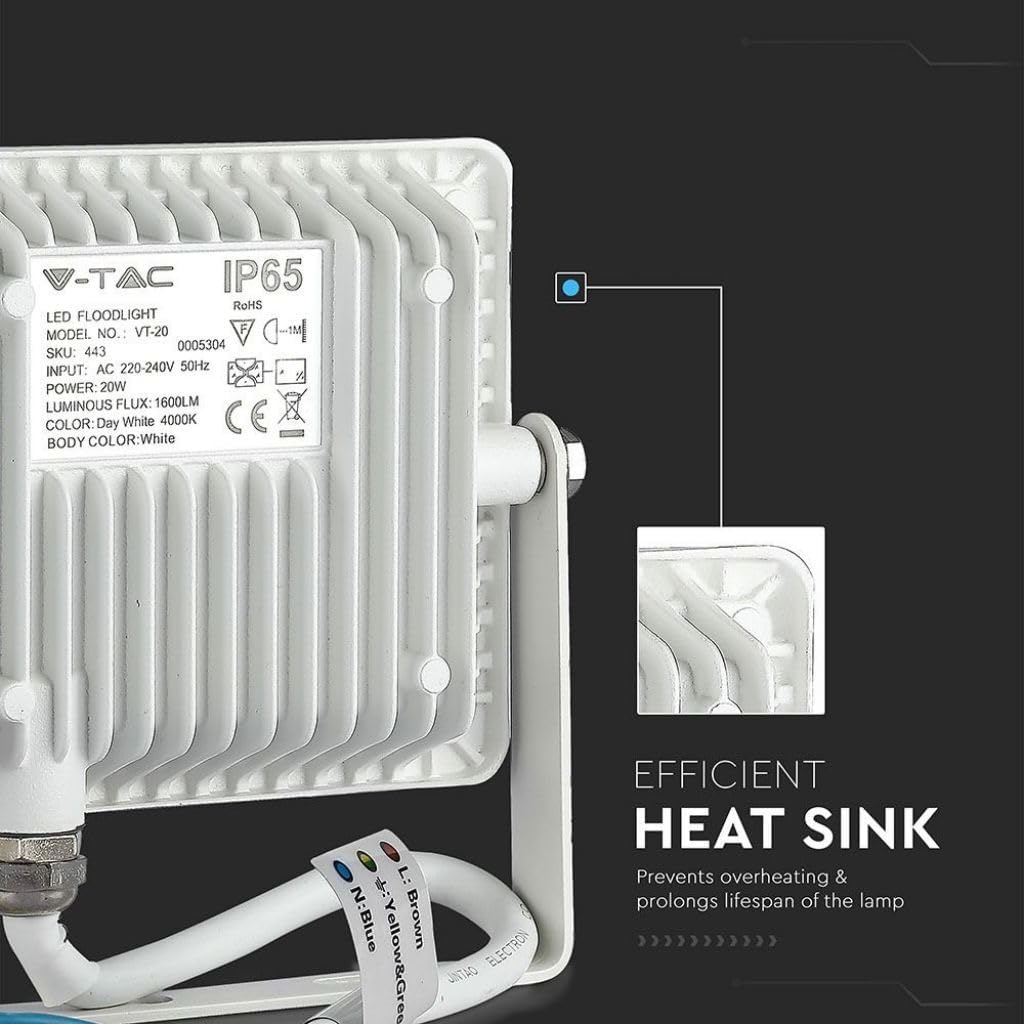
Image 4.3: Efficient Heat Sink
This image displays the rear of the floodlight, emphasizing the efficient heat sink design which helps prevent overheating and extends the product's lifespan.
5. Setup and Installation
This floodlight is designed for outdoor use and can be mounted as a freestanding unit. Professional installation by a qualified electrician is highly recommended to ensure safety and compliance with local electrical codes.
Installation Steps:
- Power Disconnection: Before starting any installation, ensure the main power supply to the installation area is switched off at the circuit breaker.
- Mounting Location: Choose a suitable outdoor location that provides the desired illumination coverage and allows for secure mounting. The floodlight comes with a bracket for surface mounting.
- Secure Mounting: Use appropriate screws and anchors (not included) to securely fasten the mounting bracket to the desired surface. Ensure the surface can support the weight of the floodlight.
- Wiring Connection:
- Connect the brown wire (L) to the Live terminal.
- Connect the blue wire (N) to the Neutral terminal.
- Connect the yellow/green wire (E) to the Earth/Ground terminal.
- Adjust Angle: Once mounted and wired, adjust the floodlight's angle to direct the light as required.
- Power Restoration: Restore power to the circuit and test the floodlight.
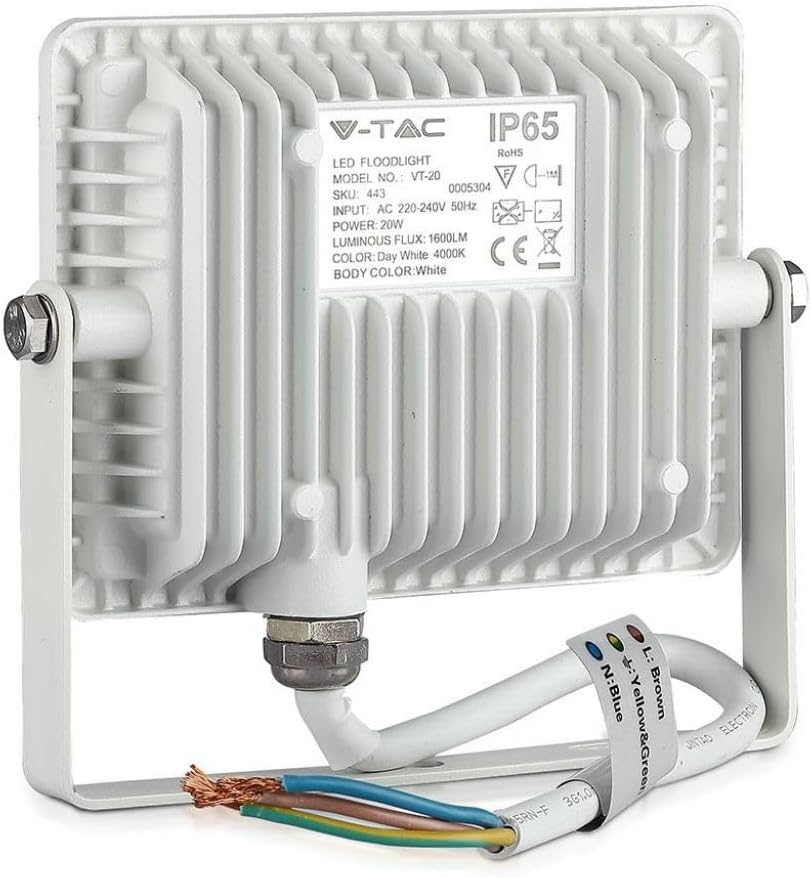
Image 5.1: Wiring Connections
This image displays the rear of the floodlight, showing the electrical cable with brown (Live), blue (Neutral), and yellow/green (Earth) wires for connection.
6. Operating Instructions
The V-TAC LED Floodlight VT-20-W operates by direct connection to your electrical mains.
- Ensure the floodlight is correctly installed and wired according to the "Setup and Installation" section.
- Switch on the power supply to the floodlight circuit. The floodlight will illuminate instantly.
- To turn off the floodlight, switch off the power supply to its circuit.
For automated operation (e.g., dusk-to-dawn or motion sensing), an external sensor or timer switch must be installed by a qualified electrician.

Image 6.1: Floodlight in Outdoor Application
This image shows multiple V-TAC LED Floodlights illuminating the exterior of a building at night, demonstrating their effectiveness in outdoor lighting.
7. Maintenance
The V-TAC LED Floodlight VT-20-W requires minimal maintenance.
- Cleaning: Ensure the floodlight is switched off and cool before cleaning. Wipe the exterior with a soft, damp cloth. Do not use abrasive cleaners or solvents.
- Inspection: Periodically inspect the floodlight and its wiring for any signs of damage, wear, or loose connections. Address any issues promptly.
- No User-Serviceable Parts: There are no user-serviceable parts inside the floodlight. Do not attempt to open or repair the unit.
8. Troubleshooting
If you encounter issues with your V-TAC LED Floodlight, refer to the following troubleshooting guide:
| Problem | Possible Cause | Solution |
|---|---|---|
| Floodlight does not turn on. |
|
|
| Light output is dim or flickering. |
|
|
If the problem persists after attempting these solutions, contact V-TAC customer support or a qualified electrician.
9. Specifications
| Parameter | Value |
|---|---|
| Model Number | VT-20-W |
| Power | 20 Watts |
| Input Voltage | AC 220-240V, 50Hz |
| Luminous Flux | 1600 Lumens |
| Color Temperature | 6400K (Cool White) |
| Body Color | White |
| Material | Die-cast Aluminum |
| Product Dimensions (L x W x D) | 15.3 x 13.2 x 2.7 cm |
| Weight | 400 g |
| IP Rating | IP65 |
| Specific Use | Outdoor use |
| Installation Type | Freestanding (with mounting bracket) |
| Energy Efficiency Class | F |
| Energy Consumption (1000h) | 20 kWh |
| CRI (Color Rendering Index) | 80 |
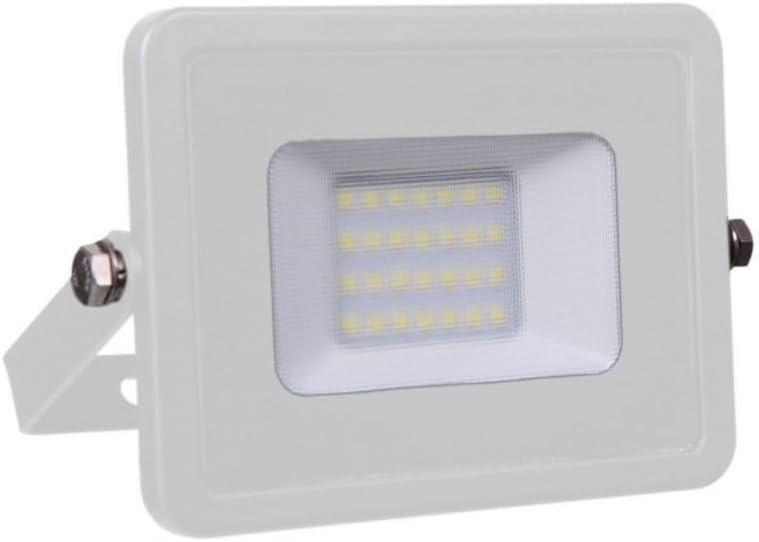
Image 9.1: EU Energy Label
This image shows the EU energy label for the V-TAC LED Floodlight, indicating an energy efficiency class of F and an energy consumption of 20 kWh per 1000 hours. More details can be found at eprel.ec.europa.eu/qr/966766.
10. Warranty and Support
V-TAC products are manufactured to high standards and are designed for durability. While specific warranty details are not provided in this manual, V-TAC typically offers a warranty period for its products. Please refer to your purchase documentation or the official V-TAC website for detailed warranty information.
For technical support, troubleshooting assistance, or warranty claims, please contact your local V-TAC distributor or visit the official V-TAC website.
Manufacturer: V-TAC Europe Ltd.
Address: bul. Rozhen 41, Sofia, Bulgaria