1. Introduction
This manual provides detailed instructions for the installation, operation, and maintenance of your Schellenberg 70896 Roll-Up Insect Screen for Doors. Please read these instructions carefully before beginning installation to ensure proper function and longevity of the product. This insect screen is designed to provide effective protection against insects while allowing fresh air circulation through your doors.

Image 1.1: Schellenberg 70896 Roll-Up Insect Screen installed on a door.
2. Safety Information
Please observe the following safety guidelines during installation and use:
- Always use appropriate tools and wear protective gear, such as gloves and safety glasses, during installation.
- Ensure the installation surface is clean, dry, and structurally sound.
- Keep small parts away from children to prevent choking hazards.
- Do not attempt to modify the product. Use only original Schellenberg replacement parts if needed.
- Ensure the screen rolls up and down smoothly without obstruction to prevent damage.
3. Package Contents
Before beginning installation, verify that all components are present in the package:
- Roll-up insect screen cassette
- Side guide rails (2x)
- Bottom guide rail
- Mounting hardware (screws, plugs)
- Handle/pull cord
- Installation instructions

Image 3.1: Product packaging showing included components.
4. Installation Guide
4.1. Before You Begin
Tools Required: Drill, screwdriver, measuring tape, pencil, level, utility knife.
Preparation:
- Measure the exact width and height of your door opening. The screen is designed for openings up to 160 cm wide and 225 cm high.
- Clean the door frame thoroughly to ensure proper adhesion and mounting.
- Unpack all components and check for any damage or missing parts.
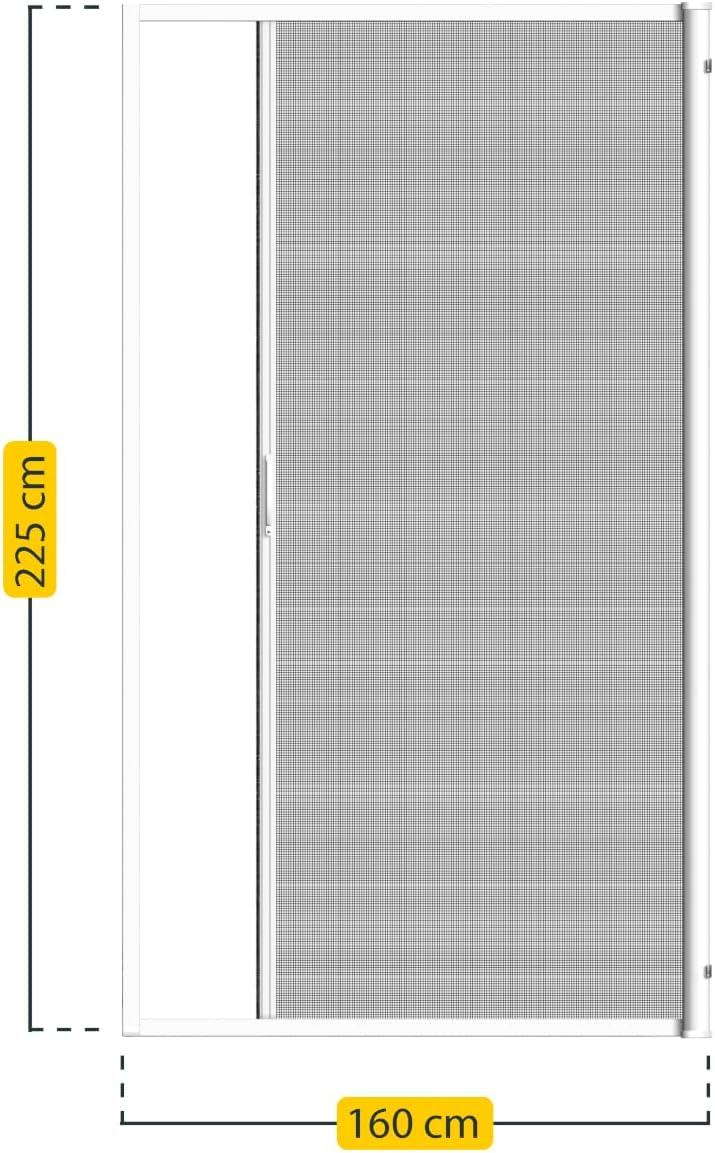
Image 4.1: Product dimensions for accurate measurement.
4.2. Step-by-Step Installation
- Mount the Screen Cassette: Position the roll-up screen cassette at the top of your door frame. Ensure it is level and centered. Mark the drilling points and secure the cassette using the provided screws and plugs.
- Install Side Guide Rails: Attach the two side guide rails vertically along the door frame, aligning them with the cassette. Ensure they are perfectly straight and parallel. Secure them with screws.
- Attach Bottom Guide Rail: Secure the bottom guide rail to the floor or threshold, ensuring it aligns with the side rails and allows the screen to move freely.
- Insert the Screen: Carefully slide the screen into the guide rails from the cassette. Ensure the screen moves smoothly without snagging.
- Final Adjustments: Test the screen by pulling it down and letting it retract. Make any necessary adjustments to the guide rails to ensure smooth operation. Attach the handle/pull cord if not pre-installed.
- Optional: Belt Mounting: The system may include a belt mounting option for specific installations. Refer to the specific instructions for belt mounting if applicable to your model.

Image 4.2: Attaching a guide rail component to the door frame.
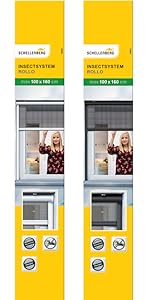
Image 4.3: Securing a frame component to the door opening.

Image 4.4: Guiding the screen into the side track.

Image 4.5: The screen fully extended and ready for use.

Image 4.6: Detail of the belt mounting mechanism.
5. Operating Instructions
To operate your Schellenberg Roll-Up Insect Screen:
- To Close: Gently pull the handle or pull cord downwards until the screen is fully extended and latches into the bottom guide rail.
- To Open: Release the latch mechanism (if present) and allow the screen to retract slowly and smoothly into the cassette. Do not let it snap back quickly, as this can cause damage.
6. Care and Maintenance
Regular cleaning and maintenance will ensure the long-term functionality and appearance of your insect screen.
- Cleaning the Mesh: Use a soft brush or a damp cloth with mild soapy water to gently clean the fiberglass mesh. Avoid harsh chemicals or abrasive cleaners.
- Cleaning the Frame and Guide Rails: Wipe the aluminum frame and guide rails with a damp cloth. Ensure no dirt or debris accumulates in the guide rails, as this can impede screen movement.
- Brush Seal Maintenance: Check the brush seals for wear or damage. Clean them gently to ensure they remain effective in keeping insects out.
- Lubrication: Periodically apply a silicone-based spray lubricant to the guide rails to ensure smooth operation.

Image 6.1: Detail of the fiberglass mesh.

Image 6.2: Detail of the brush seal.
7. Troubleshooting
Refer to the table below for common issues and their solutions:
| Problem | Possible Cause | Solution |
|---|---|---|
| Screen does not retract smoothly. | Dirt in guide rails, damaged spring mechanism, misaligned rails. | Clean guide rails, check for obstructions. If spring or alignment issue, contact customer support. |
| Screen does not stay closed. | Latch mechanism faulty or obstructed. | Check latch for debris. Ensure it engages properly. Adjust if possible or contact support. |
| Gaps around the screen. | Improper installation, worn brush seals. | Recheck installation for proper alignment. Inspect and replace brush seals if worn. |
| Mesh is torn or damaged. | Physical damage. | Small tears can be repaired with a repair kit. For large damage, mesh replacement may be necessary. Contact customer support for options. |
8. Technical Specifications
| Feature | Detail |
|---|---|
| Brand | Schellenberg |
| Model Number | 70896 |
| Material | Aluminum, Fiberglass |
| Color | White |
| Maximum Dimensions (W x H) | 160 cm x 225 cm |
| Manufacturer | Schellenberg |
| GTIN | 04003971708964 |
| ASIN | B079LDNZQV |
9. Warranty and Customer Support
Schellenberg products are manufactured to high-quality standards. For information regarding the warranty period and terms, please refer to the documentation included with your purchase or visit the official Schellenberg website.
If you have any questions about your Schellenberg 70896 Roll-Up Insect Screen, including product suitability, correct measurements, installation, or replacement parts, our customer support team is available to assist you. Please contact us through the official Schellenberg support channels for prompt assistance.


