Rolife R108X
Rolife Miller's Garden DIY Miniature Dollhouse LED Model Building Kit Instruction Manual
Brand: Rolife | Model: R108X
Introduction
This instruction manual provides detailed guidance for assembling and operating your Rolife Miller's Garden DIY Miniature Dollhouse LED Model Building Kit. Please read all instructions carefully before beginning assembly to ensure a successful and enjoyable building experience. This kit is designed for individuals aged 14 years and up.

Image: The fully assembled Miller's Garden miniature dollhouse, showcasing its detailed garden and interior elements.
Safety Information
- This kit contains small parts. Keep out of reach of young children to prevent choking hazards.
- Exercise caution when using sharp tools such as scissors or craft knives during assembly. Adult supervision is recommended for younger builders.
- Use adhesives in a well-ventilated area. Avoid contact with skin and eyes. Refer to the glue manufacturer's instructions for specific safety precautions.
- Ensure proper disposal of waste materials.
Package Contents
Your Rolife Miller's Garden kit includes various components necessary for assembly. Please verify all parts are present before starting.

Image: An overview of the kit's contents, showing various wooden pieces, fabric, paper cutouts, and small accessories.
The kit typically contains:
- Pre-cut wooden pieces for the structure and furniture.
- Various fabrics and paper for decorations.
- Small plastic or metal accessories.
- LED light components and wiring.
- Adhesive (glue).
- Paint and paintbrush.
- Detailed instruction booklet with illustrations.
Note: Batteries for the LED light are not included and must be purchased separately.
Assembly Instructions (Setup)
Follow the step-by-step instructions provided in the included booklet and refer to the visual aids below for guidance. Patience and attention to detail are key for a successful build.

Image: A visual breakdown of the assembly process, from preparing pieces to arranging components.
General Assembly Steps:
- Preparation: Carefully remove all wooden pieces from their sheets according to the 1:1 illustration paper. Organize components by their corresponding bag numbers.
- Painting: Apply paint to designated wooden parts as indicated in the instruction booklet. Allow sufficient drying time.
- Structure Assembly: Begin by building the main house frame. Use the provided adhesive to secure pieces firmly.
- Component Creation: Assemble miniature furniture and decorative elements. This often involves folding, cutting, and gluing smaller pieces.
- Arrangement and Wiring: Place all crafted elements into the mini house. Install the LED lighting system, ensuring all connections are secure.
Assembly Video Guide:
Video: This video provides a visual guide to the assembly process of the Rolife Miller's Garden miniature dollhouse. It demonstrates how to prepare components, assemble the structure, and add intricate details, offering helpful visual cues for builders.
Operating the LED Light
The Miller's Garden dollhouse features an integrated LED lighting system to enhance its display. To operate the light:
- Ensure batteries (not included) are correctly installed in the designated battery box, following polarity markings.
- Connect the LED light wiring to the battery box as shown in the assembly instructions.
- Locate the switch on the battery box or designated area. Flip the switch to the 'ON' position to illuminate the dollhouse.
- Flip the switch to the 'OFF' position when not in use to conserve battery life.
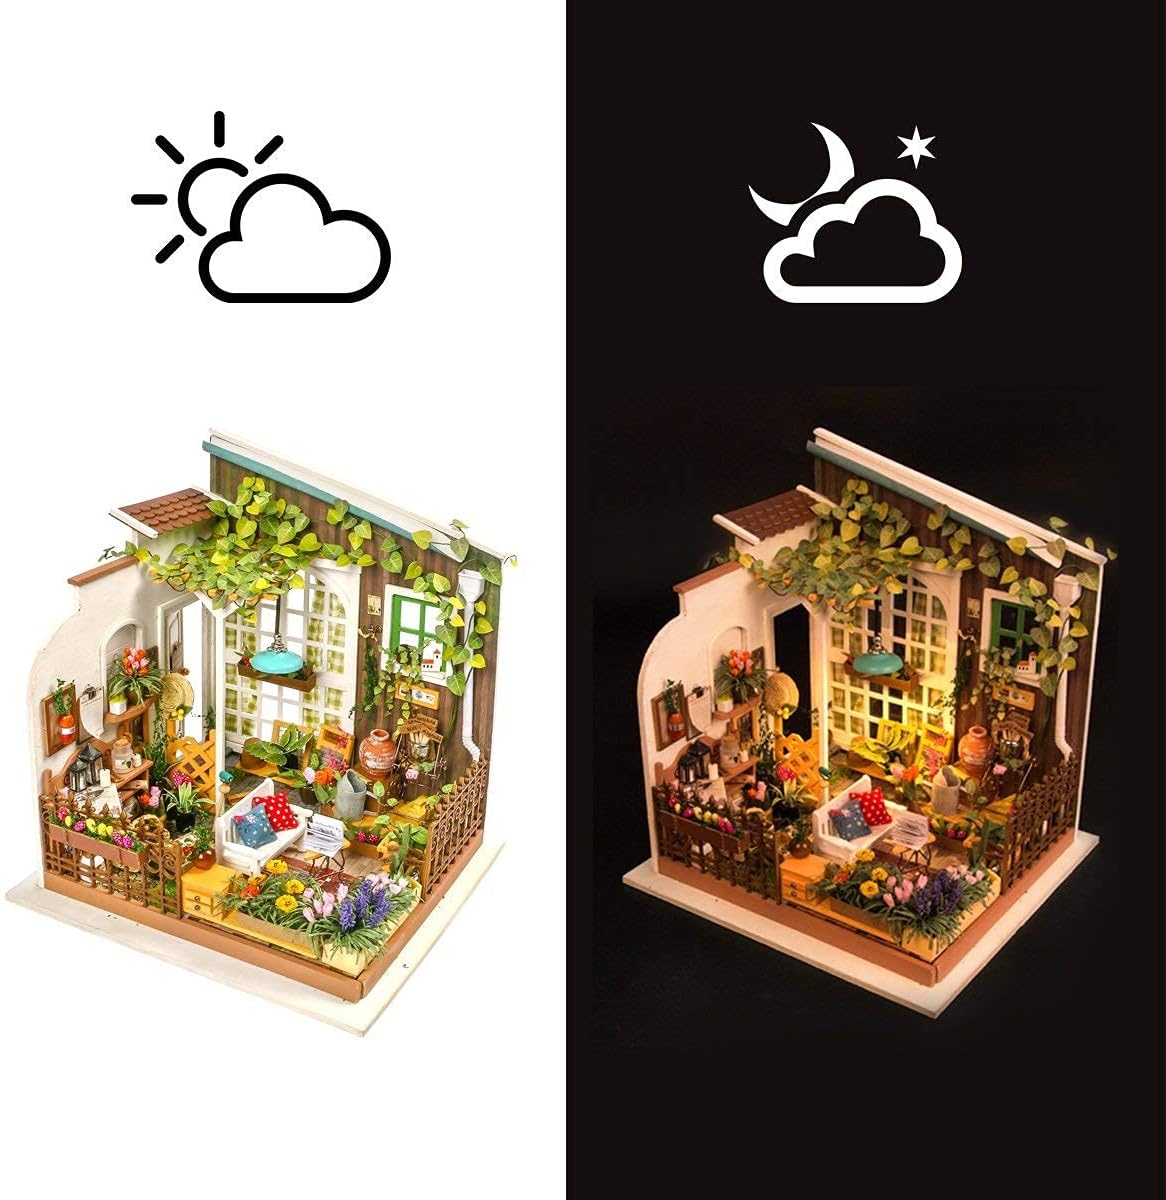
Image: A side-by-side view illustrating the dollhouse's appearance in natural light versus with its LED lights activated.
Maintenance
To preserve the appearance and longevity of your miniature dollhouse, consider the following maintenance tips:
- Cleaning: Gently dust the dollhouse and its components with a soft, dry brush or cloth. Avoid using water or chemical cleaners, as these may damage the materials.
- Placement: Display the dollhouse in a stable, dry environment away from direct sunlight, excessive heat, or humidity to prevent warping or fading of materials.
- Handling: Handle the assembled dollhouse with care, especially when moving it, to avoid dislodging small parts.
- LED Lights: If the LED lights dim or stop working, replace the batteries. Ensure the battery compartment is clean and free of corrosion.
Troubleshooting
| Problem | Possible Cause | Solution |
|---|---|---|
| Missing or broken parts | Manufacturing defect or damage during shipping. | Contact customer support for assistance. Use your imagination to fix minor breaks if possible. |
| LED lights not working | Incorrect battery installation, dead batteries, loose connection, or faulty LED. | Check battery polarity and replace batteries. Ensure all wiring connections are secure. If the issue persists, contact customer support. |
| Pieces do not fit together | Incorrect orientation, excess glue, or slight manufacturing variance. | Double-check the instruction diagrams. Gently sand edges if necessary. Ensure previous pieces are fully dry and aligned. |
| Adhesive not holding | Insufficient glue, improper application, or not enough drying time. | Apply a sufficient amount of glue evenly. Hold pieces together firmly until the adhesive sets. Allow ample drying time before handling. |
Product Specifications
| Feature | Detail |
|---|---|
| Product Dimensions | 7.2 x 8.2 x 7.6 inches |
| Item Weight | 1.76 pounds |
| Model Number | R108X |
| Manufacturer Recommended Age | 14 years and up |
| Brand | Rolife |
Warranty and Support
Rolife is committed to providing high-quality products. If you encounter any issues with your Miller's Garden DIY Miniature Dollhouse kit, such as missing or broken parts, please contact the seller directly for assistance. Our customer support team is available to help resolve any product-related problems promptly.
For further inquiries or support, please refer to the contact information provided with your purchase or visit the official Rolife store online.
Ask a question about this manual
Ask about setup, troubleshooting, compatibility, parts, safety, or missing instructions. Manuals+ will review the question and use this page’s manual context to help answer it.