Possini Euro Design 35G73
Possini Euro Design Eun Mini Pendant Lighting Fixture
Model: 35G73
Introduction
This manual provides detailed instructions for the safe installation, operation, and maintenance of your Possini Euro Design Eun Brushed Nickel Mini Pendant Lighting Fixture. Please read all instructions carefully before beginning installation and retain this manual for future reference.
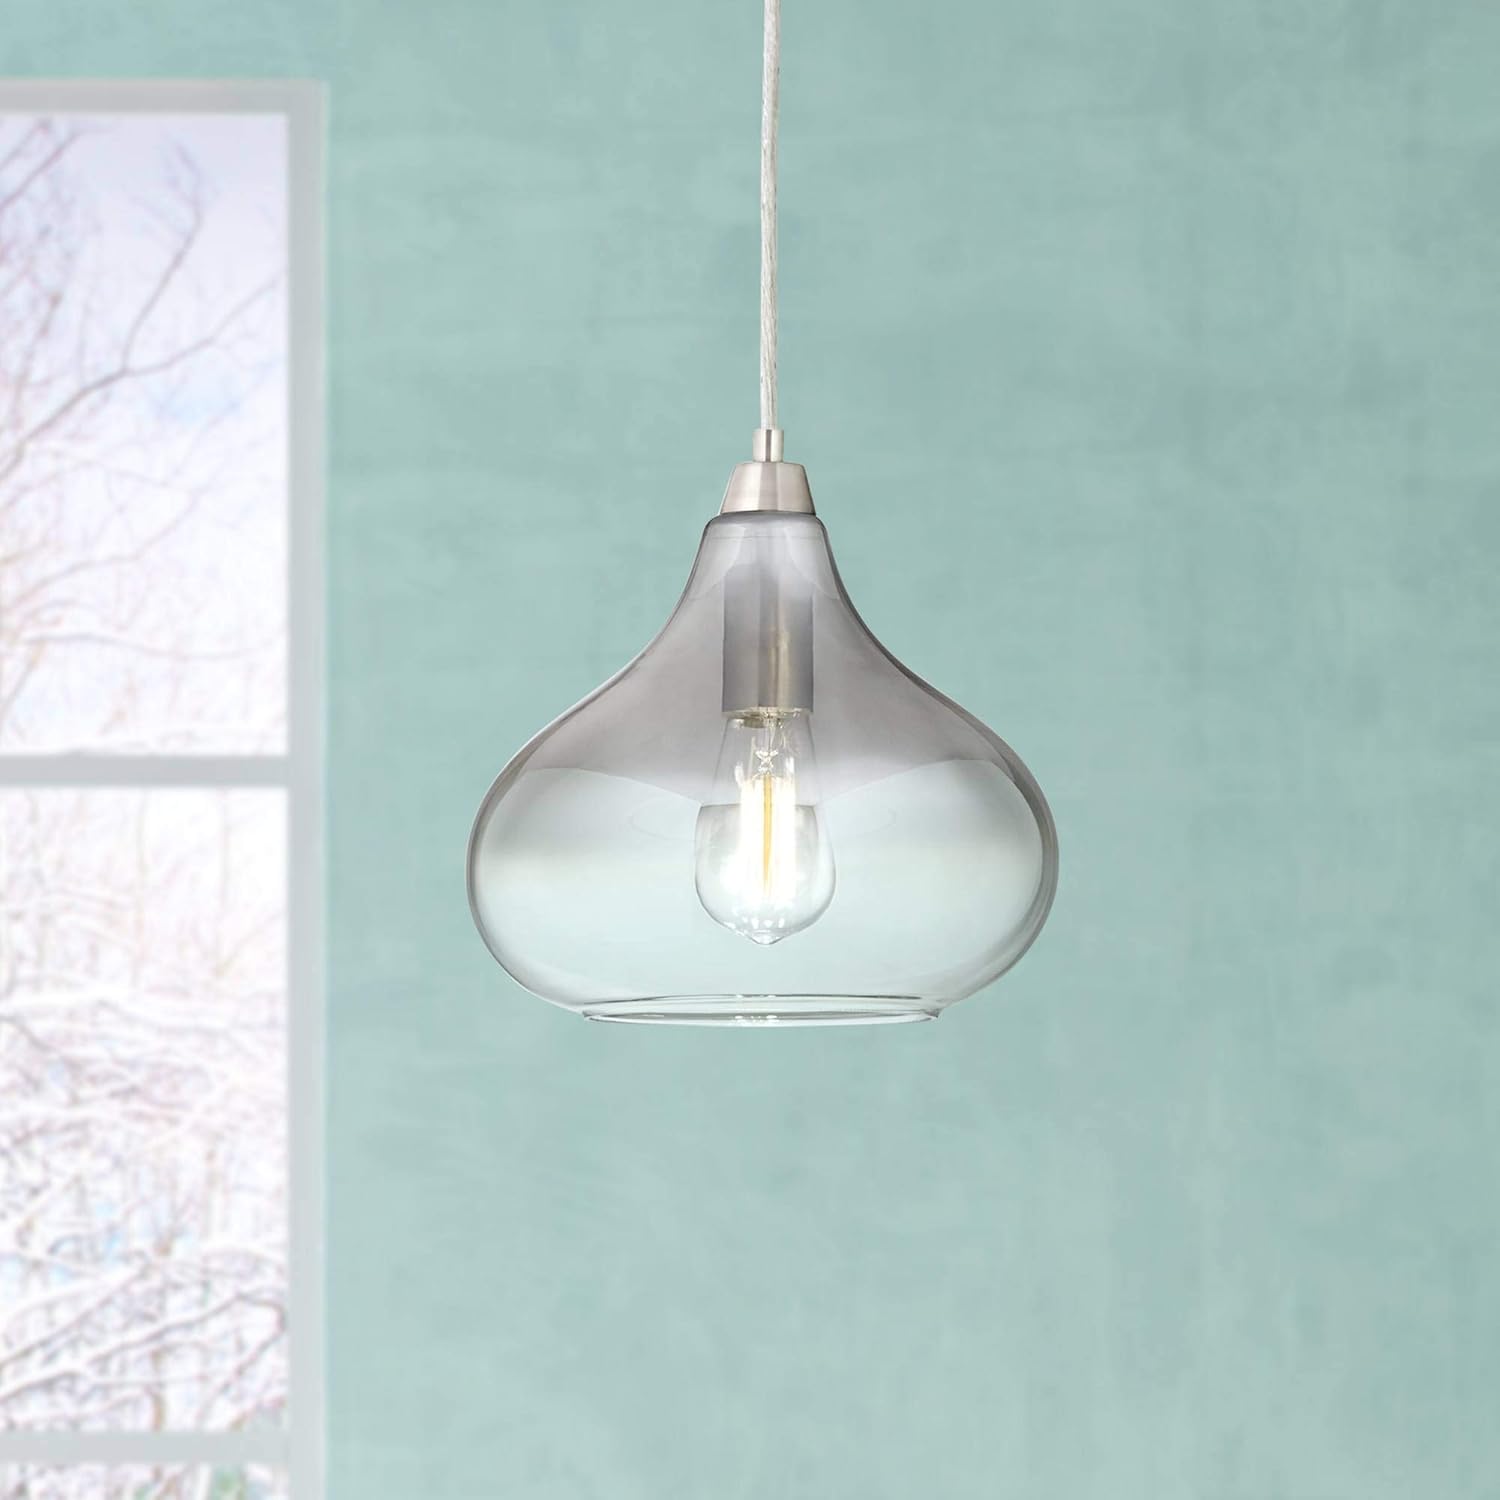
Image: The Possini Euro Design Eun Mini Pendant Lighting Fixture featuring a smoked graded glass shade and brushed nickel finish.
Safety Information
WARNING: Risk of electric shock. Disconnect power at the fuse box or circuit breaker before installing or servicing. All electrical connections must be in accordance with local codes, ordinances, or the National Electric Code (NEC).
- Consult a qualified electrician if you are unsure about the installation process.
- Do not connect this fixture to an ungrounded electrical system.
- Do not handle the fixture or attempt to install it while standing on a wet or damp surface.
- Ensure all wires are properly connected and insulated.
- This fixture is designed for indoor use only.
Package Contents
Verify that all components are present before beginning installation:
- Pendant Fixture with Smoked Graded Glass Shade
- Canopy with Mounting Hardware
- 10-feet of Clear Cord
- 1 x Dimmable 7-watt Edison Style LED Bulb (E26 base)
- Instruction Manual
Setup and Installation
Follow these steps for proper installation:
- Turn Off Power: Before starting, ensure the power to the circuit is turned off at the main circuit breaker or fuse box.
- Prepare Mounting Surface: Ensure the ceiling junction box is securely mounted and capable of supporting the fixture's weight (approximately 3.2 lbs).
- Install Mounting Bracket: Attach the mounting bracket (included with the canopy) to the junction box using the provided screws.
- Adjust Cord Length: The fixture comes with 10 feet of clear cord. Adjust the cord length to your desired hanging height. Secure any excess cord within the canopy or junction box.
- Make Electrical Connections:
- Connect the fixture's black wire to the house's black (hot) wire.
- Connect the fixture's white wire to the house's white (neutral) wire.
- Connect the fixture's ground wire to the house's ground wire (bare copper or green).
- Secure all connections with wire nuts (not included) and wrap with electrical tape for added safety.
- Attach Canopy: Carefully push the canopy up to the ceiling, aligning the mounting screws with the holes in the canopy. Secure the canopy with the decorative nuts or screws provided.
- Install Bulb: Screw the provided 7-watt Edison style LED bulb into the fixture's E26 socket. Do not overtighten.

Image: Close-up view of the brushed nickel canopy and mounting hardware, showing the cord entry point.

Image: Diagram illustrating the dimensions of the pendant fixture, including its 9 3/4" height, 9 1/2" width, and 5" canopy width.
Operating Instructions
Once installed, the fixture is ready for use.
- Power On: Restore power to the circuit at the main circuit breaker or fuse box.
- Light Operation: The fixture will illuminate when power is supplied.
- Dimming: This fixture is dimmable with an electronic low voltage dimmer or an LED-rated dimmer (not included). Ensure your dimmer switch is compatible with LED lighting for optimal performance.
- Bulb Replacement: To replace the bulb, first turn off power to the fixture. Allow the bulb to cool, then unscrew the old bulb and screw in a new E26 base LED bulb (maximum 60-watt equivalent incandescent, 7-watt LED).

Image: Close-up of the included 7-watt Edison style LED bulb, which is dimmable and has an E26 base.
Maintenance
Regular maintenance will help preserve the appearance and functionality of your fixture.
- Cleaning: Turn off power and allow the fixture to cool before cleaning. Wipe the fixture with a soft, dry cloth. Do not use abrasive cleaners, solvents, or polishes as they may damage the finish or glass.
- Bulb Care: Replace bulbs only with the specified type and wattage. Ensure the bulb is fully cooled before handling.
- Inspection: Periodically check all electrical connections and mounting hardware for tightness.
Troubleshooting
| Problem | Possible Cause | Solution |
|---|---|---|
| Fixture does not light. |
|
|
| Light flickers or dims improperly. |
|
|
| Fixture hums. |
|
|
Specifications
| Brand | Possini Euro Design |
| Model Number | 35G73 |
| Dimensions (L x W x H) | 9.5"L x 9.5"W x 9.75"H |
| Weight | 3.2 Pounds |
| Material | Metal, Glass |
| Finish Type | Brushed Nickel |
| Shade Material | Smoked Graded Glass |
| Light Source Type | LED |
| Wattage | 7 watts (LED) |
| Voltage | 120 Volts |
| Brightness | 800 lumens |
| Color Temperature | 2700K (Warm White) |
| CRI | 80 |
| Bulb Base | E26 |
| Special Feature | Dimmable |
| Indoor/Outdoor Usage | Indoor |
| Sloped Ceiling Adaptable | Yes |
Warranty
This Possini Euro Design fixture comes with a Limited 1-Year Warranty from the date of purchase. This warranty covers defects in materials and workmanship under normal use. It does not cover damage resulting from improper installation, accident, misuse, abuse, or normal wear and tear. For warranty claims, please retain your proof of purchase and contact customer support.
Customer Support
For technical assistance, replacement parts, or warranty inquiries, please contact Possini Euro Design customer support. Refer to the contact information provided with your purchase documentation or visit the official Possini Euro Design website for current support details.
You can also visit the Possini Euro Design Store on Amazon for more product information.
Ask a question about this manual
Ask about setup, troubleshooting, compatibility, parts, safety, or missing instructions. Manuals+ will review the question and use this page’s manual context to help answer it.