1. Introduction
This manual provides essential information for the safe installation, operation, and maintenance of your Lindby LED Ceiling Light 'Della' (Model 9620972). Please read these instructions carefully before proceeding with installation or use. Retain this manual for future reference.
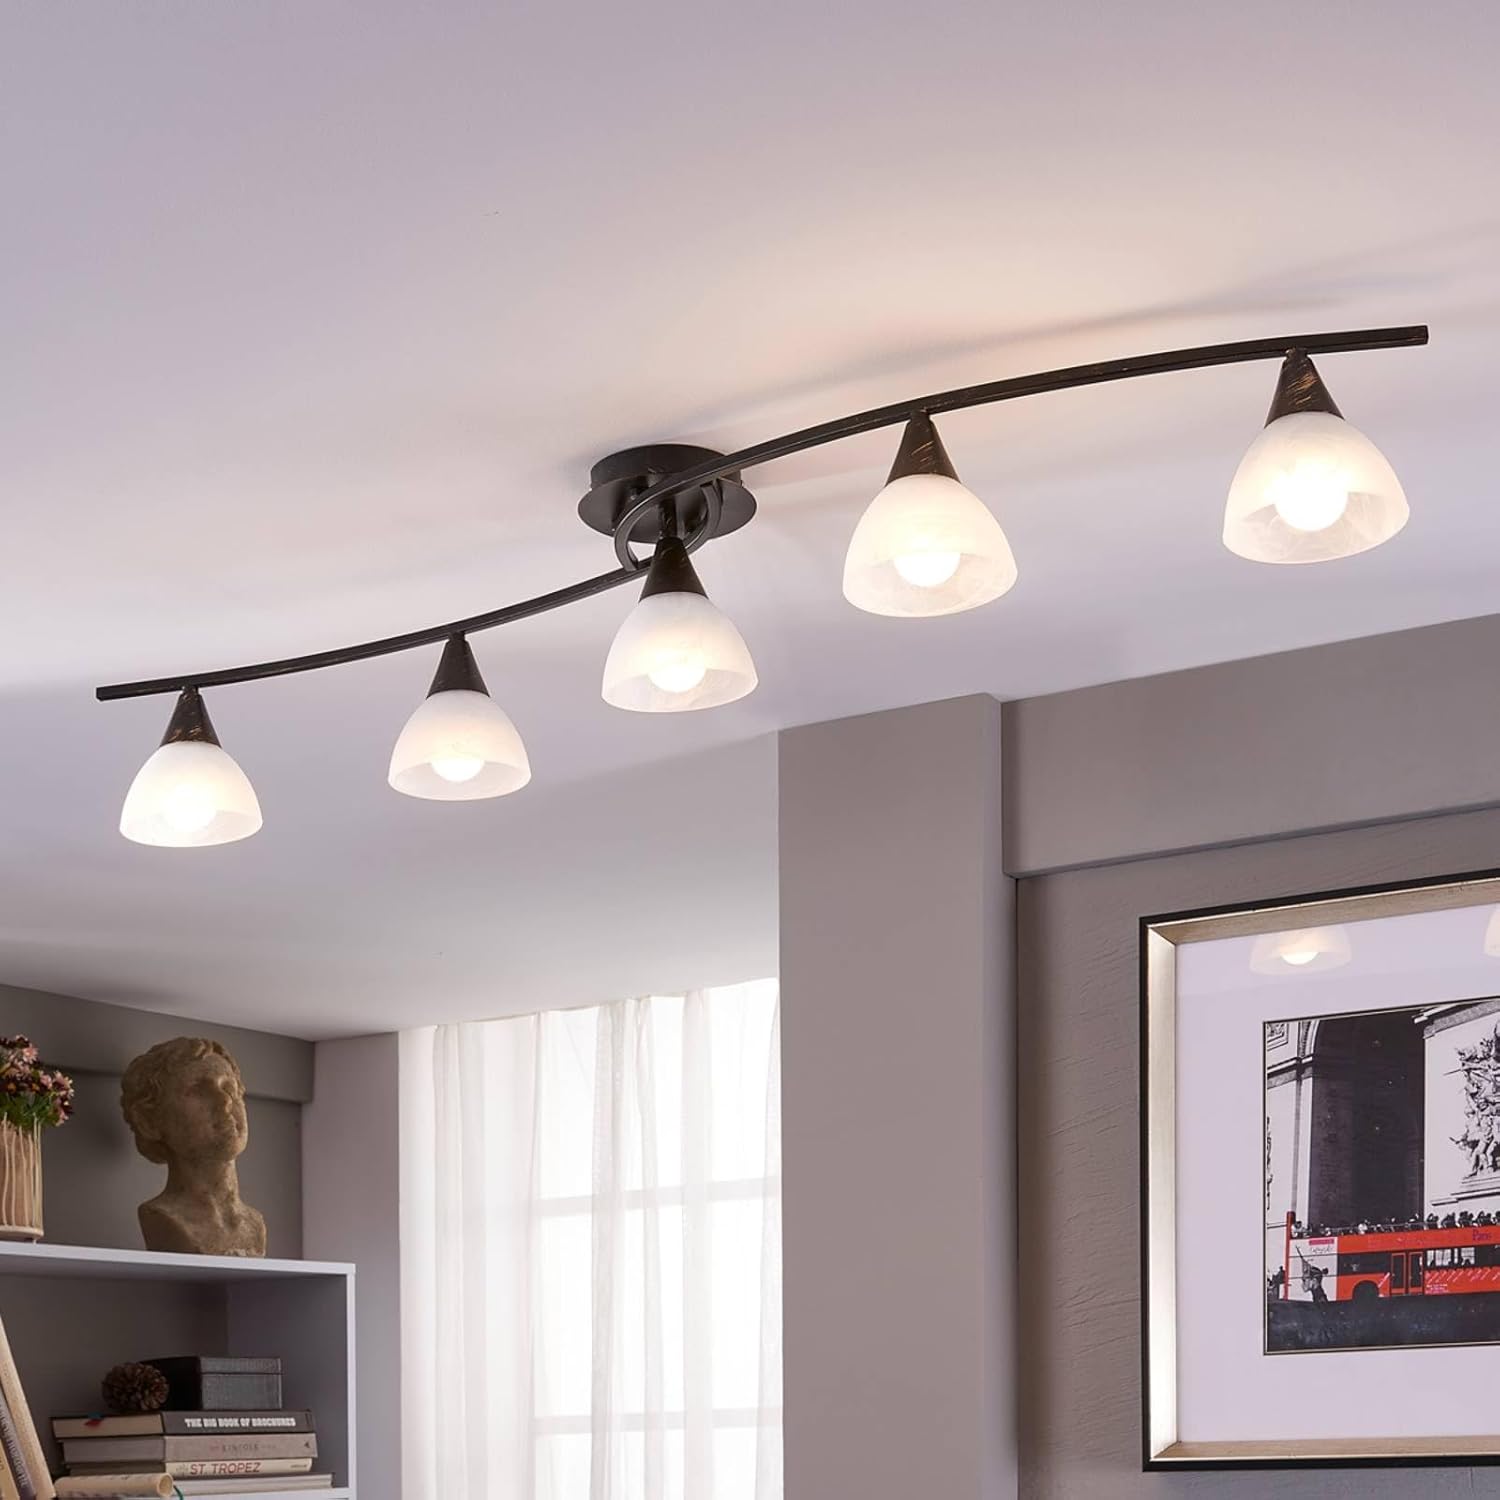
Figure 1: Lindby Della LED Ceiling Light installed in a living room.
2. Safety Instructions
- Electrical Safety: Installation must be performed by a qualified electrician or competent person in accordance with local electrical codes and regulations. Always disconnect power at the main circuit breaker before installation, maintenance, or bulb replacement.
- Handling: Handle the glass shades and bulbs with care to prevent breakage.
- Environment: This fixture is rated IP20 for indoor use only. Do not expose to moisture or direct water spray.
- Ventilation: Ensure adequate ventilation around the fixture. Do not cover the light fixture with any materials.
- Bulb Type: Use only E14 LED bulbs as specified. Do not exceed the maximum wattage per bulb (4W LED).
3. Package Contents
Verify that all components are present and undamaged before beginning installation.
- 1x Lindby Della Ceiling Light Fixture (Black/Brushed Gold frame)
- 5x Glass Shades (White)
- 5x E14 LED Bulbs (4W each)
- Mounting Hardware (screws, wall plugs, terminal block)
- Instruction Manual
4. Specifications
| Feature | Specification |
|---|---|
| Brand | Lindby |
| Model Number | 9620972 |
| Dimensions (L x W x H) | 110 cm x 13 cm x 17 cm |
| Weight | 2.2 kg |
| Material | Glass (Shades), Metal (Frame) |
| Color | White (Shades), Black, Brushed Gold (Frame) |
| Number of Lights | 5 |
| Bulb Type | E14 LED (Bulbs Included) |
| Max. Wattage per Bulb | 4W LED |
| Operating Voltage | 230 Volts |
| IP Rating | IP20 (Indoor Use Only) |
| Protection Class | I |
| Luminous Flux | 2000 Lumen (Total) |
| Energy Efficiency Label | A+ |
5. Setup and Installation
Important: Ensure the main power supply is switched off at the circuit breaker before commencing installation.
- Preparation: Unpack all components and inspect for any damage. Gather necessary tools (e.g., screwdriver, drill, wire strippers).
- Marking and Drilling: Hold the mounting bracket against the ceiling at the desired installation point. Mark the drilling positions. Drill holes suitable for the provided wall plugs and screws.
- Mounting Bracket Installation: Secure the mounting bracket to the ceiling using the provided screws and wall plugs. Ensure it is firmly attached.
- Electrical Connection: Connect the household electrical wires to the terminal block on the light fixture. Ensure correct polarity (Live, Neutral, Earth). The fixture is Class I, requiring an earth connection.
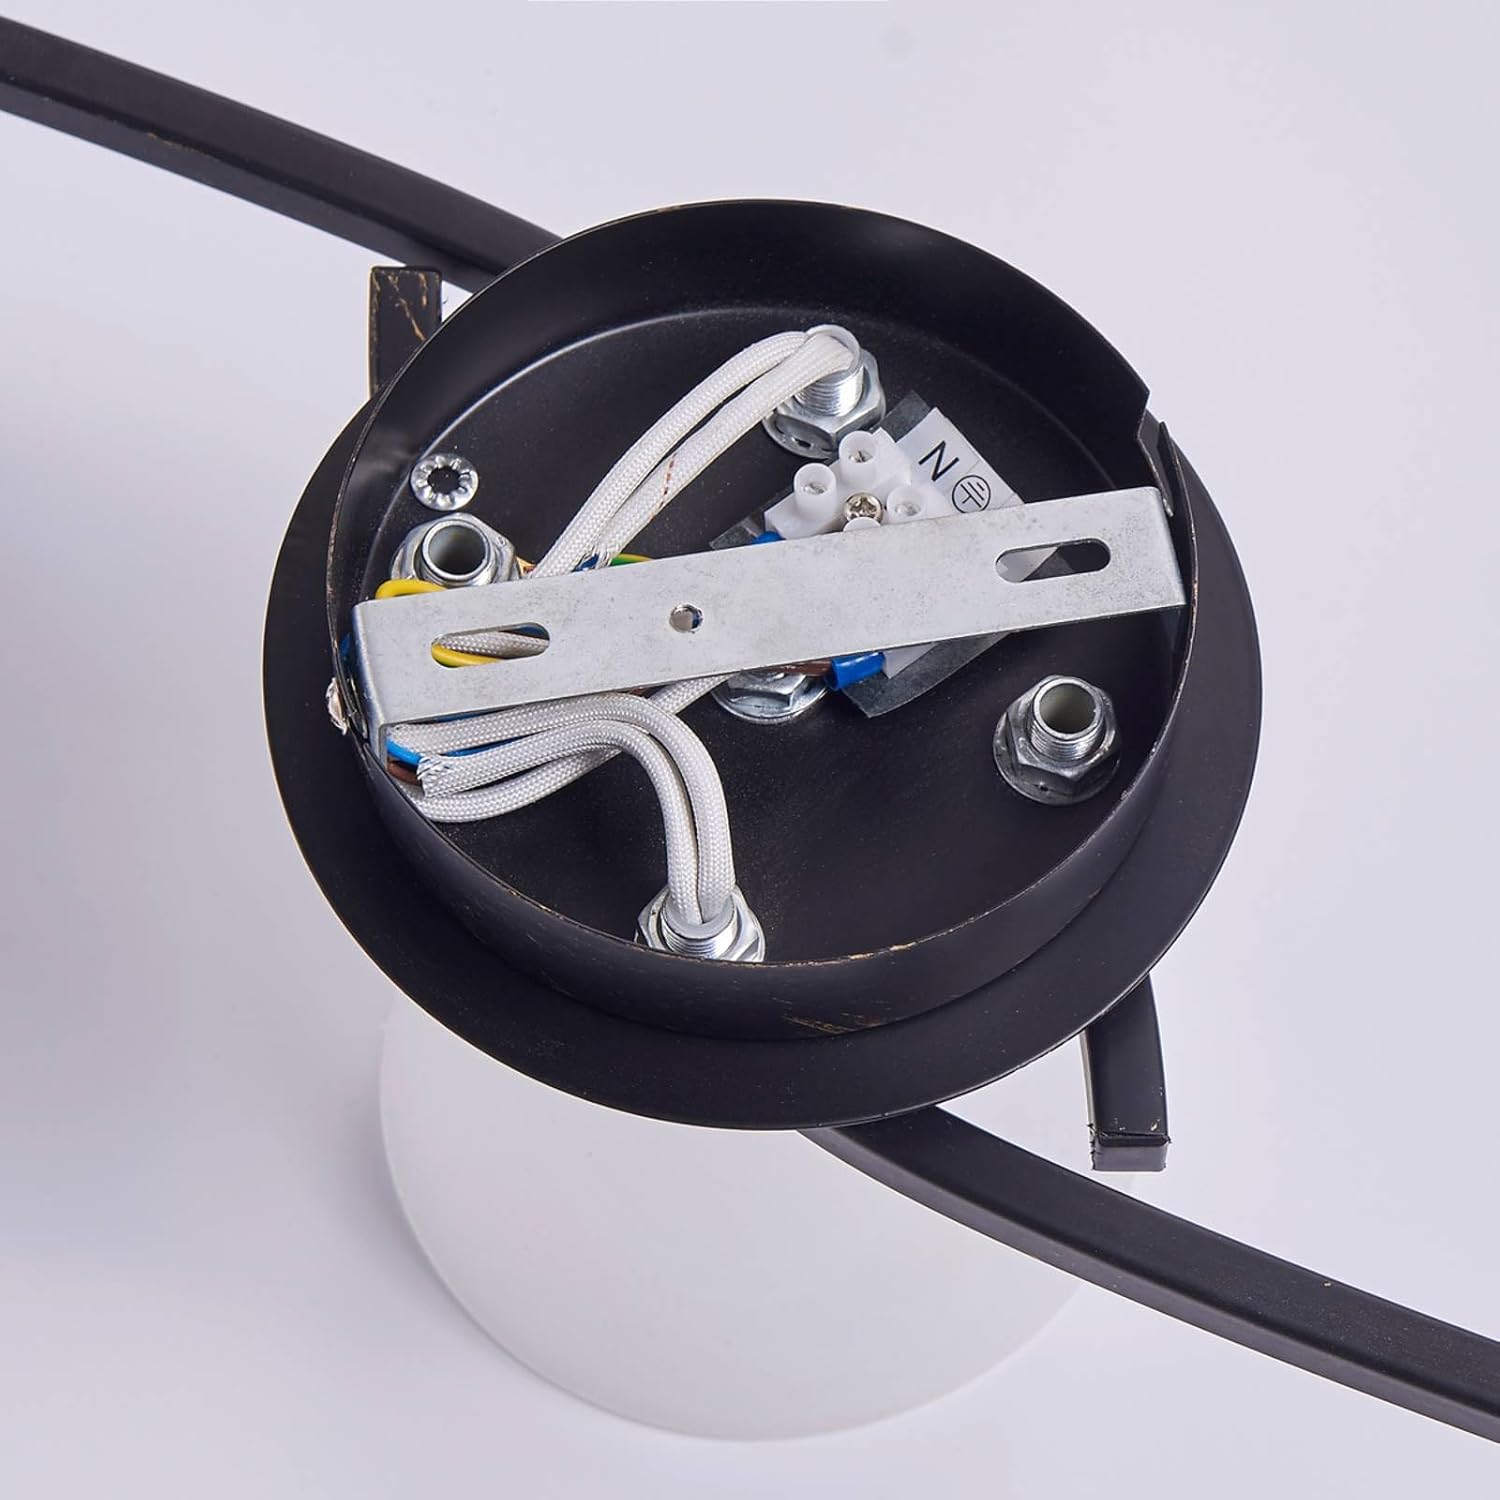
Figure 2: Electrical wiring connections within the mounting base.
- Attaching the Fixture: Carefully lift the light fixture and align it with the mounting bracket. Secure the fixture to the bracket using the provided screws.

Figure 3: Mounting base and arm detail.
- Installing Bulbs: Gently screw the E14 LED bulbs into the lamp holders. Do not overtighten.
- Attaching Shades: Carefully place the glass shades over the bulbs and secure them according to the fixture design (typically by screwing them onto a threaded ring or using a retaining clip).

Figure 4: E14 LED bulb installation within a glass shade.
- Power On: Once installation is complete and all connections are secure, restore power at the main circuit breaker.
6. Operating Instructions
The Lindby Della LED Ceiling Light is operated via a standard wall switch connected to the fixture's power supply. Simply toggle the wall switch to turn the light ON or OFF.
7. Maintenance
- Cleaning: Disconnect power before cleaning. Wipe the fixture with a soft, dry, or slightly damp cloth. Do not use abrasive cleaners, solvents, or harsh chemicals, as these can damage the finish or glass.
- Bulb Replacement: Ensure power is disconnected. Allow bulbs to cool completely before touching. Unscrew the old E14 bulb and replace it with a new E14 LED bulb of the same wattage (max 4W) or lower.
- Inspection: Periodically check the fixture for any signs of wear, loose connections, or damage. If any issues are found, disconnect power and consult a qualified electrician.
8. Troubleshooting
| Problem | Possible Cause | Solution |
|---|---|---|
| Light does not turn on. | No power supply. | Check the circuit breaker and wall switch. |
| Loose wiring connection. | Disconnect power and check all electrical connections. Consult a qualified electrician if unsure. | |
| Faulty bulb. | Replace the bulb with a new E14 LED bulb. | |
| Light flickers. | Loose bulb or connection. | Ensure bulbs are screwed in tightly. Check wiring connections. |
| Incompatible dimmer switch. | This fixture is not specified as dimmable. If a dimmer is used, ensure it is compatible with LED bulbs or remove it. |
9. Warranty and Support
For warranty information or technical support, please refer to the purchase documentation or contact your retailer. Keep your proof of purchase for any warranty claims.
10. Disposal Information
Do not dispose of electrical appliances as unsorted municipal waste. Use separate collection facilities. Contact your local government for information regarding the collection systems available. If electrical appliances are disposed of in landfills or dumps, hazardous substances can leak into the groundwater and get into the food chain, damaging your health and well-being.