Introduction
This manual provides comprehensive instructions for the setup, operation, maintenance, and troubleshooting of your Summer Infant Panorama Digital Color Video Monitor. Please read this manual thoroughly before using the product to ensure safe and optimal performance.
Product Overview
The Summer Infant Panorama Digital Color Video Monitor offers advanced features for monitoring your baby, including a 5-inch high-resolution color LCD display, remote-controlled pan/tilt camera, two-way talk-back, digital zoom, and automatic night vision.
Key Features
- 5" full color digital flat screen display
- Remote control pan and tilt camera
- Two-way talk-back to baby
- Digital zoom functionality
- Built-in 2-color soft-glow nursery nightlight
- Automatic black & white night vision
- Sound activated LED lights
- Up to 800 ft range
- Power save button
- Low battery and out of range indicators
- Expandable system, up to 4 cameras
- Tabletop or wall mount camera option
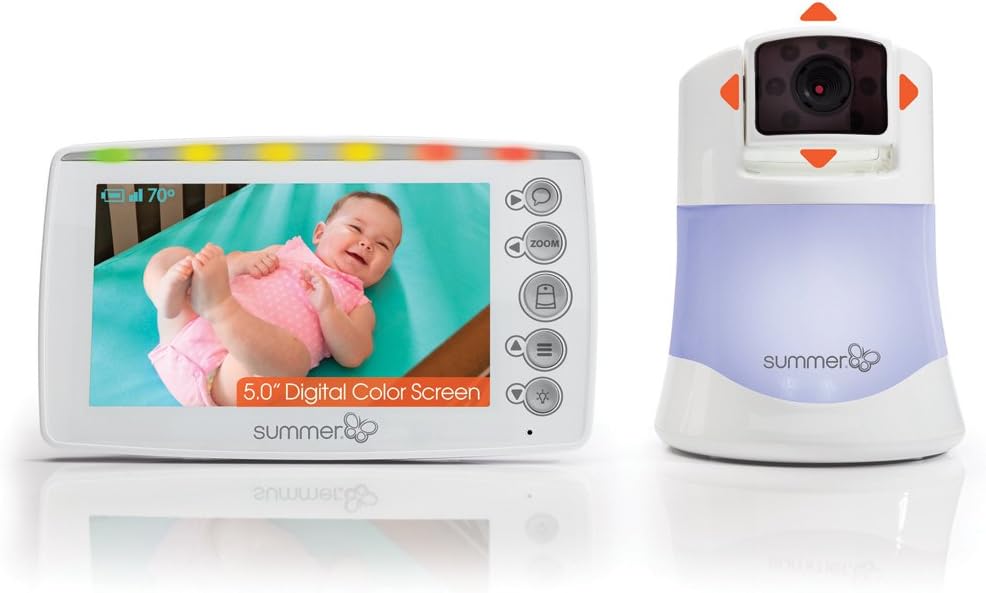
Figure 1: Summer Infant Panorama Digital Color Video Monitor, showing the parent unit and camera.
Setup
Package Contents
Ensure all components are present:
- Parent Unit (Monitor)
- Baby Unit (Camera)
- AC Adapters (2)
- Wall mounting hardware (screws, anchors, cable clips)
Charging the Parent Unit
- Connect one AC adapter to the Parent Unit and plug it into a standard electrical outlet.
- Charge the Parent Unit for at least 8 hours before first use to ensure optimal battery performance.
- The battery indicator on the screen will show charging status.
Positioning the Baby Unit (Camera)
- Place the Baby Unit on a flat surface, such as a dresser or shelf, at least 3 feet (1 meter) away from the baby's crib.
- Ensure the camera has a clear line of sight to the baby.
- For wall mounting, use the provided hardware. Secure the camera to the wall at a height that provides a good view of the crib, ensuring the power cord is out of reach of children.
- Connect the second AC adapter to the Baby Unit and plug it into a standard electrical outlet.

Figure 2: Proper placement of the camera and parent unit for optimal monitoring.
Initial Pairing
The Parent Unit and Baby Unit are pre-paired at the factory. If re-pairing is needed or additional cameras are added:
- Turn on both the Parent Unit and Baby Unit.
- On the Parent Unit, navigate to the menu and select the "Pairing" option.
- Follow the on-screen prompts to initiate pairing.
- Press the pairing button on the Baby Unit (refer to the camera diagram for location).
- The units will automatically connect.
Operating Instructions
Parent Unit Controls
The Parent Unit features a 5-inch display and various control buttons:
- Power Button: Turns the unit on/off.
- Volume Buttons: Adjusts the listening volume.
- Brightness Control: Adjusts screen brightness.
- Zoom Button: Activates digital zoom.
- Talk-Back Button: Press and hold to speak to your baby through the camera.
- Menu Button: Accesses settings and options.
- Navigation Buttons: Used to pan/tilt the camera and navigate menus.

Figure 3: The 5.0" handheld parent unit in use.
Camera Control (Pan & Tilt)
Use the navigation buttons on the Parent Unit to remotely adjust the camera's view:
- Press the Up/Down arrows to tilt the camera vertically.
- Press the Left/Right arrows to pan the camera horizontally.

Figure 4: The camera unit demonstrating pan and tilt capabilities.
Digital Zoom
Press the Zoom button on the Parent Unit to digitally zoom in on the image. Press again to zoom out.
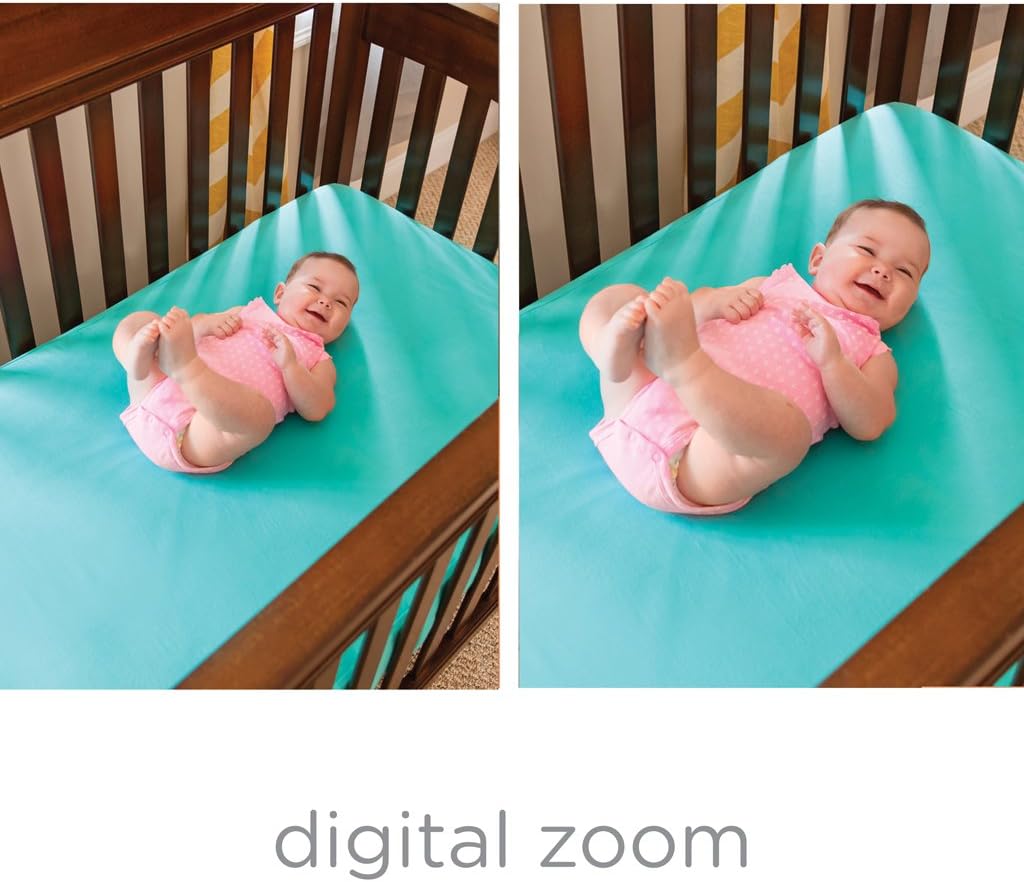
Figure 5: Comparison of normal view and digital zoom.
Night Vision
The monitor automatically switches to black and white night vision in low light conditions, providing a clear view of your baby without disturbing them.

Figure 6: Night vision view of a baby in a crib.
Two-Way Talk-Back
Press and hold the talk-back button on the Parent Unit to speak to your baby. Release the button to hear your baby.
Nightlight
The Baby Unit includes a soft-glow nightlight. Access the menu on the Parent Unit to turn the nightlight on/off or change its color.
Maintenance
Cleaning
- Wipe the Parent Unit and Baby Unit with a dry, soft cloth.
- Do not use cleaning sprays or liquid cleaners.
Battery Care
- To preserve battery life, fully charge the Parent Unit before each use.
- If the unit will not be used for an extended period, remove the battery.
Troubleshooting
| Problem | Solution |
|---|---|
| No picture/sound on Parent Unit | Ensure both units are plugged in and turned on. Check battery level of Parent Unit. Ensure units are within range. |
| "Out of Range" indicator | Move the Parent Unit closer to the Baby Unit. Reduce obstacles between units. |
| Poor picture quality | Adjust the camera angle. Ensure adequate lighting for color vision or check night vision activation. |
| Static or interference | Move units away from other electronic devices (cordless phones, Wi-Fi routers). |
| Parent Unit battery drains quickly | Ensure the unit is fully charged before use. Reduce screen brightness. Use power save mode if available. |
Specifications
- Model Number: 29593
- Screen Size: 5 Inches
- Wireless Communication Technology: Wi-Fi
- Connectivity Technology: Wireless
- Special Feature: Night Vision
- Power Source: Battery Powered (AC adapter included)
- Battery Life: Up to 10 Hours (Parent Unit)
- Range: Up to 800 feet
- Dimensions (L x W x H): 22.2 x 30.5 x 11.7 Centimetres
- Item Weight: 793 g
- Mounting Type: Wall Mount, Tabletop
Warranty and Support
For warranty information and customer support, please refer to the official Summer Infant website or contact their customer service department. Keep your purchase receipt as proof of purchase.
Manufacturer: Summer Infant
Place of Business: Mississauga, ON L4Y 3Y4, CA
Date First Available: September 30, 2018
Important Safety Information
- Keep all cords out of reach of children (at least 3 feet / 1 meter away).
- Never place the camera or cords inside the crib or playpen.
- This product is not a substitute for adult supervision.
- Do not use near water.
- Use only the AC adapters provided.
Related Videos
No official product videos from the seller are available for direct embedding in this manual based on the provided criteria.