Fistone K9
Fistone RC Robot Dinosaur K9 Instruction Manual
Model: K9
1. Introduction
Welcome to the world of interactive robotic dinosaurs! The Fistone RC Robot Dinosaur K9 is an intelligent, remote-controlled toy designed for engaging play. It features multiple functions including walking, dancing, singing, fight mode with sucker bullets, touch-sensitive interaction, and independent programming. This manual provides detailed instructions for setup, operation, maintenance, and troubleshooting to ensure a fun and safe experience.

Image 1: The Fistone RC Robot Dinosaur K9 and its remote control.
2. Product Overview
Familiarize yourself with the main components and features of your robot dinosaur:

Image 2: Labeled diagram of the robot dinosaur, highlighting LED lights, weapon launcher, rotatable head, swinging tail, battery compartment, mouth, front paws, and sliding wheels.
- LED Lights: Located on the head, indicating status and enhancing visual appeal.
- Weapon Launcher: Mounted on the back, capable of firing sucker bullets.
- Rotatable Head: Allows for dynamic head movements.
- Swinging Tail: Provides realistic dinosaur movement.
- Battery Compartment: Located on the underside for the robot's main battery.
- Mouth: Can open and close, accompanied by sound effects.
- Front Paws: Capable of swinging for expressive gestures.
- Sliding Wheels: Enable smooth movement across surfaces.
3. What's in the Box
Please check the package contents to ensure all items are present:
- 1 x Fistone RC Robot Dinosaur K9
- 1 x Remote Controller
- 1 x USB Charging Cable
- 1 x Lithium Polymer Battery (for robot)
- 5 x Sucker Bullets
- 1 x Small Screwdriver
4. Setup
4.1. Battery Installation (Robot)
- Locate the battery compartment on the underside of the robot dinosaur.
- Use the provided screwdriver to open the battery compartment cover.
- Connect the included Lithium Polymer battery to the robot's battery connector.
- Carefully place the battery inside the compartment and close the cover, securing it with the screw.
4.2. Battery Installation (Remote Control)
- Locate the battery compartment on the back of the remote control.
- Use the provided screwdriver to open the battery compartment cover.
- Insert 2 AAA batteries (not included) into the compartment, observing correct polarity (+/-).
- Close the cover and secure it with the screw.
4.3. Charging the Robot Battery
Before first use, fully charge the robot's Lithium Polymer battery.
- Remove the Lithium Polymer battery from the robot's compartment.
- Connect the battery to the USB charging cable.
- Plug the USB charging cable into a compatible USB power source (e.g., computer, USB wall adapter).
- The charging indicator on the cable will typically show red during charging and turn off or change color when fully charged.
- Charging usually takes approximately 4 hours. Do not overcharge.
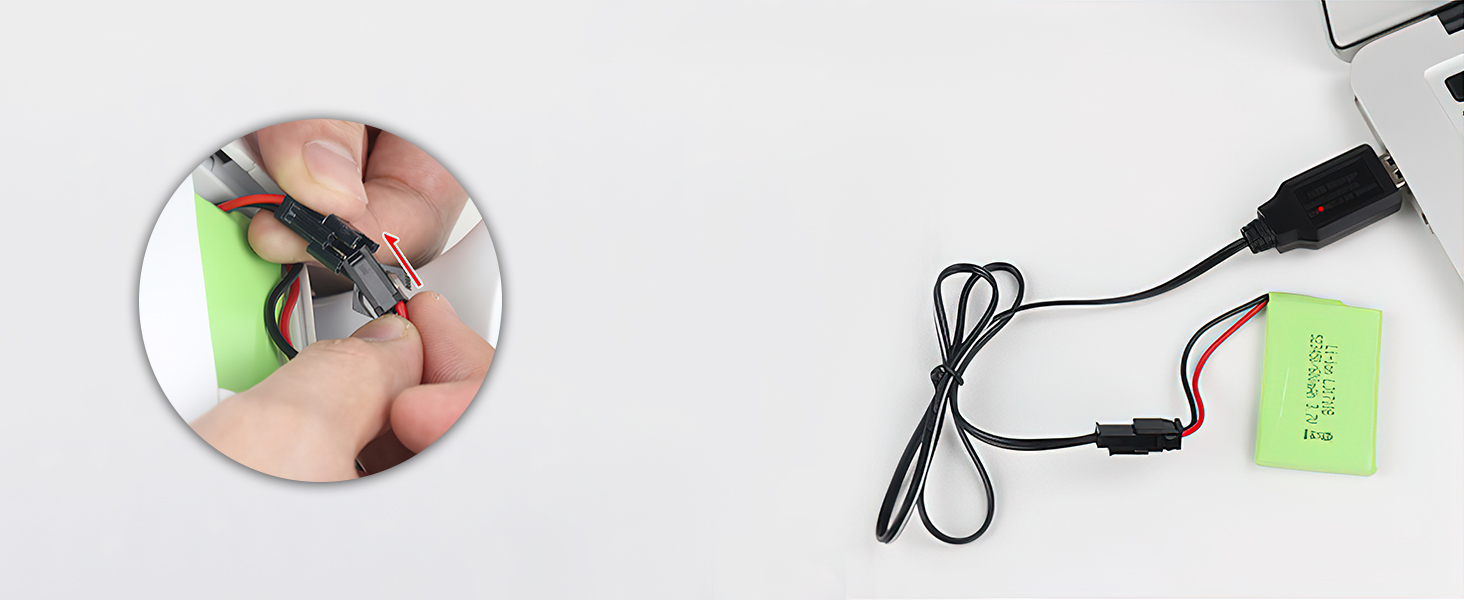
Image 3: Illustration of connecting the robot's battery to the USB charging cable for recharging.
5. Operating Instructions
5.1. Remote Control Functions
The remote control allows full command over your robot dinosaur. Refer to the diagram below for button identification:

Image 4: Remote control with labels for functions like Step Forward, Step Back, Turn Left, Turn Right, Shake Head, Shake Tail, Music, Shooting, Program, and more.
- Directional Pad (Up/Down/Left/Right): Controls forward, backward, left turn, and right turn movements.
- VOL+/VOL-: Adjusts the robot's volume.
- Shake the Head: Activates head movements.
- Shake the Tail: Activates tail wagging.
- Music 1/2/3: Plays different music and dance routines.
- Touch to Interact: Activates touch-sensitive responses.
- Program: Initiates and saves programming sequences.
- Fine: Fine-tunes movements.
- Start War Mode (Shooting): Activates fight mode and launches sucker bullets.
- Mechanical Language: Activates mechanical sound effects.
- Stop: Halts current actions.
5.2. Basic Movement Modes
Use the directional pad on the remote control to command the robot:
- Press Forward to make the dinosaur walk or slide forward.
- Press Backward to make the dinosaur walk or slide backward.
- Press Turn Left or Turn Right to change direction.

Image 5: The robot dinosaur demonstrating forward, turning, and backward movements.
5.3. Interactive Features
- Touch-Sensitive Interaction: Touch the interactive respondent area on the robot's head. The robot will respond by shaking its head, wagging its tail, and emitting different voices with multiple touches.

Image 6: A hand interacting with the touch-sensitive head of the robot dinosaur.
5.4. Special Modes
- Fight Mode (Shooting): Press the 'Start War Mode' button on the remote. The robot will scream, perform launch functions, lock onto a target, and launch sucker bullets.

Image 7: The robot dinosaur in action, firing a sucker bullet.
- Independent Programming: Press the 'Program' button. You can program up to 50 actions. After inputting the desired sequence, press 'Program' again to execute the actions one by one.
- Music & Dance: Press 'Music 1', 'Music 2', or 'Music 3' to activate different music and dance routines.

Image 8: The robot dinosaur performing a dance routine with music.
Video 1: Official product video demonstrating various functions of the Fistone RC Robot Dinosaur K9, including movement, sound, and interactive features.
6. Maintenance
- Cleaning: Wipe the robot and remote control with a soft, damp cloth. Do not immerse in water.
- Storage: Store the toy in a cool, dry place away from direct sunlight. Remove batteries from both the robot and remote control if not used for extended periods to prevent leakage.
- Battery Care: Always use the provided charging cable for the robot's battery. Do not mix old and new batteries or different types of batteries in the remote control.
7. Troubleshooting
- Robot not responding: Ensure both the robot and remote control are powered on. Check if batteries are correctly installed and charged. Try replacing remote control batteries.
- Sucker bullets not firing: Verify that the sucker bullets are properly loaded into the launcher. Check the robot's battery level.
- Unexpected behavior: Turn off both the robot and remote control, then turn them back on to reset the connection.
8. Specifications
- Product Dimensions: 25.98 x 6.3 x 12.99 inches
- Item Weight: 3.8 pounds
- Item Model Number: K9
- Manufacturer Recommended Age: 36 months - 10 years
- Robot Battery: 1 Lithium Polymer battery (included)
- Remote Control Batteries: 2 AAA batteries (not included)
- Manufacturer: Fistone
9. Safety Information
- Adult supervision is recommended during play.
- Keep small parts, such as sucker bullets, away from young children to prevent choking hazards.
- Do not aim the launcher at eyes or face.
- Do not modify or disassemble the product, as this may cause damage or injury.
- Follow all battery safety guidelines: do not mix old and new batteries, do not mix alkaline, standard (carbon-zinc), or rechargeable (nickel-cadmium) batteries. Dispose of batteries properly.
10. Warranty & Support
For any questions, concerns, or support needs regarding your Fistone RC Robot Dinosaur K9, please contact the manufacturer directly or visit the official Fistone store for assistance.
Thank you for choosing Fistone!
Ask a question about this manual
Ask about setup, troubleshooting, compatibility, parts, safety, or missing instructions. Manuals+ will review the question and use this page’s manual context to help answer it.