1. Important Safety Information
Always observe the following safety precautions when working on your vehicle:
- Disconnect the vehicle's battery before beginning any electrical work to prevent accidental starting or electrical shorts.
- Wear appropriate personal protective equipment, including safety glasses and gloves.
- Ensure the vehicle is securely supported on jack stands or a lift before working underneath it.
- Allow the engine and exhaust components to cool down before handling to avoid burns.
- Consult a qualified mechanic if you are unsure about any installation steps.
2. Product Overview
The JEGS Heavy-Duty Mini Starter, Model 10009, is designed for high-performance applications in Small Block and Big Block Chevy engines. This Hitachi-style mini starter offers a compact design and increased cranking power compared to many factory units.

Image 2.1: Front view of the JEGS Heavy-Duty Mini Starter, Model 10009.
Key Features:
- Designed for Small Block and Big Block Chevy engines with a straight mounting configuration.
- Compatible with both 153-tooth and 168-tooth flywheels and flexplates, featuring an adjustable mounting block.
- Capable of cranking engines with up to a 14:1 compression ratio.
- Lighter in weight than many factory starters, weighing approximately 12 lbs.
- Features a 3.7:1 gear reduction for enhanced torque.
- Rated at 1.4kW (1.9 HP).
3. Setup and Installation
3.1 Compatibility
- This starter fits all Small Block Chevy engines, with the exception of LS series engines (LS1, LS6, 4.8L, 5.3L, and 6.0L).
- It also fits Big Block Chevy engines.
- Ensure your engine uses a straight mounting configuration.
3.2 Required Tools (Typical)
- Socket wrench set
- Open-end wrenches
- Battery terminal cleaner
- Torque wrench
- Safety glasses and gloves
3.3 Installation Steps
- Prepare the Vehicle: Park the vehicle on a level surface. Engage the parking brake. Disconnect the negative (-) battery cable first, then the positive (+) battery cable.
- Access the Starter: Depending on your vehicle, you may need to lift it and secure it with jack stands. Locate the existing starter motor.
- Remove Old Starter: Disconnect all electrical connections from the old starter. Note their positions for reinstallation. Remove the mounting bolts securing the old starter to the engine block. Carefully remove the old starter.
- Inspect Mounting Surface: Clean the engine block's starter mounting surface to ensure proper contact and alignment.
- Install New Starter:

Image 3.1: Close-up of the starter's mounting block and drive gear.
Position the JEGS Mini Starter against the engine block. The starter mounting flange must be in the correct position for the starter to engage properly with the flywheel/flexplate. Use the provided shims (Image 3.2) as necessary to achieve proper gear mesh. Insert the mounting bolts (Image 3.2) and tighten them to the manufacturer's specified torque.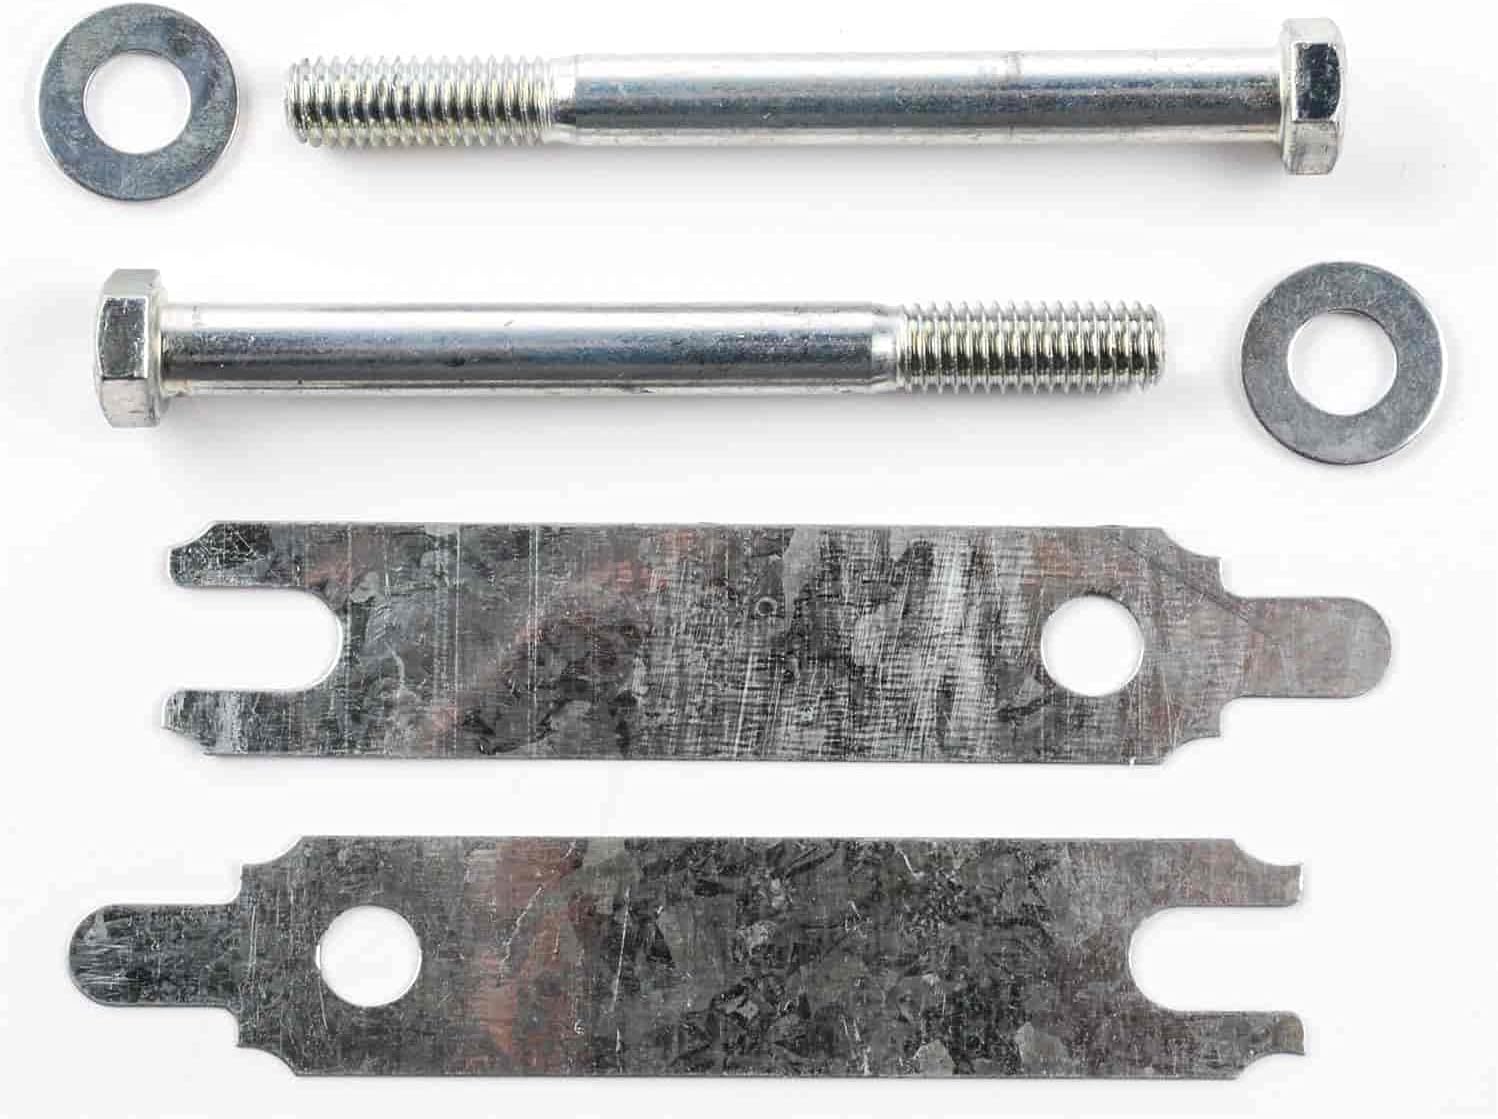
Image 3.2: Included installation hardware, including mounting bolts and shims.
- Connect Electrical Wiring:Connect the main battery cable to the large terminal (typically the positive terminal). Connect the solenoid trigger wire(s) to the appropriate smaller terminal(s) (Image 3.3). Ensure all connections are clean and secure.

Image 3.3: Electrical terminals on the JEGS Mini Starter.
Special Note: If your GM vehicle was originally equipped with a breaker point ignition, you may require the use of an "R" Terminal Diode Kit (JEGS Part No. 555-10038) to ensure proper operation with this aftermarket mini starter. - Reconnect Battery: Reconnect the positive (+) battery cable first, then the negative (-) battery cable.
- Test Operation: Start the engine and listen for any unusual noises. If the starter grinds or makes excessive noise, immediately shut off the engine and re-check the starter's alignment and shimming.
4. Operating Instructions
Once properly installed, the JEGS Heavy-Duty Mini Starter operates like any standard automotive starter. To start your engine:
- Ensure the vehicle is in Park or Neutral.
- Turn the ignition key to the "START" position.
- Hold the key in the "START" position until the engine begins to run, then release the key. Avoid prolonged cranking to prevent overheating the starter.
5. Maintenance
Regular maintenance helps ensure the longevity and reliable performance of your starter:
- Check Connections: Periodically inspect all electrical connections to the starter for tightness and corrosion. Clean any corroded terminals.
- Inspect Mounting: Ensure the starter mounting bolts remain tight. Loose mounting can lead to improper gear mesh and premature wear.
- Battery Condition: A healthy battery is crucial for starter performance. Ensure your vehicle's battery is fully charged and in good condition.
- Engine Condition: Address any engine issues that make starting difficult, as this can put undue strain on the starter.
6. Troubleshooting
If you experience issues with your starter, consult the table below for common problems and potential solutions:
| Problem | Possible Cause | Solution |
|---|---|---|
| Starter does not engage or click | Dead or low battery; Loose or corroded battery cables; Faulty ignition switch; Faulty starter solenoid; Open circuit in wiring. | Check battery charge and terminals; Inspect and tighten all wiring connections; Test ignition switch and solenoid. |
| Starter clicks but does not crank engine | Low battery charge; Loose battery cables; Internal starter motor issue; Engine seized. | Charge or replace battery; Clean and tighten battery cables; Inspect starter motor; Check engine for seizure. |
| Starter cranks slowly | Low battery charge; Corroded battery cables; High resistance in starter circuit; Incorrect starter for application. | Charge or replace battery; Clean battery terminals and cables; Inspect wiring for damage; Verify starter compatibility. |
| Grinding noise during cranking | Improper starter shimming; Damaged flywheel/flexplate teeth; Loose starter mounting bolts. | Re-check starter shimming and alignment; Inspect flywheel/flexplate; Tighten mounting bolts. |
| Starter continues to run after engine starts | Faulty starter solenoid; Sticking ignition switch. | Replace starter solenoid; Inspect or replace ignition switch. |
7. Specifications
| Specification | Value |
|---|---|
| Model Number | 10009 |
| Brand | JEGS |
| Type | Heavy-Duty Mini Starter (Hitachi-Style) |
| Engine Compatibility | Small Block Chevy (excluding LS series), Big Block Chevy |
| Flywheel/Flexplate Compatibility | 153-tooth and 168-tooth |
| Mounting Configuration | Straight |
| Gear Reduction | 3.7:1 |
| Compression Ratio Rating | Up to 14:1 |
| Power Output | 1.4 kW (1.9 HP) |
| Item Weight | Approximately 11.91 lbs |
| Product Dimensions (L x W x H) | 10.3 x 6.3 x 6.3 inches |
| Material | Metal |
| UPC | 889944003243 |
8. Warranty and Support
For warranty information or technical support regarding your JEGS Heavy-Duty Mini Starter, please contact JEGS customer service directly. Keep your purchase receipt and product model number (10009) available when contacting support.
You can typically find contact information on the official JEGS website or through your original point of purchase.