
1. Introduction
This document provides essential instructions for the installation and maintenance of the Binks Humdinger 41-12815 / 4112815 Aftermarket Repair Kit. This kit is designed to replace worn components in your Binks Humdinger equipment, restoring its functionality. It is crucial to read and understand all instructions before proceeding with any repair work. This is an aftermarket part; always refer to your original equipment manufacturer's manual for specific disassembly and reassembly procedures, as well as safety guidelines.
2. Safety Information
WARNING: Always prioritize safety. Before beginning any repair, ensure the equipment is disconnected from all power sources and depressurized. Wear appropriate personal protective equipment (PPE) such as safety glasses and gloves. Refer to the original equipment manufacturer's manual for comprehensive safety warnings and precautions specific to your Binks Humdinger unit. Failure to follow safety instructions can result in serious injury or equipment damage.
3. Package Contents
Verify that all components listed below are present in your repair kit:
- O-Rings
- Washers
Note: The exact number and type of components may vary slightly depending on the specific kit version. Compare contents with your original equipment's required parts.
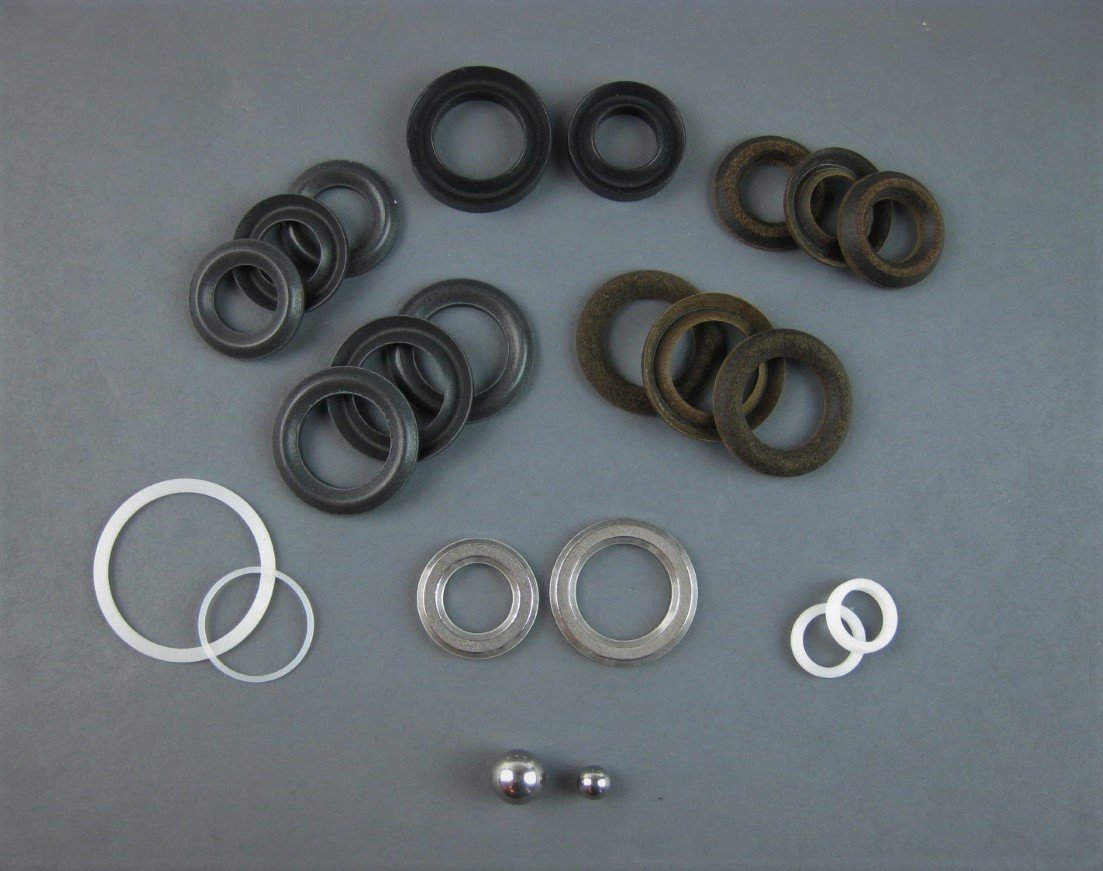
Image: Components of the Binks Humdinger 41-12815 / 4112815 Aftermarket Repair Kit, typically including O-rings and washers for sealing and proper function.
4. Installation (Setup)
This repair kit is intended for use by individuals familiar with the disassembly and reassembly of Binks Humdinger equipment. Detailed installation steps are specific to the original equipment model and are best found in the original equipment manufacturer's service manual.
- Preparation: Ensure the equipment is clean, de-energized, and depressurized. Gather all necessary tools.
- Disassembly: Carefully disassemble the relevant section of your Binks Humdinger unit according to the original manufacturer's instructions to access the components requiring replacement.
- Component Replacement: Remove the old O-rings, washers, or other worn parts. Clean the mating surfaces thoroughly. Install the new components from this repair kit, ensuring proper orientation and seating. Apply appropriate lubricants if specified by the original manufacturer.
- Reassembly: Reassemble the equipment, ensuring all fasteners are tightened to the manufacturer's specifications.
- Leak Check: After reassembly, perform a thorough leak check before returning the equipment to full operation.
Always consult your original Binks Humdinger equipment manual for precise, step-by-step installation procedures and torque specifications.
5. Post-Installation Check (Operating)
After installing the repair kit and reassembling your Binks Humdinger equipment, perform the following checks before resuming normal operation:
- Visual Inspection: Check for any visible leaks, loose connections, or improperly seated parts.
- Functionality Test: Gradually re-pressurize or re-energize the equipment. Monitor for proper operation, unusual noises, or vibrations.
- Performance Verification: Confirm that the equipment is performing as expected and that the repair has resolved the original issue.
If any issues are observed, immediately shut down the equipment and re-evaluate the installation.
6. Maintenance
Proper maintenance of your Binks Humdinger equipment, including the components from this repair kit, is essential for longevity and optimal performance. Refer to your original equipment manual for a detailed maintenance schedule.
- Regular Inspection: Periodically inspect the repaired area for signs of wear, leaks, or damage.
- Cleaning: Keep the equipment clean and free of debris that could affect seals or moving parts.
- Component Replacement: Replace worn O-rings and washers as part of routine maintenance or when performance degrades.
7. Troubleshooting
If you encounter issues after installing the repair kit, consider the following common troubleshooting steps:
- Leaks: Recheck the seating and condition of all O-rings and washers. Ensure mating surfaces are clean and free of nicks or scratches. Verify proper torque on fasteners.
- Improper Function: Confirm that all components were installed in the correct orientation and sequence. Ensure no parts were omitted or incorrectly placed.
- Persistent Issues: If the problem persists, consult the original equipment manufacturer's troubleshooting guide or contact a qualified service technician.
8. Specifications
| Attribute | Detail |
|---|---|
| Brand | Binks |
| Model Number | 41-12815 / 4112815 |
| Material | Metal, Plastic (components) |
| Included Components | O-Rings, Washers |
| Item Weight (Kit) | Approximately 0.31 Pounds (5 ounces) |
| Product Dimensions (Packaging) | 6 x 2 x 6 inches |
| UPC | 655726477386 |
9. Warranty and Support
As an aftermarket repair kit, warranty coverage may vary. Please refer to the seller or manufacturer of this specific aftermarket kit for details regarding warranty terms and conditions. For technical support or assistance with installation, it is recommended to contact the vendor from whom you purchased this repair kit or consult a certified Binks service technician.