
Important Safety Information
WARNING: This product contains small parts which may pose a choking hazard. Not suitable for children under 3 years.
Always operate the drone in open, clear areas, away from people, animals, and obstacles. Do not fly in strong winds or adverse weather conditions. Adult supervision is recommended for users under 14 years of age. Read all instructions before operation.
Package Contents
Verify that all items listed below are included in your package:
- World Tech Toys Striker-X Glow-In-The-Dark 2.4GHz 4.5CH RC HD Camera Drone
- 2.4GHz Transmitter
- USB Charging Cable
- 3.7V 500mAh LiPo Battery
- 4GB Micro SD Card
- Micro SD Card Adapter
- 4 Spare Rotor Blades
- Screwdriver
- Instruction Manual (this document)

Image: All accessories included with the Striker-X drone, laid out for inspection.
Setup
1. Drone Battery Installation and Charging
- Locate the battery compartment on the drone.
- Insert the provided 3.7V 500mAh LiPo battery into the compartment, ensuring correct polarity.
- Connect the drone's battery to the USB charging cable.
- Plug the USB charging cable into a USB power source (e.g., computer, USB wall adapter). The charging indicator will illuminate during charging and turn off when fully charged.
- Charging typically takes approximately 60-90 minutes. Do not overcharge.
2. Transmitter Battery Installation
- Open the battery compartment on the back of the 2.4GHz transmitter.
- Insert 4 AA batteries (not included) into the compartment, observing the correct positive (+) and negative (-) terminals.
- Close the battery compartment securely.
3. Rotor Blade and Guard Installation
The drone may come with rotor guards pre-installed or require attachment. If not pre-installed, gently snap the rotor guards onto the drone's arms. Ensure they are securely fastened to protect the blades during flight.

Image: Detail of a rotor blade and its protective guard.
4. Micro SD Card Installation
- Locate the micro SD card slot on the drone, typically near the camera module.
- Insert the provided 4GB micro SD card into the slot until it clicks into place. Ensure the card is inserted in the correct orientation.
- To remove, gently press the card inward until it springs out.
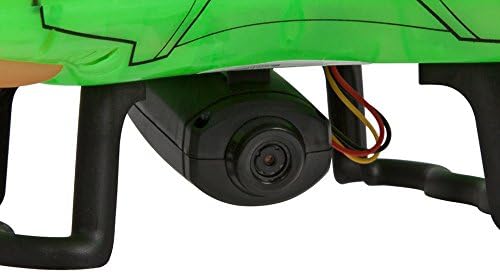
Image: The drone's integrated 720p HD camera.
Operating Instructions
1. Power On and Pairing
- Ensure the drone battery is charged and installed, and the transmitter has fresh AA batteries.
- Place the drone on a flat, level surface.
- Turn on the drone's power switch. The drone's lights will flash.
- Turn on the transmitter's power switch.
- Move the left joystick (throttle) fully up, then fully down. The drone's lights will become solid, indicating successful pairing.
2. Basic Flight Controls
The 2.4GHz transmitter provides precise control over the drone's movements.
- Left Joystick (Throttle): Up/Down for altitude control (ascend/descend). Left/Right for yaw (rotate left/right).
- Right Joystick (Direction): Up/Down for pitch (forward/backward). Left/Right for roll (sideways left/right).
- Trim Buttons: Use these to fine-tune the drone's stability if it drifts in any direction during hover.
3. Special Flight Modes and Features
- Altitude Lock: This feature helps maintain a consistent altitude, making it easier to control the drone. Engage via the designated button on the transmitter.
- Speed Controls: Adjust the drone's speed settings (low, medium, high) using the speed button on the transmitter. Start with low speed for beginners.
- 3D Flip Stunt Mode: To perform a 3D flip, press the 3D flip button, then quickly move the right joystick in the desired flip direction (forward, backward, left, or right). Ensure sufficient altitude and clear space.
- Launch Toss: With the drone powered on and paired, gently toss it into the air and immediately apply throttle to initiate flight.
- Autopilot (Auto Takeoff/Landing): Press the autopilot button for automatic takeoff or landing. Caution: Ensure the drone is on a flat surface for takeoff and in a clear area for landing. Monitor the drone's ascent carefully, especially in windy conditions, and be prepared to take manual control if it drifts unexpectedly.
4. Camera Operation (Photo/Video)
The Striker-X drone is equipped with a 720p HD camera for aerial photography and video recording.
- Ensure a micro SD card is properly installed in the drone.
- To take a photo, press the photo button on the transmitter. The drone's lights may flash once to confirm.
- To start video recording, press the video button on the transmitter. The drone's lights may flash continuously or change color to indicate recording is in progress. Press the button again to stop recording.
- After flight, power off the drone and remove the micro SD card. Use the micro SD adapter to transfer files to a computer for viewing.

Image: Top view of the Striker-X drone.

Image: Angled view of the Striker-X drone.
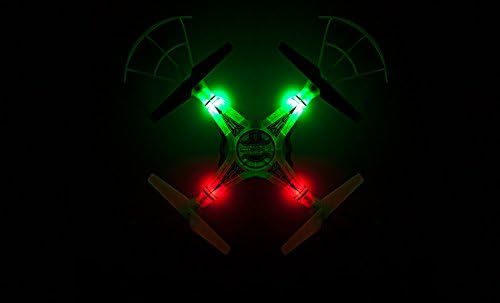
Image: The Striker-X drone glowing in the dark.
5. Official Product Video
Watch this official video for a visual guide on operating the Striker-X drone:
Video: An official demonstration of the Striker-X Glow-In-The-Dark 2.4Ghz 4.5Ch RC HD Camera Drone in action, showcasing its features and flight capabilities.
Maintenance
1. Cleaning
Gently wipe the drone's body with a soft, dry cloth to remove dust and debris. Avoid using water or chemical cleaners, as they may damage electronic components.
2. Rotor Blade Replacement
If a rotor blade becomes damaged, use the provided screwdriver to carefully remove the screw holding the damaged blade. Replace it with a new spare rotor blade, ensuring it is oriented correctly, and secure it with the screw. Always replace damaged blades to maintain flight stability.
3. Battery Care
- Always disconnect the battery from the drone after use.
- Store the LiPo battery in a cool, dry place, away from direct sunlight and extreme temperatures.
- Do not puncture, short-circuit, or expose the battery to fire.
- If the battery appears swollen or damaged, discontinue use immediately and dispose of it properly.
Troubleshooting
| Problem | Possible Cause | Solution |
|---|---|---|
| Drone does not respond to transmitter. | Low battery in drone or transmitter; Not paired correctly; Out of range. | Charge drone battery; Replace transmitter batteries; Re-pair drone and transmitter; Ensure drone is within operating range. |
| Drone drifts during flight. | Uneven surface during takeoff; Wind interference; Trim settings incorrect. | Place drone on a flat surface for takeoff; Avoid flying in windy conditions; Use trim buttons to adjust stability. |
| Drone ascends uncontrollably with Autopilot. | Environmental factors (e.g., strong updrafts); Sensor interference. | Immediately attempt to regain manual control by adjusting the throttle joystick. If control is lost, power off the drone. Ensure sufficient open space for flight and avoid strong winds. Autopilot is best used in calm, indoor environments or very still outdoor conditions. |
| Camera not recording or taking photos. | No micro SD card; SD card full or corrupted; Incorrect button press. | Ensure micro SD card is inserted; Format or replace SD card; Refer to camera operation instructions. |
| Drone lights are flashing but not pairing. | Incorrect pairing sequence. | Ensure drone is powered on first, then transmitter. Move left joystick fully up and then fully down to complete pairing. |
Specifications
| Feature | Detail |
|---|---|
| Model Number | 33044 |
| Dimensions | 12 x 12 x 3.25 inches |
| Weight | 2 pounds |
| Material | Plastic |
| Frequency | 2.4GHz |
| Camera | 720p HD |
| Drone Battery | 3.7V 500mAh LiPo (included) |
| Transmitter Batteries | 4 x AA (not included) |
| Storage | 4GB Micro SD Card (included) |
| Recommended Age | 14+ years (168 to 216 months) |
| Usage Environment | Outdoor |
Warranty Information
This World Tech Toys Striker-X drone comes with a 30-day warranty against manufacturer defects. This warranty covers defects in materials and workmanship under normal use. It does not cover damage caused by misuse, accidents, unauthorized modifications, or normal wear and tear. Please retain your proof of purchase for warranty claims.
Customer Support
For technical assistance, troubleshooting not covered in this manual, or warranty inquiries, please contact World Tech Toys customer support. Refer to the product packaging or the official World Tech Toys website for the most current contact information.