
1. Introduction and Overview
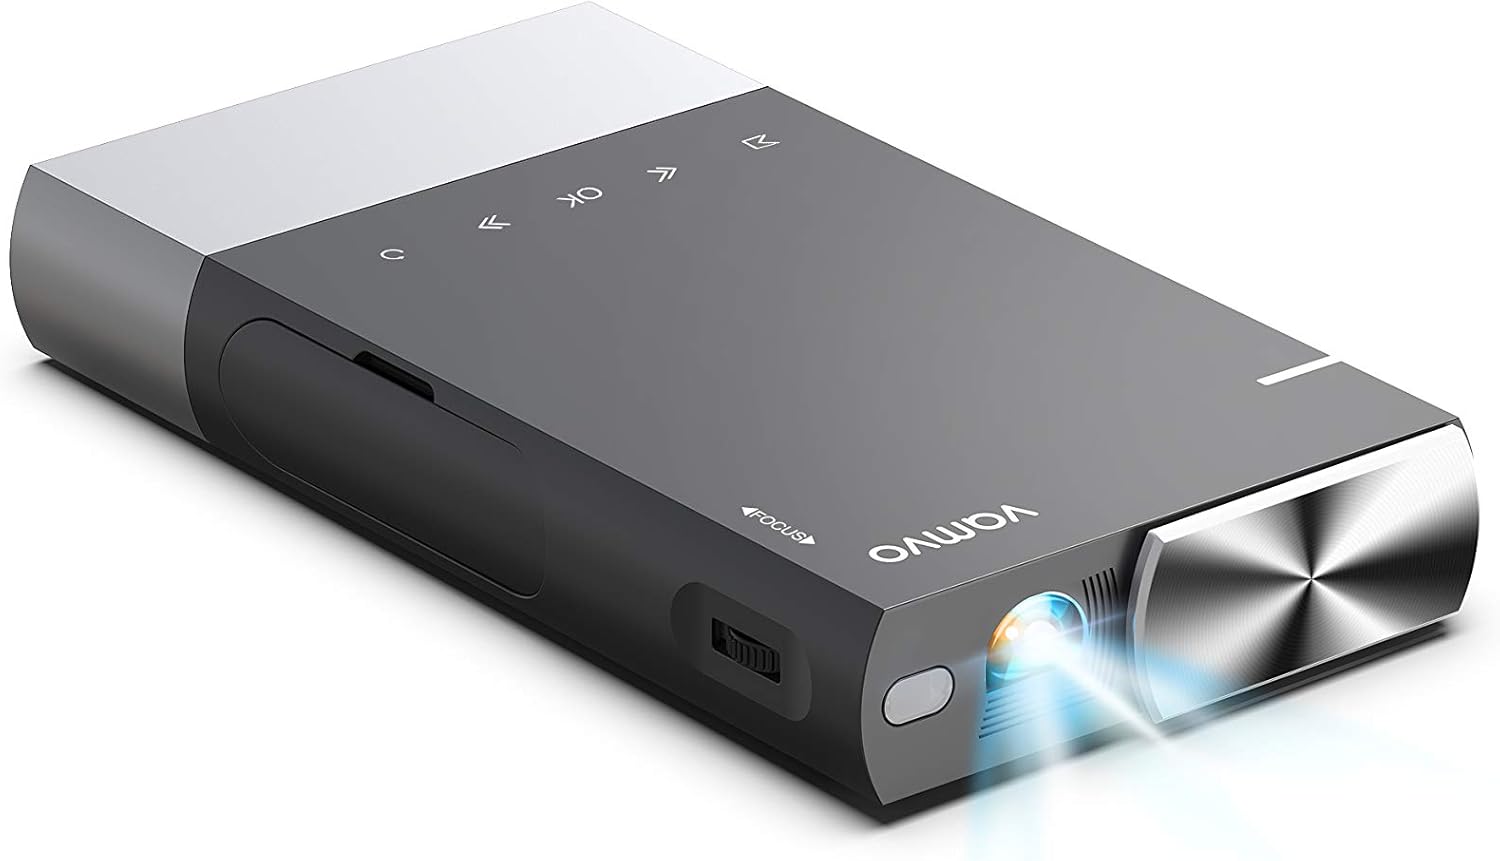
The Vamvo Mini Portable Projector (Model S1) is designed for versatility and portability, offering a compact solution for various projection needs. Its lightweight design makes it ideal for on-the-go use, transforming any space into a viewing area.
- Compact, Portable, Versatile: With a tiny frame of 5.7 x 3.2 x 0.9 inches and a weight of just 0.6 lbs., this projector is extremely portable and easy to set up, akin to carrying a Smart TV in your pocket. It is suitable for small meetings, classrooms, or business environments.
- Multi-Screen Sharing: The projector incorporates the latest multi-screen technology, allowing projection of iOS/Android device screens onto a large screen (up to 130 inches maximum) using an original USB cable. An additional HDMI adapter (not included) can also be used for screen synchronization.
- Vibrant Display: Enjoy vibrant color and crystal-clear images with a maximum resolution of 1080p. An ideal screen size of 80 inches can be achieved with a projection distance of 5 ft. The built-in 5200mAh battery provides over 2 hours of continuous playback.
- Multimedia Video Projector: Compatible with iPhones, iPads, Android devices, laptops, PCs, MacBooks, XBOX, PS3/PS4, and more. It features rich connectivity options including HDMI, USB, TF, and Micro SD ports.

Image: The Vamvo Mini Projector shown next to a smartphone, illustrating its compact size (5.8" x 3").

Image: A split image comparing the brightness and clarity of the Vamvo projector versus another projector, highlighting a "Brand New Upgrade" and "30% Brighter" claim.
2. Setup
Setting up your Vamvo Mini Portable Projector is straightforward. Follow these steps to get started:
- Power On: To turn on the projector, rotate the lens cover. The device will power on automatically.
- Focus Adjustment: Use the "FOCUS" wheel located on the side of the projector to adjust the image clarity until it is sharp.
- Placement: Position the projector on a stable surface. It includes a standard 1/4-inch tripod thread on the bottom for mounting on compatible tripods (not included).
- Connectivity: Connect your desired media source using the available ports:
- HDMI: For connecting laptops, gaming consoles (XBOX, PS3/PS4), and other HDMI-enabled devices.
- USB: For connecting USB drives or for multi-screen sharing with iOS/Android devices using an original USB cable.
- TF/Micro SD: Insert a TF or Micro SD card to play media directly from the card.
- Audio Port: Connect external speakers or headphones for enhanced audio.
- Multi-Screen Setup (for iOS/Android): For direct screen mirroring from iOS/Android devices, connect your device using its original USB cable to the projector's USB port. For some encrypted content or specific applications (e.g., Netflix, Hulu), an additional HDMI adapter (not included) may be required.

Image: Diagram showing the projector's ports (Power Interface, USB Cable, Audio Port, SD Card, HDMI) and the On/Off lens cover/switch.

Image: Illustrations demonstrating how to connect iOS and Android devices to the projector using USB and HDMI adapters (adapters not included).
3. Operating Instructions
Once set up, operating the Vamvo Mini Portable Projector is intuitive. You can control it using the touch buttons on the top panel or the included remote control.
3.1. Controls
- Top Panel Buttons: The top surface features touch-sensitive buttons for navigation and control. These include:
- Menu/Source Selection
- Left/Right Navigation (also functions as Volume +/-)
- OK/Confirm
- Back/Return
- Power Indicator Light: A light indicator on the top panel shows the power status. It glows blue when the device is on and functioning correctly. It turns red when the battery needs charging or is currently charging.
- Focus Wheel: Located on the side, this wheel allows for fine-tuning the image focus.
3.2. Battery and Charging
The projector is equipped with a 5200mAh battery, providing over 2 hours of continuous playback. It supports charging while in use, ensuring uninterrupted viewing sessions when connected to a power source.
3.3. Usage Scenarios
The Vamvo Mini Portable Projector is versatile for various settings:
- Home Theater: Create an immersive experience for movies and shows.
- Bedroom: Project content onto the ceiling for comfortable viewing.
- Outdoor/Travel: Its portability makes it perfect for outdoor movie nights or presentations on the go.

Image: Four panels illustrating different usage scenarios: Home Theater, Bedroom (projecting on ceiling), Outdoor, and Travel (in a car).

Image: A side view of the projector highlighting its design and an illustration of it projecting onto a bedroom ceiling.

Image: The projector displayed with a large projection screen and various devices (smartphone, tablet, laptop) to show its multimedia input and MHL connectivity.
4. Maintenance
Proper maintenance ensures the longevity and optimal performance of your Vamvo Mini Portable Projector.
- Cleaning the Lens: Gently wipe the projector lens with a soft, lint-free cloth. Avoid using abrasive cleaners or excessive force, as this may scratch the lens.
- Dust Removal: Regularly clean the projector's exterior with a dry, soft cloth to prevent dust accumulation. Ensure ventilation openings are clear of obstructions.
- Storage: When not in use, store the projector in a cool, dry place, away from direct sunlight and extreme temperatures. Use the original packaging or a protective case to prevent damage.
5. Troubleshooting
If you encounter issues with your Vamvo Mini Portable Projector, refer to the following common troubleshooting tips:
- No Power:
- Ensure the lens cover is fully rotated to the ON position.
- Check if the battery is charged. Connect the projector to a power source using the provided adapter.
- No Image/Signal:
- Verify that the input source (HDMI, USB, TF/Micro SD) is correctly selected in the projector's menu.
- Check all cable connections to ensure they are secure.
- If using a mobile device, ensure it is compatible with multi-screen sharing and that any necessary adapters are correctly connected.
- Blurry Image:
- Adjust the "FOCUS" wheel on the side of the projector until the image is clear.
- Ensure the projection surface is flat and the projector is positioned at an optimal distance.
- No Sound or Low Sound:
- Increase the volume using the projector's controls or the remote.
- If using external speakers, ensure they are properly connected to the audio port and powered on.
6. Specifications
| Brand Name | Vamvo |
| Item Weight | 1.48 pounds |
| Product Dimensions | 5.8 x 3.1 x 0.8 inches |
| Item Model Number | S1 |
| Batteries | 1 Lithium Ion batteries required (included) |
| Special Features | Portable, USB Connectivity, HDMI Connectivity |
| Speaker Type | Built-In |
| Display Resolution | 800 x 480 |
7. Warranty and Support
Vamvo provides a 2-year warranty for the projector. If you are not completely satisfied with your order, you may be offered a refund or replacement within the first 3 months of purchase. This ensures a risk-free buying experience.
For further assistance or inquiries, please contact Vamvo customer service.

