1. Introduction
This manual provides essential information for the installation, operation, and maintenance of your EAGLEGGO compatible oven igniter assembly. This component is designed as a replacement part for various General Electric and Hotpoint gas ranges, ensuring proper ignition of the oven burner. Please read these instructions thoroughly before proceeding with installation or any service.
2. Safety Information
Improper installation or maintenance can result in serious injury or property damage. Always adhere to the following safety precautions:
- Disconnect Power and Gas: Before beginning any installation or service, ensure the electrical power and gas supply to the appliance are completely disconnected.
- Professional Installation Recommended: If you are not experienced with appliance repair, it is highly recommended to seek assistance from a qualified technician.
- Wear Protective Gear: Use appropriate personal protective equipment, such as gloves and eye protection, during installation.
- Gas Leak Check: After reconnecting the gas supply, always check for gas leaks using a soap and water solution. Never use an open flame.
- Handle with Care: The igniter element is fragile. Handle it gently to prevent damage.
3. Compatibility
This EAGLEGGO igniter assembly is a compatible replacement for the following original equipment manufacturer (OEM) part numbers:
- WB13K21
- DG94-00520A
- WB13T10045
- AP3202322
- 1085573
- AH952863
- EA952863
- PS952863
It is compatible with a wide range of General Electric and Hotpoint gas oven models, including but not limited to:
- JGS905SEK2SS, JGS968TH1WW, JGS968TH2WW, JGS968TH3WW, JGS968TH4WW, JGS968TH5WW, JGS968TH6WW
- JGSP28BEK1BB, JGSP28CEK1CC, JGSP28DEN1BB, JGSP28SEK1SS, JGSP28WEK1WW
- JGSP42DET1BB, JGSP42DET1WW, JGSP42DET2WW, JGSP42SET1SS
- JGSP48BH1BB, JGSP48CH1CC, JGSP48SH1SS, JGSP48WH1WW
- PGS908BEM1BB, PGS908CEM1CC, PGS908DEP1BB, PGS908SEM1SS, PGS908SEP1SS, PGS908WEM1WW
- PGS968BEM1BB, PGS968DEP1BB, PGS968KEM1CC
For a comprehensive list of compatible models, please refer to the product listing or consult your appliance's service manual.
4. Package Contents
Your package should contain the following items:
- 1 x Oven Igniter Assembly (Model RCO-WB13T10045-DL6)
- 2 x Ceramic Wire Nuts

Image 1: The EAGLEGGO oven igniter assembly, showing the igniter element, metal bracket, wire harness, and included ceramic wire nuts.
5. Installation Instructions
Follow these steps carefully to replace your oven igniter. Remember to prioritize safety by disconnecting power and gas before starting.
- Disconnect Power and Gas: Turn off the circuit breaker supplying power to the oven and close the gas shut-off valve.
- Access Oven Interior: Open the oven door and remove the oven racks. Depending on your model, you may need to remove the oven bottom panel to access the burner assembly. This usually involves removing a few screws.
- Locate Old Igniter: The igniter is typically located near the gas burner tube, often attached to a bracket.
- Disconnect Wiring: Carefully disconnect the electrical wires leading to the old igniter. Note their connection points.
- Remove Old Igniter: Unscrew or unclip the old igniter from its mounting bracket. Handle it gently as it may be fragile.
- Install New Igniter: Mount the new EAGLEGGO igniter assembly onto the bracket using the original screws or mounting hardware. Ensure it is securely fastened and positioned correctly relative to the burner tube.

Image 2: Top view of the igniter, illustrating the heating element and its protective casing.
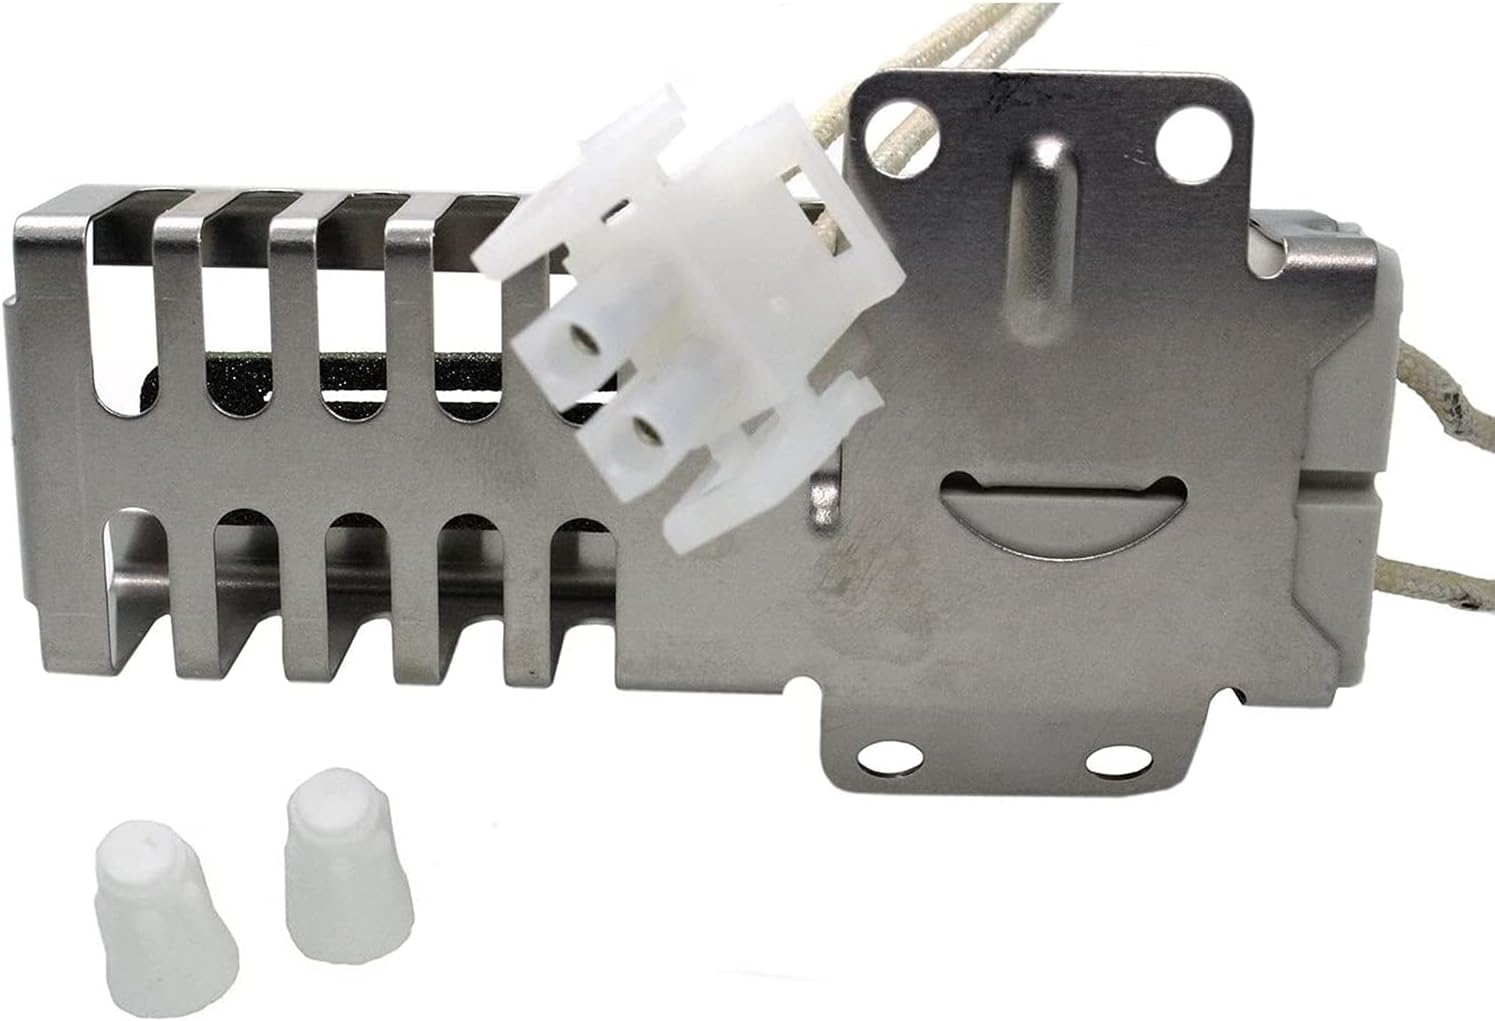
Image 3: Rear view of the igniter, highlighting the mounting holes and the wire connection point.
- Connect Wiring: Using the provided ceramic wire nuts, connect the wires from the new igniter to the oven's wiring. Ensure connections are tight and secure.
- Reassemble Oven: Replace the oven bottom panel and any other components removed during access.
- Restore Power and Gas: Turn the gas supply back on and then restore electrical power to the oven.
- Test Operation: Set the oven to bake at a moderate temperature (e.g., 350°F). Observe the igniter. It should glow red, and then the gas burner should ignite within 30-90 seconds.
6. Operation Verification
After installation, verify the igniter's proper function:
- Set the oven to a bake cycle.
- Observe through the oven window or by carefully opening the door (briefly) after a minute or two.
- The igniter should begin to glow a bright orange-red.
- Once the igniter reaches sufficient temperature, the gas valve will open, and the burner should ignite with a clear blue flame.
- If the burner does not ignite or if there is a strong gas odor, immediately turn off the oven and gas supply and consult a qualified technician.
7. Maintenance
The oven igniter is a wear-and-tear component and generally does not require routine maintenance. However, to promote longevity of your appliance:
- Keep the oven interior clean to prevent grease or food debris from accumulating near the igniter or burner.
- Periodically inspect the igniter for any visible damage or excessive carbon buildup.
8. Troubleshooting
If your oven is not functioning correctly after igniter replacement, consider the following:
| Issue | Possible Cause | Solution |
|---|---|---|
| Oven not heating / Igniter not glowing | No power to oven; faulty wiring connection; igniter damaged during installation. | Check circuit breaker. Verify all wire connections are secure. Inspect igniter for cracks or damage. |
| Igniter glows but burner does not ignite | Insufficient current to igniter (weak glow); gas supply issue; faulty gas valve. | Ensure igniter glows brightly. Check gas supply. If igniter glows brightly and gas is on, a faulty gas valve may require professional service. |
| Oven takes too long to heat | Igniter is weak or failing (not reaching proper temperature quickly). | If the igniter glows dimly or takes an extended time to glow, it may need replacement. |
| Gas odor present | Gas leak from connections. | Immediately turn off gas supply and power. Ventilate area. Check all gas connections with a soap and water solution. Do not use the oven until the leak is resolved by a qualified technician. |
If troubleshooting steps do not resolve the issue, contact a qualified appliance repair technician.
9. Specifications
- Product Type: Oven Igniter Assembly
- Brand: EAGLEGGO
- Model Number: RCO-WB13T10045-DL6
- Replaces Part Numbers: WB13K21, DG94-00520A, WB13T10045, AP3202322, 1085573, AH952863, EA952863, PS952863
- Compatibility: General Electric and Hotpoint gas ranges
10. Warranty and Support
For specific warranty information regarding your EAGLEGGO oven igniter assembly, please refer to the product's purchase documentation or contact the seller directly. For technical support or further assistance, please reach out to the retailer or manufacturer through their official channels.