1. Product Overview
This manual provides essential information for the installation, operation, and maintenance of your new Glenparts aftermarket carburetor. This carburetor is designed as a direct replacement for specific Tecumseh 4-cycle gasoline engines, ensuring proper fuel delivery and engine performance.
It replaces Tecumseh OEM numbers: 640350, 640303, and 640271.

Figure 1: Front view of the Glenparts carburetor, showing the main body, fuel bowl, and included gasket.
2. Compatibility
This carburetor is compatible with the following engine and equipment models:
- Tecumseh 4-cycle gasoline engines: LEV105-347005C, LEV105-347006B, LEV105-347006C, LEV105-347007B, LV195EA, LV 195XA, LEV100, LEV105, LEV120.
- Toro Lawn Mowers: 20001, 20003, 20005, 20007, 20008, 20009, 20012, 20013, 20014, 20016, 20017, 20018, 20019, 20031, 20051, 20069, 20070, 20071, 20072, 20073, 20074, 20075, 20076, 20079, 20071A, 20072A, 20073A, 20074A, 20076A, 20094, 20096.
- Craftsman Engine: 143026708.
- Lawn-Boy Insight Lawn Mowers: 10670C, 10671, 10673, 10682, 10683, 10684, 10685, 10686, 10687, 10780, 10785, 10995, 10997.
Always verify compatibility with your specific engine model before installation.
3. Components Included
The package includes:
- 1 x Glenparts Aftermarket Carburetor
- 1 x Gasket (for installation)
4. Setup and Installation
Safety First: Before beginning any work, ensure the engine is cool, the spark plug wire is disconnected, and the fuel tank is drained or the fuel line is clamped to prevent spills.
- Access the Carburetor: Locate the existing carburetor on your engine. This typically involves removing the air filter housing and any shrouds covering the engine.
- Disconnect Fuel Line: Carefully disconnect the fuel line from the old carburetor. Be prepared for residual fuel to leak.
- Disconnect Linkages: Detach any throttle and choke linkages connected to the carburetor. Note their positions for reassembly.
- Remove Mounting Bolts: Unscrew the bolts holding the carburetor to the engine manifold.
- Remove Old Carburetor and Gasket: Carefully remove the old carburetor and ensure all old gasket material is cleaned from the mounting surfaces.
- Install New Gasket: Place the new gasket onto the engine manifold, ensuring it aligns correctly with the mounting holes and intake port.
- Mount New Carburetor: Position the new Glenparts carburetor onto the gasket and secure it with the mounting bolts. Tighten evenly to prevent air leaks.
- Reconnect Linkages: Reattach the throttle and choke linkages to their correct positions on the new carburetor.
- Reconnect Fuel Line: Connect the fuel line to the new carburetor. Ensure a secure fit to prevent leaks.
- Final Checks: Double-check all connections, ensure no tools are left in the engine area, and reconnect the spark plug wire.

Figure 2: View of the carburetor's intake side, illustrating key dimensions for fitment. The intake port measures approximately 22mm, and the mounting bolt spacing is approximately 30.5mm.

Figure 3: View of the carburetor's air filter side, showing dimensions. The air intake opening measures approximately 20.5mm, and the mounting bolt spacing is approximately 38.5mm.
5. Operating Principles
A carburetor's primary function is to mix air and fuel in the correct ratio for combustion in the engine. When the engine is started, air is drawn through the carburetor, creating a vacuum that pulls fuel from the fuel bowl into the airstream. The throttle and choke mechanisms control the amount of air and fuel mixture entering the engine, regulating engine speed and aiding in cold starts.

Figure 4: Side view of the carburetor, highlighting the fuel inlet barb and the red primer bulb, which assists in drawing fuel into the carburetor for easier starting.
6. Maintenance
Regular maintenance helps ensure optimal performance and longevity of your carburetor.
- Fuel Quality: Always use fresh, clean gasoline. Stale or contaminated fuel is a common cause of carburetor issues. Consider using a fuel stabilizer if the equipment will be stored for extended periods.
- Fuel Filter: Regularly inspect and replace the fuel filter (if equipped) to prevent debris from reaching the carburetor.
- Air Filter: Ensure the air filter is clean and properly installed. A dirty air filter can restrict airflow, leading to a rich fuel mixture and poor engine performance.
- Carburetor Cleaning: If performance issues arise, the carburetor may need cleaning. This typically involves disassembling the fuel bowl and jets, cleaning them with carburetor cleaner, and reassembling with new gaskets if necessary. Consult a service manual or qualified technician for detailed cleaning procedures.
- Storage: Before long-term storage, run the engine until it runs out of fuel, or drain the fuel tank and carburetor bowl to prevent fuel degradation and gumming.

Figure 5: Top-down view of the carburetor, showing the throttle linkage mechanism. Proper function of this linkage is crucial for controlling engine speed.
7. Troubleshooting
If your engine experiences issues after carburetor installation, consider the following common problems and solutions:
| Problem | Possible Cause | Solution |
|---|---|---|
| Engine won't start | No fuel reaching carburetor; clogged fuel filter; incorrect choke setting; spark plug issue. | Check fuel level, fuel line, and filter. Ensure choke is set correctly for starting. Inspect spark plug. |
| Engine runs rough/stalls | Dirty carburetor jets; air leak at gasket; old/stale fuel; incorrect idle adjustment. | Clean carburetor jets. Check for air leaks around the gasket. Use fresh fuel. Adjust idle screw. |
| Engine lacks power | Clogged air filter; partially clogged fuel filter/jets; incorrect governor adjustment. | Clean/replace air filter. Clean fuel system components. Consult service manual for governor adjustment. |
| Fuel leaks | Loose fuel line connection; damaged fuel bowl gasket; float needle not seating properly. | Tighten fuel line. Replace fuel bowl gasket. Inspect float and needle valve for debris or wear. |
If issues persist, it is recommended to consult a qualified small engine technician.
8. Specifications
| Feature | Detail |
|---|---|
| Brand | Glenparts |
| Manufacturer Part Number | CB233 - 13 |
| Fuel Type | Gasoline |
| Recommended Uses | Lawn Mower |
| Replaces OEM Numbers | 640350, 640303, 640271 |
| UPC | 611748661318 |
9. Additional Views

Figure 6: Various perspectives of the carburetor, including an example of its application on a lawnmower, demonstrating its typical installation environment.

Figure 7: Two carburetors displayed from distinct angles, providing a comprehensive view of the component's design and features.
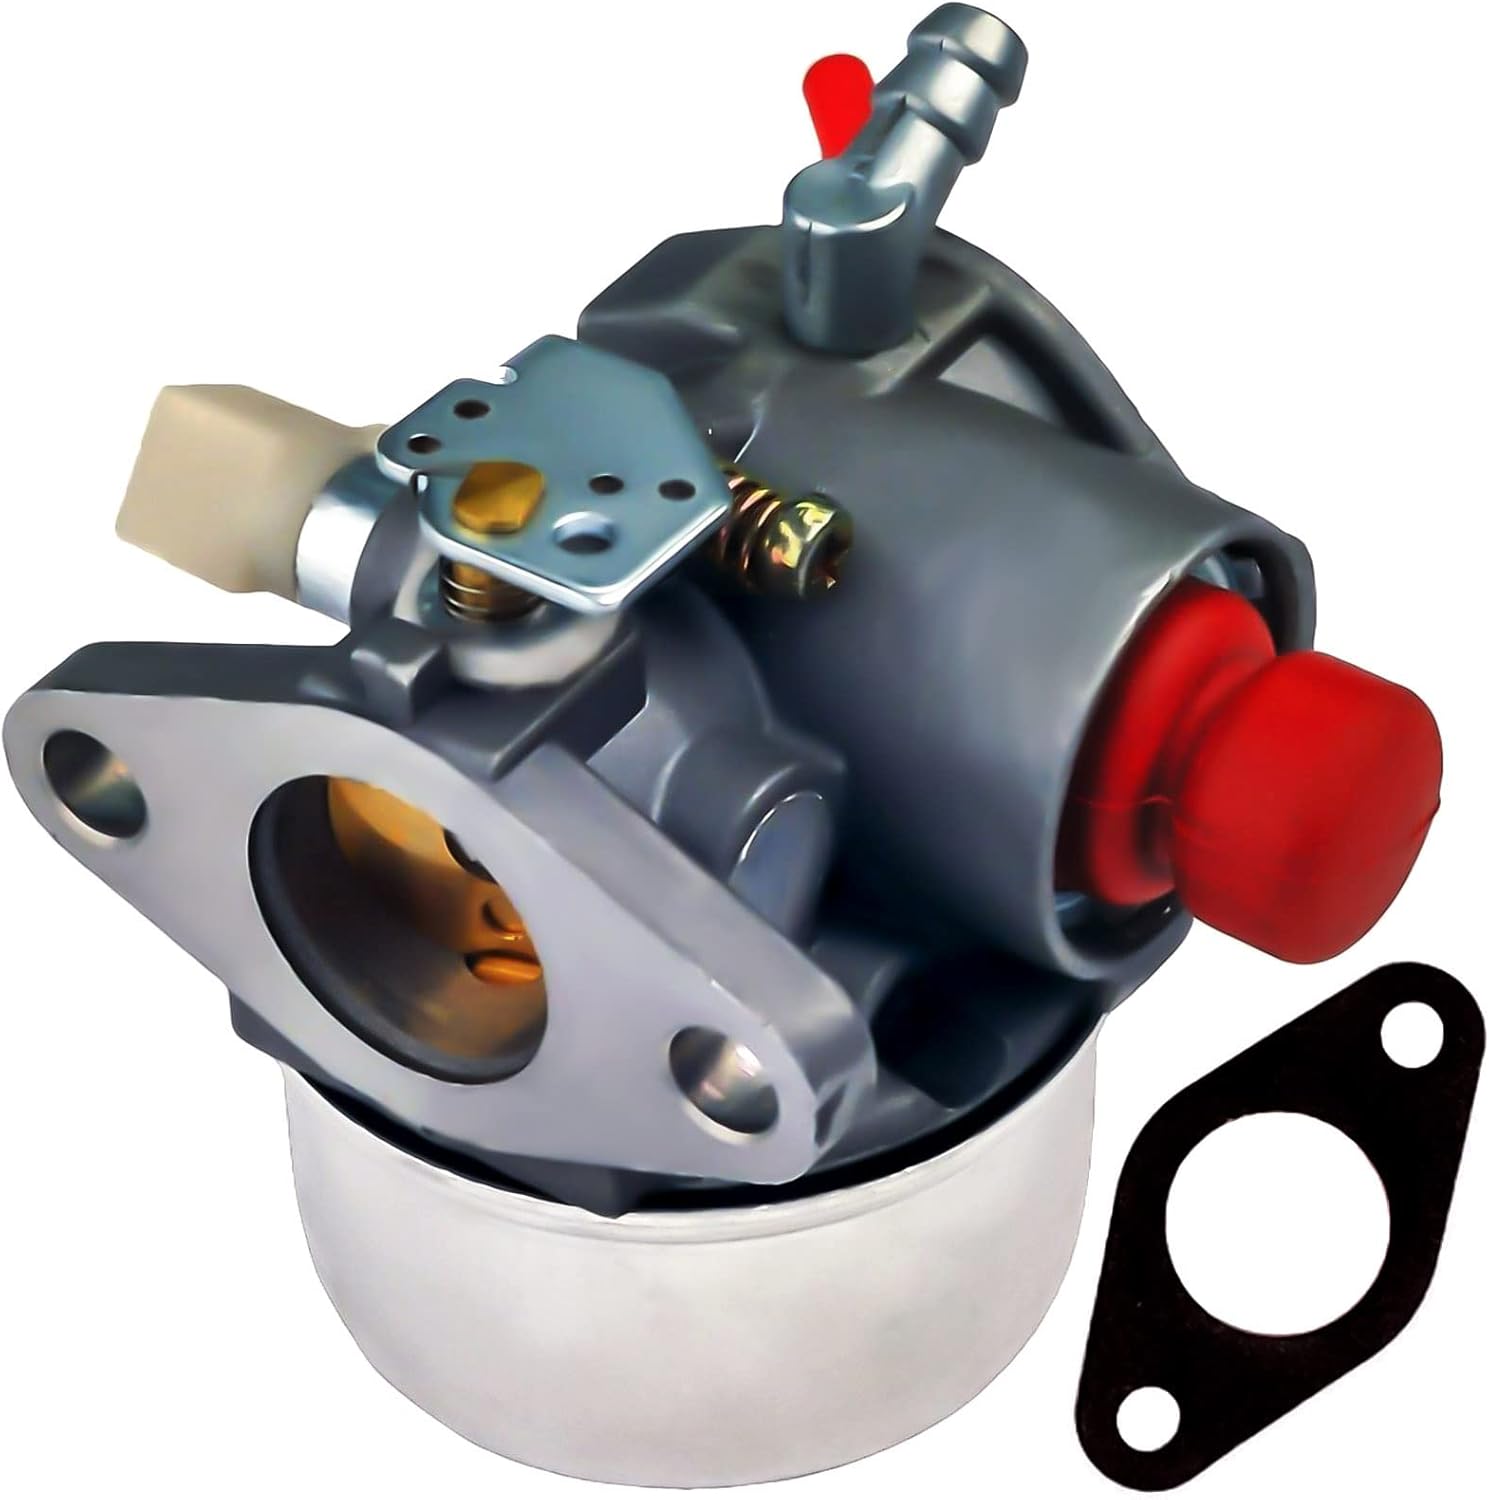
Figure 8: An angled view of the carburetor, clearly showing the included gasket and the red primer bulb, essential for manual fuel priming.