1. Introduction
This manual provides essential information for the safe and effective operation of your Pro-Craft 10 Amp 110V Rectifier. This electro-plating machine is designed for jewelry making and other small-scale plating applications. Please read this manual thoroughly before initial use and retain it for future reference.
2. Safety Information
Always observe the following safety precautions to prevent injury or damage to the equipment:
- Electrical Safety: Ensure the unit is connected to a properly grounded 110V AC outlet. Do not operate with wet hands or in damp conditions.
- Electrode Contact: CAUTION: Do not allow the positive (anode) and negative (work) electrodes to touch each other during operation, as this can cause damage to the components.
- Ventilation: Operate the rectifier in a well-ventilated area to dissipate any fumes generated during the plating process.
- Fuse Protection: CAUTION: Installation of an incorrect fuse will void your warranty and damage components. Always use the specified 2 Amp fuse.
- Chemical Handling: Always wear appropriate personal protective equipment (PPE) such as gloves and eye protection when handling plating solutions. Refer to the safety data sheets (SDS) for your specific plating chemicals.
- Children and Pets: Keep the unit and all plating chemicals out of reach of children and pets.
3. Package Contents
Upon unpacking, verify that the following item is included:
- Pro-Craft 10 Amp 110V Rectifier (Model: 45.506G)
4. Product Overview
The Pro-Craft Electro-Plater is housed in a durable steel cabinet and features intuitive controls for precise plating operations. Familiarize yourself with the components shown below.

Figure 1: Front View of Pro-Craft Rectifier
This image displays the front panel of the Pro-Craft 10 Amp 110V Rectifier. Key features visible include the main ON/OFF toggle switch, two analog meters for DC Volts and DC Amperes, a large rotary knob labeled 'Increase' for adjusting output, and clearly marked positive (red) and negative (black) output terminals. A 2 Amp fuse holder is also present on the lower left.
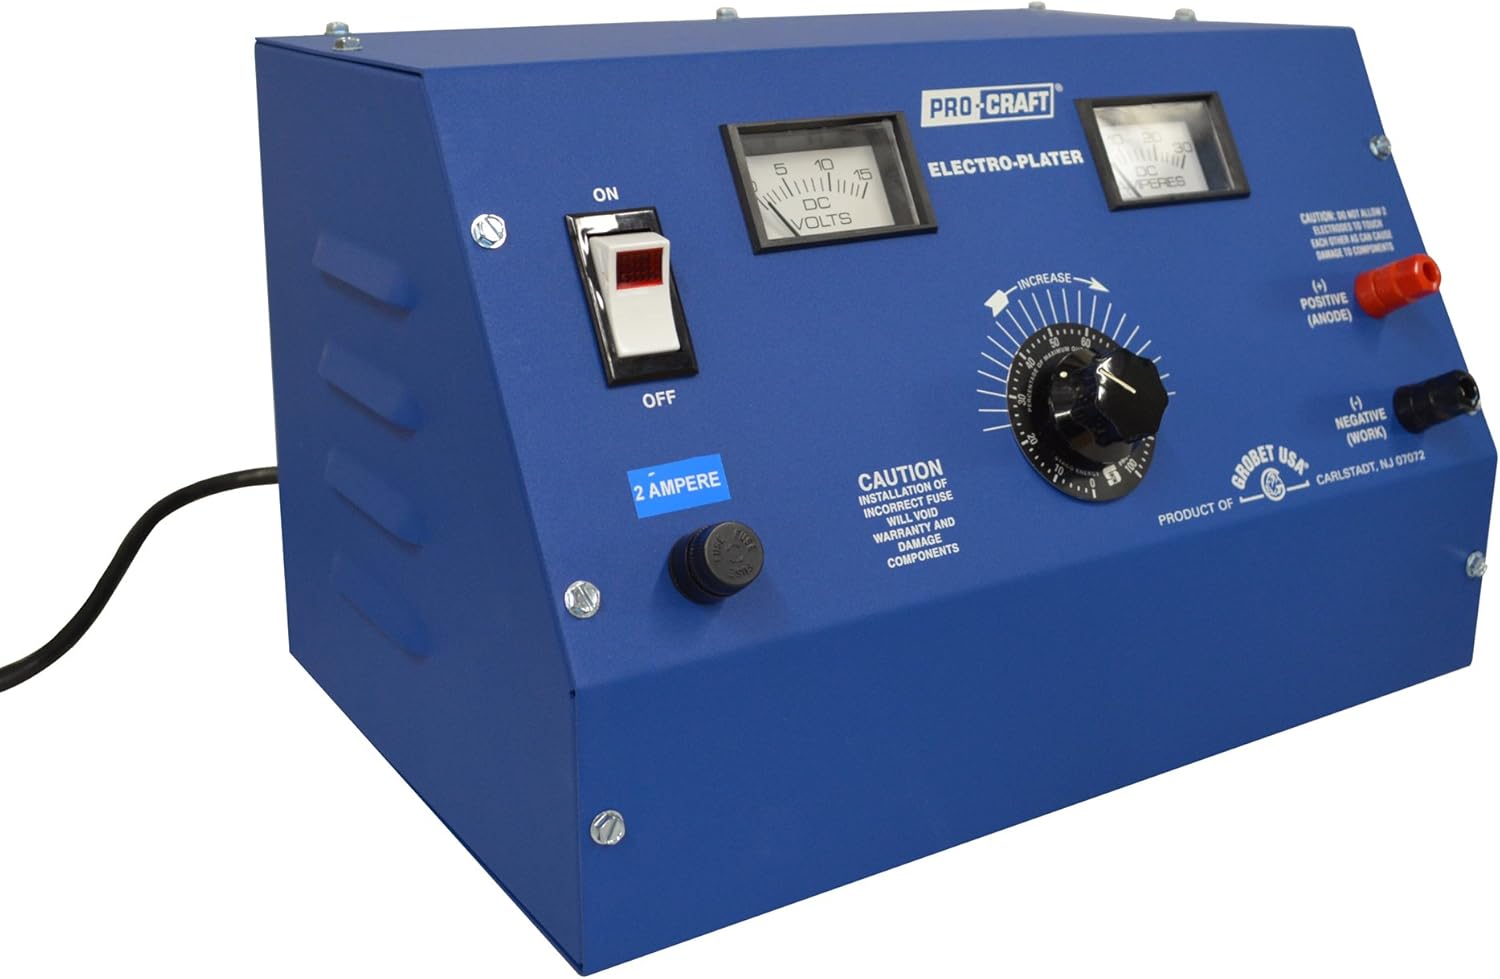
Figure 2: Angled View of Pro-Craft Rectifier
This image provides an angled perspective of the Pro-Craft 10 Amp 110V Rectifier, highlighting its compact steel cabinet design. The front panel controls, including the ON/OFF switch, meters, and adjustment knob, are clearly visible, along with the power cord extending from the rear of the unit.
Key Components:
- ON/OFF Switch: Main power control for the unit.
- DC Volts Meter: Displays the output voltage.
- DC Amperes Meter: Displays the output current.
- Increase Control Knob: Adjusts the output voltage and current.
- Positive (+) Anode Terminal (Red): Connects to the anode (sacrificial metal or insoluble electrode).
- Negative (-) Work Terminal (Black): Connects to the item being plated (cathode).
- 2 Amp Fuse Holder: Contains the protective fuse for the unit.
5. Specifications
| Model Number | 45.506G |
| Input Voltage | 110V AC |
| Output Voltage | 0 to 10 Volts DC (Continuous Duty) |
| Output Current | 0 to 10 Amps (Continuous Duty) |
| Maximum Plating Bath Volume | 1 Gallon (except for rhodium, 2 quart maximum) |
| Cabinet Dimensions (W x H x D) | 13" x 8" x 8.5" |
| Fuse Type | 2 Amp |
6. Setup
- Placement: Place the rectifier on a stable, level surface in a well-ventilated area, away from direct sunlight, heat sources, and moisture.
- Power Connection: Ensure the ON/OFF switch is in the 'OFF' position. Plug the rectifier's power cord into a standard 110V AC grounded electrical outlet.
- Electrode Connections:
- Connect the positive (+) lead (typically red) from your plating setup to the red (+) ANODE terminal on the rectifier.
- Connect the negative (-) lead (typically black) from your plating setup to the black (-) WORK terminal on the rectifier.
Important: Ensure all connections are secure. Do not allow the positive and negative electrodes to touch each other at any point during the plating process.
- Plating Bath Preparation: Prepare your plating solution and bath according to the manufacturer's instructions for the specific plating chemicals you are using.
7. Operating Instructions
- Initial Check: Before turning on the unit, ensure the 'Increase' control knob is set to its minimum (fully counter-clockwise) position.
- Power On: Flip the ON/OFF switch to the 'ON' position. The DC Volts and DC Amperes meters should illuminate or show initial readings.
- Adjusting Output: Slowly turn the 'Increase' control knob clockwise to increase the output voltage and current. Monitor the DC Volts and DC Amperes meters to achieve the desired settings for your specific plating application. Refer to your plating solution's instructions for recommended voltage and current densities.
- Plating Process: Once the desired settings are achieved, carefully immerse the item to be plated (connected to the negative terminal) and the anode (connected to the positive terminal) into the plating solution. Maintain appropriate spacing between the anode and cathode as per your plating solution's guidelines.
- Monitoring: Continuously monitor the meters during the plating process to ensure stable operation and adjust the 'Increase' knob as needed.
- Power Off: After the plating process is complete, first turn the 'Increase' control knob fully counter-clockwise to reduce output to minimum. Then, flip the ON/OFF switch to the 'OFF' position.
- Disconnect: Disconnect the electrodes from the rectifier terminals and safely remove items from the plating bath.
8. Maintenance
- Cleaning: Regularly wipe the exterior of the rectifier with a dry, soft cloth to remove dust and debris. Do not use abrasive cleaners or solvents. Ensure the unit is unplugged before cleaning.
- Fuse Replacement: If the unit fails to power on or operate, check the 2 Amp fuse located on the front panel. To replace, unscrew the fuse holder cap, remove the old fuse, and insert a new 2 Amp fuse. Only use a 2 Amp fuse. Using an incorrect fuse can damage the unit and void the warranty.
- Storage: When not in use, store the rectifier in a clean, dry environment, away from extreme temperatures and humidity.
9. Troubleshooting
| Problem | Possible Cause | Solution |
|---|---|---|
| Unit does not power on. |
|
|
| No output voltage/current. |
|
|
| Inconsistent plating results. |
|
|
10. Warranty and Support
For warranty information, technical support, or assistance with your Pro-Craft 10 Amp 110V Rectifier, please contact PMC Supplies LLC directly. Refer to your purchase documentation or visit the PMC Supplies LLC website for contact details.
PMC Supplies LLC
Carlstadt, NJ 07072