
1. Introduction
This instruction manual provides detailed guidance for the installation, operation, and maintenance of your TIKROUND Youngtown 12888 Quartz DIY Wall Clock Movement Mechanism. This mechanism is designed for repairing, replacing, or creating wall clocks with dials up to 40 cm (15.7 inches) in diameter. It features a silent, step-motion second hand and offers accuracy within ±30 seconds deviation per month under normal temperature conditions.
Please read these instructions carefully before beginning installation to ensure proper function and longevity of your clock movement.
2. Package Contents
Verify that all the following components are included in your package:
- 1 x Quartz clock movement
- 1 x Second caps
- 1 x Minute hand
- 1 x Hour hand
- 1 x Plastic washer
- 1 x Brass washer
- 1 x Brass nut
- 1 x Metal hook

Figure 2.1: Overview of the clock movement, its dimensions, and the included accessories.
3. Specifications
| Feature | Detail |
|---|---|
| Movement Type | Quartz, Step Second Hand Motion |
| Accuracy | ±30 seconds deviation per month (normal temperature) |
| Case Size | Approx. 55 x 55 x 16 mm (2.2 x 2.2 x 0.65 inches) |
| Total Shaft Length | 16 mm (41/64 inch) |
| Thread Length | 8 mm (5/16 inch) |
| Suitable Clock Panel Thickness | 2 - 6 mm (5/64 - 15/64 inch) |
| Total Hour Hand Length | Approx. 172 mm (6.8 inches) |
| Total Minute Hand Length | Approx. 207 mm (8.1 inches) |
| Second Caps Diameter | Approx. 7 mm (0.3 inch) |
| Power Source | 1 x 1.5V Carbon-zinc AA battery (not included) |
| Material | Plastic and Aluminum |
| Special Feature | Silent Clock Operation |

Figure 3.1: Guide for selecting the correct shaft length based on clock dial thickness. This model is suitable for 2-6 mm thickness.
4. Setup and Installation
Follow these steps to install your TIKROUND Youngtown 12888 clock movement:
- Prepare the Clock Dial: Ensure your clock dial has a central hole appropriate for the movement shaft. The movement is suitable for clock dials with a thickness between 2-6 mm (5/64 - 15/64 inch).
- Insert the Movement: Insert the clock movement shaft through the center hole of your clock dial from the back.
- Secure the Movement: Place the plastic washer, then the brass washer, and finally the brass nut onto the shaft from the front of the dial. Tighten the brass nut gently by hand to secure the movement. Do not overtighten.
- Attach the Hour Hand: Carefully press the hour hand onto the hour shaft (the wider shaft) at the 12 o'clock position. Ensure it is snug but not forced.
- Attach the Minute Hand: Carefully press the minute hand onto the minute shaft (the narrower shaft) at the 12 o'clock position. Ensure it is snug but not forced.
- Remove Protective Film: If your clock hands have a protective film, gently peel it off before attaching them.
- Attach the Second Cap: Press the second cap onto the second shaft (the thinnest shaft) at the 12 o'clock position.
- Install Battery: Insert one 1.5V Carbon-zinc AA battery into the battery compartment, observing the correct polarity (+/-). Important: Do not use Alkaline or rechargeable batteries, as they can damage the movement.
- Mount the Clock: Use the included metal hook to hang your clock on a wall.
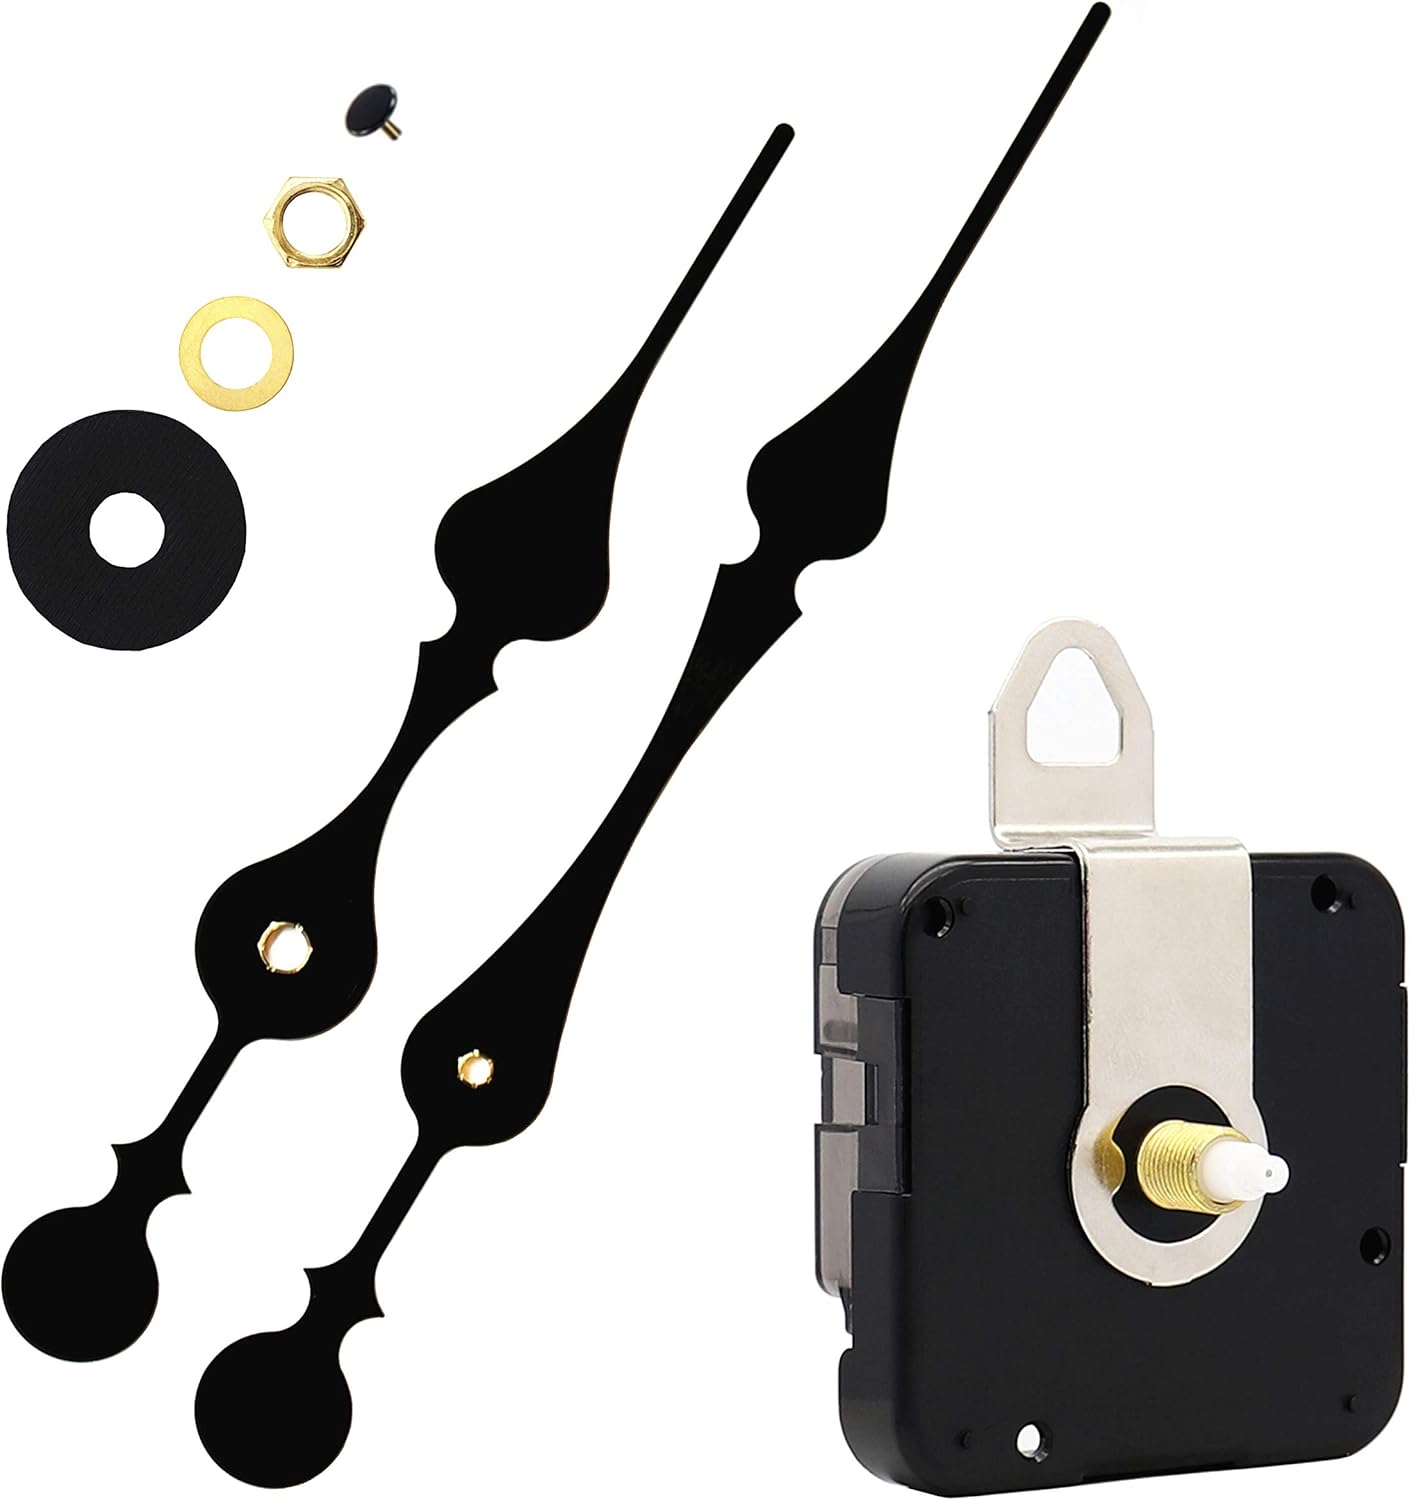
Figure 4.1: The TIKROUND clock movement with hands attached, ready for installation.

Figure 4.2: Remember to remove any protective film from the clock hands before installation.
5. Operating Instructions
Once the movement is installed and the battery is inserted:
- Setting the Time: Use the small adjustment knob located on the back of the clock movement to set the correct time. Rotate the knob clockwise or counter-clockwise until the hands display the desired time.
- The second hand will begin to move in a step motion, indicating the clock is functioning.
6. Maintenance
- Battery Replacement: Replace the 1.5V Carbon-zinc AA battery annually or when the clock begins to lose time or stops. Always use Carbon-zinc batteries.
- Cleaning: Clean the clock movement and hands with a soft, dry cloth. Avoid using liquid cleaners or solvents, as they may damage the components.
- Environment: Keep the clock in a dry environment, away from extreme temperatures and direct sunlight, to ensure optimal performance and longevity.
7. Troubleshooting
If your clock movement stops or exhibits inaccurate timekeeping, consider the following:
- Battery Check: Ensure the battery is a fresh 1.5V Carbon-zinc AA battery and is inserted with correct polarity. Replace if necessary.
- Brass Nut Tightness: The brass hex nut that secures the movement to the clock dial should be tightened just enough to hold the movement firmly. If it is overtightened, it can cause friction and impede the movement's operation or accuracy. Loosen it slightly if you suspect it's too tight.
- Second Cap Position: Ensure the second cap is pressed down firmly and correctly onto the second shaft. A loose or improperly seated second cap can affect the movement.
- Hand Clearance: Check that the hour, minute, and second hands are not touching each other or the clock dial. Gently bend them if necessary to ensure free movement.
- Shaft Compatibility: Verify that the shaft length of your movement is appropriate for the thickness of your clock dial (2-6 mm for this model). Incorrect shaft length can lead to improper hand attachment and function.

Figure 7.1: Common issues and their solutions for clock movement stopping or inaccuracy.
8. Warranty Information
TIKROUND products are manufactured with quality and precision. For specific warranty details, please refer to the product packaging or contact customer support. Keep your purchase receipt for any warranty claims.
9. Customer Support
If you encounter any issues or have questions not covered in this manual, please contact TIKROUND customer support through the retailer where you purchased the product. Our team is available to assist you with further guidance and technical support.