1. Introduction
This manual provides essential information for the proper installation, operation, and maintenance of your Hydronix MH03-1812WH-QC Quick Connect RO Membrane Housing. Please read these instructions carefully before use to ensure optimal performance and safety.
The Hydronix MH03-1812WH-QC is a Quick Connect Reverse Osmosis (RO) membrane housing designed to accommodate standard membrane elements. It features a dual double O-ring design for leak-proof connections and 1/4-inch Quick Connect ports for easy installation into standard RO systems. This housing is NSF Standard 58 certified for use in Reverse Osmosis Water Treatment Systems.
2. Safety Information
- Always turn off the water supply and relieve system pressure before attempting any installation, maintenance, or membrane replacement.
- Do not exceed the maximum operating temperature of 125°F (51.7°C) or maximum operating pressure of 100 PSI (7 bar).
- Ensure all connections are secure and leak-free after installation or maintenance.
- Use only appropriate tools and follow all local plumbing codes.
- Keep the product out of reach of children.
3. Product Components
The Hydronix MH03-1812WH-QC Quick Connect RO Membrane Housing includes the following main components:
- Membrane Housing Body
- Housing Cap
- Dual Double O-rings (pre-installed or included)
- 1/4" Quick Connect Ports (integrated into the housing)
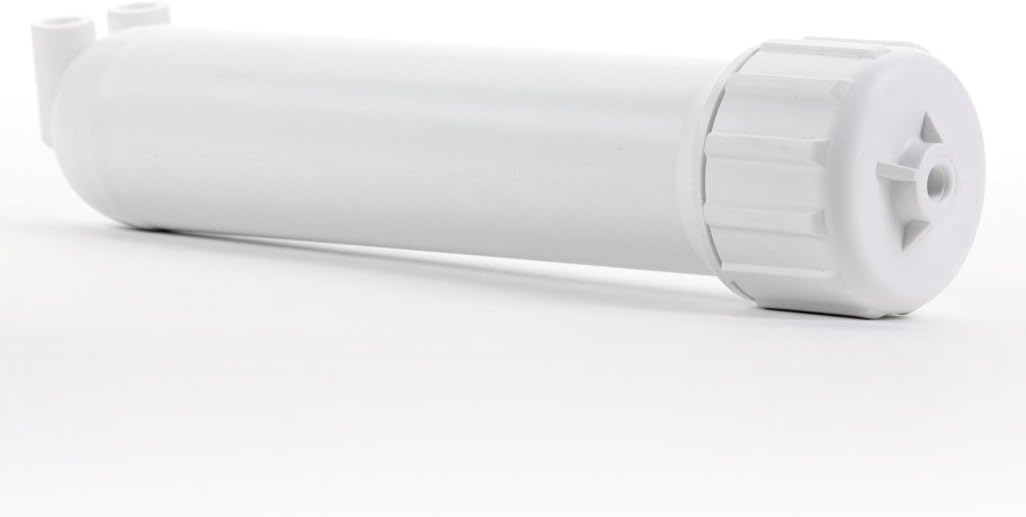
Image 1: The Hydronix MH03-1812WH-QC Quick Connect RO Membrane Housing, showing the main body and quick connect ports.

Image 2: The Hydronix MH03-1812WH-QC Membrane Housing with the cap removed, illustrating the internal threads and O-ring grooves for membrane insertion.
4. Setup and Installation
This membrane housing is designed for quick installation into any standard RO system that utilizes 1/4" Quick Connect hose connections. Adapters (not included) can be used if different hose sizes are required.
- Prepare the System: Turn off the main water supply to your RO system and relieve any existing pressure by opening a faucet or drain valve.
- Insert RO Membrane: Carefully unwrap your new RO membrane (not included) and insert it into the open end of the membrane housing. Ensure the membrane is fully seated inside the housing.
- Secure the Cap: Thread the housing cap onto the housing body. Hand-tighten the cap securely. Do not overtighten, as this can damage the O-rings or housing.
- Connect Tubing: Insert your 1/4" RO tubing firmly into the Quick Connect ports on the housing. Push the tubing in until it stops, then give a gentle tug to ensure it is securely locked in place.
- Check for Leaks: Slowly turn on the water supply to your RO system. Monitor all connections, especially around the housing cap and Quick Connect ports, for any signs of leaks. If leaks occur, turn off the water, relieve pressure, and re-seat the connections or cap.
- Flush the System: Follow your RO system's instructions for flushing a new membrane to remove any manufacturing residues.
5. Operating Instructions
Once properly installed and flushed, the Hydronix MH03-1812WH-QC membrane housing operates as an integral part of your Reverse Osmosis water filtration system. Ensure that the water supply to the system is on and that the system is functioning according to its design. No specific operational adjustments are required for the housing itself.
6. Maintenance
Regular maintenance ensures the longevity and efficiency of your RO system and membrane housing.
- Membrane Replacement: The RO membrane housed within this unit has a finite lifespan. Replace the RO membrane according to the membrane manufacturer's recommendations, typically every 2-3 years, depending on water quality and usage.
- O-Ring Inspection: During membrane replacement, inspect the O-rings for any signs of wear, cracks, or damage. Replace O-rings if necessary to maintain a leak-proof seal. Lubricate new O-rings with a food-grade silicone lubricant before installation.
- Housing Inspection: Periodically inspect the housing body and cap for any physical damage, cracks, or discoloration. If significant damage is observed, the housing should be replaced.
7. Troubleshooting
| Problem | Possible Cause | Solution |
|---|---|---|
| Water Leakage |
|
|
| Low Water Flow from RO System |
|
|
8. Specifications
- Model Number: MH03-1812WH-QC
- Materials of Construction: Polypropylene Housing and Cap, EPDM O-Ring
- Ports: 1/4" Quick Connect (QC)
- Maximum Temperature: 125°F (51.7°C)
- Maximum Pressure: 100 PSI (7 bar)
- Certifications: NSF Standard 58
- Dimensions: Approximately 14 x 3 x 3 inches
- Item Weight: Approximately 0.01 ounces
9. Warranty Information
Specific warranty details for the Hydronix MH03-1812WH-QC Quick Connect RO Membrane Housing are not provided in the product information. Please refer to the manufacturer's official website or contact their customer support for current warranty terms and conditions.
10. Customer Support
For technical assistance, replacement parts, or further inquiries regarding your Hydronix product, please visit the official Hydronix website or contact their customer service department. Contact information can typically be found on the product packaging or the manufacturer's website.