1. Introduction
Thank you for choosing the LANDMANN Pantera 1.0 Compact Gas Barbecue. This manual provides essential information for the safe assembly, operation, maintenance, and troubleshooting of your new gas grill. Please read these instructions carefully before use and retain them for future reference.
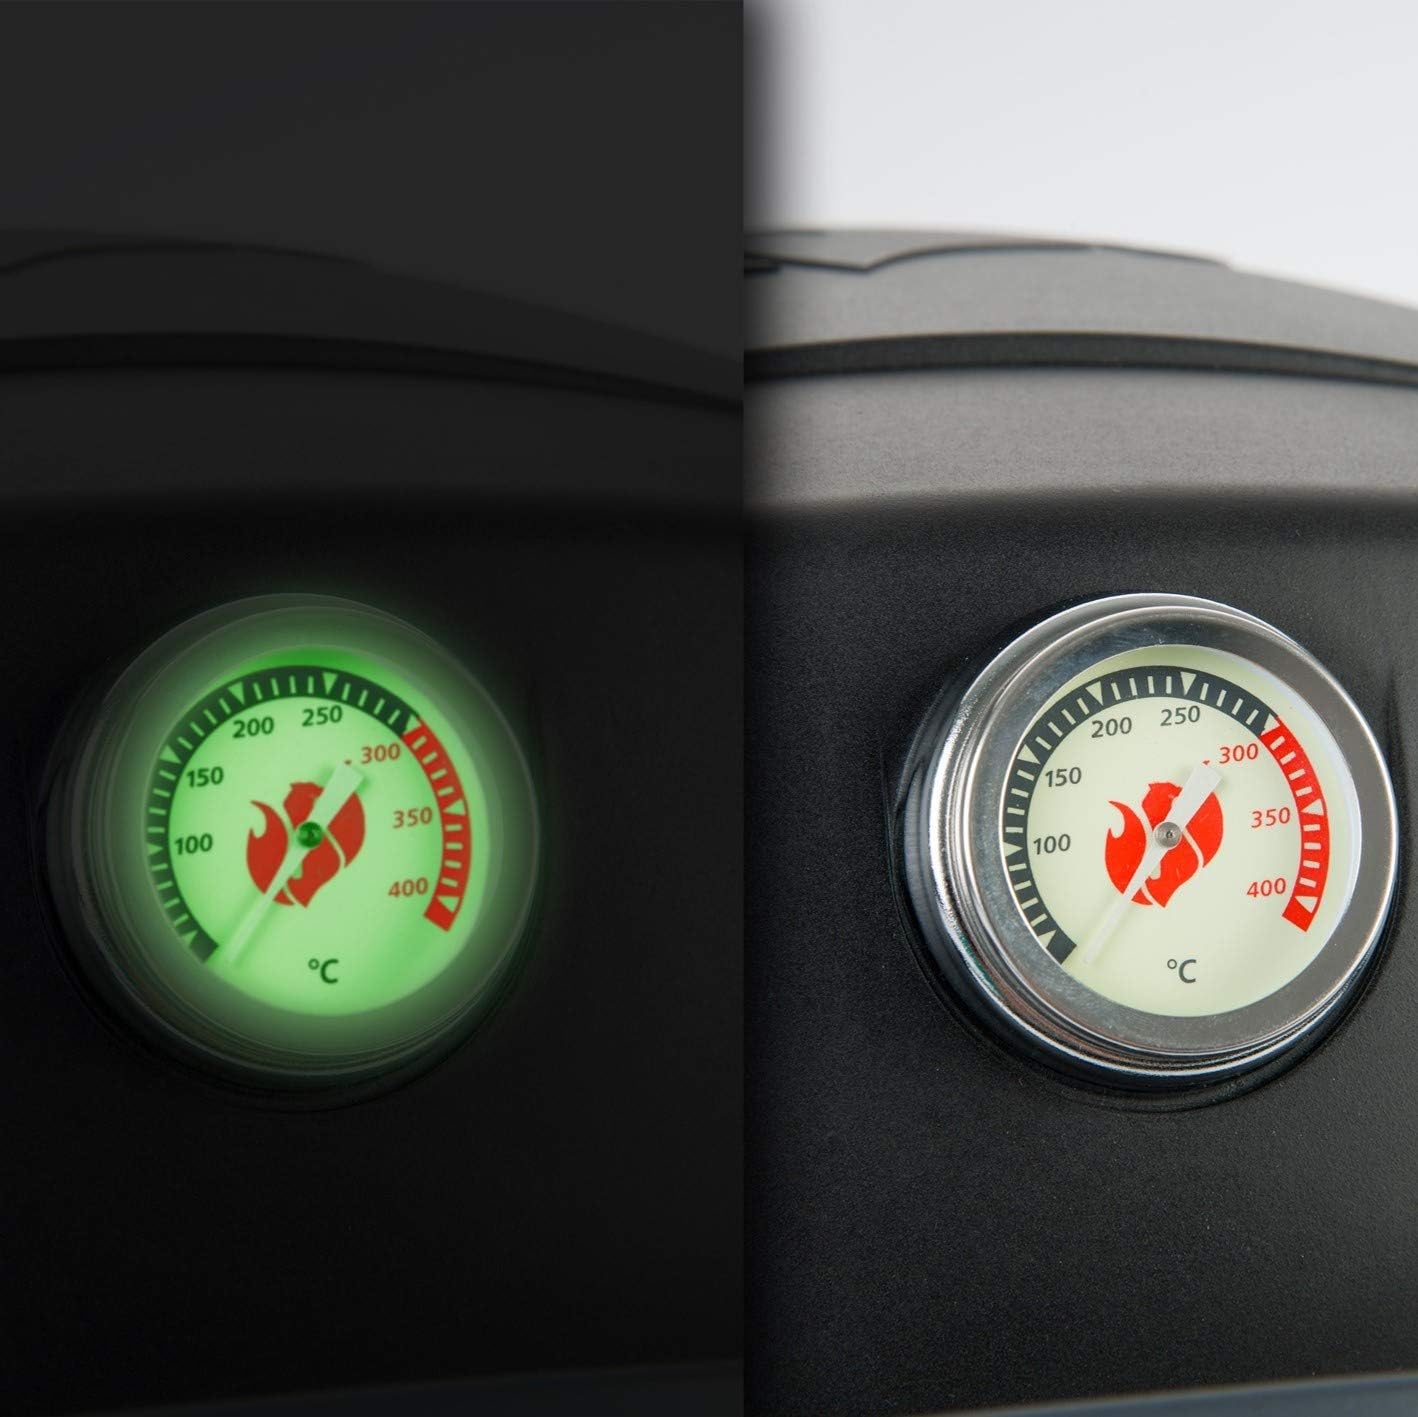
Image 1.1: The LANDMANN Pantera 1.0 Compact Gas Barbecue in its assembled state, showcasing its portable design.
Key Features:
- Compact gas barbecue with a temperature display on the cast aluminum lid (readable in the dark).
- Cooking surface of 48x37 cm, suitable for up to 6 people.
- Equipped with 1 continuously adjustable stainless steel burner (3 kW).
- Electronic ignition for easy startup.
- Enameled cast iron cooking grate for even heat distribution and durability.
2. Safety Information
WARNING: Failure to follow these safety instructions could result in serious personal injury or property damage.
- For Outdoor Use Only: Never operate this appliance indoors or in an enclosed area.
- Gas Leak Check: Always perform a leak test on all gas connections before initial use and after any gas cylinder change. Use a soapy water solution; bubbles indicate a leak.
- Ventilation: Ensure adequate ventilation. Do not obstruct the flow of combustion and ventilation air.
- Clearance: Maintain a minimum distance of 1 meter (3 feet) from combustible materials to the sides and rear of the appliance.
- Hot Surfaces: The barbecue surfaces become very hot during operation. Use heat-resistant gloves and avoid direct contact.
- Children and Pets: Keep children and pets away from the barbecue at all times.
- Fuel Type: Use only the specified type of gas (e.g., propane or butane, depending on your region and regulator).
- Regulator and Hose: Use only the pressure regulator and hose assembly supplied with the appliance. If replacement is necessary, contact the manufacturer for approved parts.
- Never Leave Unattended: Do not leave the barbecue unattended while in use.
- Grease Fires: In case of a grease fire, turn off the gas supply immediately. Do not use water to extinguish a grease fire.
3. Assembly Instructions
The LANDMANN Pantera 1.0 barbecue requires some assembly. It is recommended to have two people for assembly. Ensure all parts are present before beginning.
Required Tools:
- Screwdriver (Phillips head)
- Adjustable wrench
Assembly Steps:
- Unpack Components: Carefully remove all parts from the packaging. Check against the parts list (not provided in this manual, refer to your product's packaging for a complete list).
- Attach Side Shelves: Secure the side shelves to the main body of the barbecue using the provided screws and hardware.
- Install Burner: Place the stainless steel burner into its designated position within the firebox. Ensure it is seated correctly over the gas inlet.
- Place Cooking Grate: Position the enameled cast iron cooking grate onto the supports above the burner.
- Connect Gas Supply: Connect the gas hose and regulator to the barbecue's gas inlet and then to your gas cylinder. Ensure all connections are tight. Perform a leak test as described in the Safety Information section.

Image 3.1: Interior view of the barbecue with the stainless steel burner installed, ready for the cooking grate.

Image 3.2: The enameled cast iron cooking grate placed inside the barbecue, providing the cooking surface.
4. Operating Instructions
4.1. Connecting the Gas Cylinder
- Ensure the burner control knob is in the "OFF" position.
- Connect the regulator to the gas cylinder valve. Hand-tighten firmly.
- Open the gas cylinder valve slowly.
- Perform a leak test on all connections using a soapy water solution. If bubbles appear, tighten connections or replace faulty parts. Do not use the barbecue if a leak is detected.
4.2. Lighting the Burner
- Open the gas cylinder valve.
- Push in and turn the control knob to the "HIGH" position.
- Press and hold the electronic ignition button until the burner ignites. You should hear a clicking sound and see a flame.
- If the burner does not ignite within 5 seconds, turn the control knob to "OFF", wait 5 minutes for gas to dissipate, and repeat the lighting procedure.
- Once lit, adjust the flame to the desired cooking temperature using the control knob.
4.3. Temperature Control
The LANDMANN Pantera 1.0 features a temperature display integrated into the lid, allowing you to monitor the internal temperature of the barbecue. This display is designed to be readable even in low light conditions.

Image 4.1: The integrated temperature gauge on the barbecue lid, featuring a glow-in-the-dark function for visibility in various lighting conditions.
- Adjust the control knob to increase or decrease the flame size, thereby controlling the cooking temperature.
- Close the lid to allow the barbecue to preheat and maintain a consistent temperature.
- Monitor the temperature gauge to achieve optimal cooking conditions for your food.
4.4. Shutting Down the Barbecue
- Turn the burner control knob to the "OFF" position.
- Close the valve on the gas cylinder.
- Allow the barbecue to cool completely before moving or cleaning.
5. Maintenance and Cleaning
Regular maintenance ensures the longevity and safe operation of your barbecue.
5.1. After Each Use:
- Cooking Grate: Once the grate has cooled slightly but is still warm, use a grill brush to remove food residue. For stubborn residue, wash with warm soapy water and rinse thoroughly.
- Grease Tray: Empty and clean the grease tray regularly to prevent grease fires.
5.2. Periodic Maintenance:
- Burner Cleaning: Periodically inspect the burner ports for blockages (e.g., from insects). Use a wire brush or a stiff wire to clear any obstructions.
- Exterior Cleaning: Clean exterior surfaces with a mild detergent and a soft cloth. Avoid abrasive cleaners.
- Gas Hose and Regulator: Inspect the gas hose and regulator for cracks, cuts, or damage. Replace immediately if any damage is found.
- Storage: When not in use for extended periods, disconnect the gas cylinder and store the barbecue in a dry, protected area.
6. Troubleshooting
| Problem | Possible Cause | Solution |
|---|---|---|
| Burner does not light with electronic ignition. |
|
|
| Uneven heat or low flame. |
|
|
| Gas leak detected (smell of gas, bubbling with soapy water). |
|
|
7. Specifications
| Feature | Detail |
|---|---|
| Model Number | 12338 |
| Brand | Landmann |
| Product Dimensions (L x W x H) | 101 x 52.5 x 42 cm |
| Item Weight | 12.57 Kilograms |
| Cooking Surface | 48 x 37 cm |
| Burner Type | 1 x Stainless Steel Burner |
| Burner Power | 3 kW |
| Fuel Type | Gas |
| Ignition Type | Electronic |
| Grill Grate Material | Enameled Cast Iron |
| Lid Material | Cast Aluminum |
| Handle Material | Stainless Steel |
| Assembly Required | Yes |
| Special Feature | Compact, Temperature Display (readable in dark) |
| ASIN | B0787GLJHS |
| UPC/EAN | 04000810123384 |
8. Warranty and Support
For warranty information, technical support, or to order replacement parts, please contact Landmann customer service. Refer to the contact details provided with your product packaging or visit the official Landmann website.
Website: www.landmann.com (Please verify the correct regional website for support)