
Kick Push B0786P2VN3
Kick Push Scooter Upgrade Pack Instruction Manual
Model: B0786P2VN3
Product Overview
The Kick Push Upgrade Pack is designed to refresh and enhance your scooter's performance and appearance. This comprehensive kit includes essential components to replace worn parts and improve your riding experience.
The package contains:
- 2 High-Performance Scooter Wheels (100mm diameter)
- 4 Bearings (pre-installed in wheels)
- 1 Set of Handlebar Grips
- 1 Sheet of Griptape
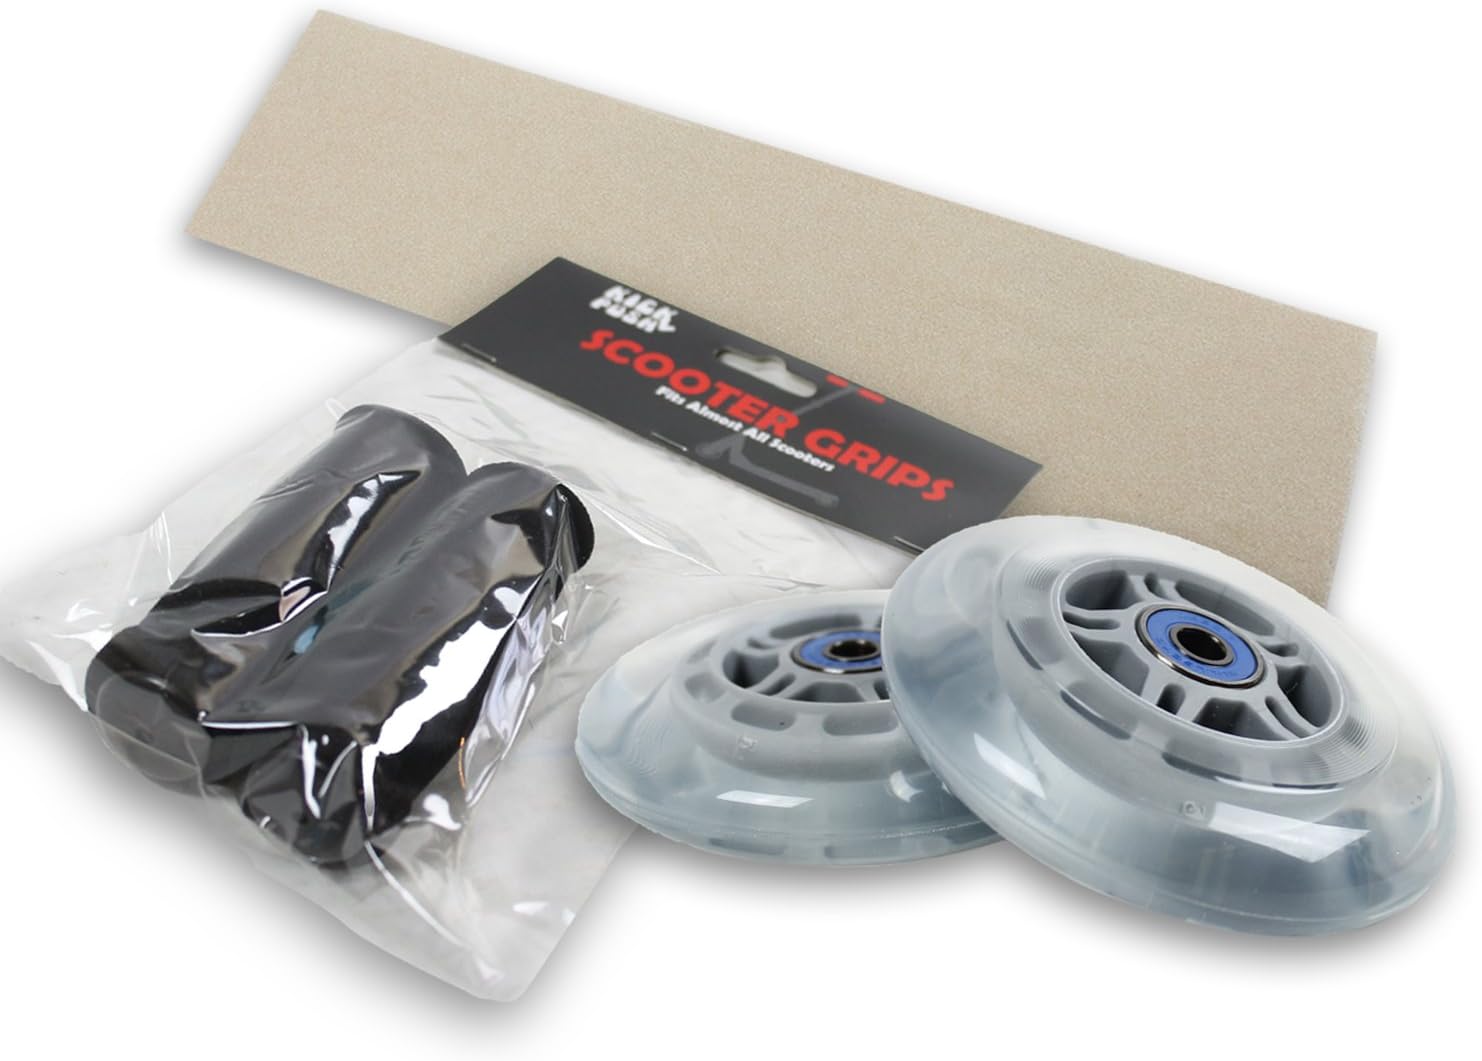
Image: Contents of the Kick Push Scooter Upgrade Pack, showing clear wheels, black handlebar grips, and a sheet of griptape.
Component Details
Scooter Wheels
The upgrade pack includes two high-performance, high-rebound clear scooter wheels. These wheels are designed for longevity and durability, providing a smooth and comfortable ride.
- Diameter: 100mm
- Width: Standard 24mm
- Material: Specialized outdoor urethane formula (88A Durometer)
- Profile: Rounded, for less friction and improved control.

Image: A pair of clear scooter wheels, highlighting their transparent design and integrated bearings.

Image: Technical diagram illustrating the 100mm diameter and 24mm width of the scooter wheel.
Bearings
The wheels come with pre-installed Bullseye bearings, engineered for smooth and efficient rotation.
- Balls: Super hard Chrome Steel (65 Rockwell Scale)
- Raceways: Deep-groove
- Retainer: Self-lubricating Delrin crown
- Lubrication: Low viscosity synthetic oil for minimal friction.
Handlebar Grips
The dense foam grips provide maximum control and comfort, designed for durability and non-bleeding colors.
- Length: 4 inches
- Center Hole Diameter: 7/8 inches (fits 7/8" bars)
- Compatibility: Compatible with virtually all scooters.
- Protection: Includes plastic end caps for bar and grip protection.

Image: A pair of black foam handlebar grips, ready for installation.

Image: Diagram detailing the dimensions of the handlebar grips, including length, inside diameter, and wall thickness.

Image: An example of the handlebar grips installed on a scooter's handlebars.
Griptape
A sheet of griptape is included to provide a non-skid surface for your scooter deck, ensuring secure footing.
- Dimensions: 4.5 inches wide by 16 inches long
- Grit: Industry Standard 80grit
- Adhesive: Super sticky, designed to adhere to any scooter deck.
- Application: Easy peel-off backing for simple application.

Image: The griptape sheet, showing the texture and the easy peel-off backing.

Image: A full view of the griptape sheet, featuring the "BLACK DIAMOND GRIP TAPE" pattern.
Setup and Installation
This section provides general guidance for installing the upgrade components. Specific scooter models may vary, so always refer to your scooter's original manual for detailed disassembly and assembly instructions.
Wheel Replacement
- Prepare the Scooter: Place your scooter on a stable surface. You may need to remove the front or rear axle bolts depending on which wheels you are replacing.
- Remove Old Wheels: Carefully loosen and remove the axle bolts. Slide the old wheels off the axles. Keep all washers and spacers in order, as they may be needed for reassembly.
- Install New Wheels: The new Kick Push wheels come with bearings pre-installed. Slide the new wheels onto the axles, ensuring any spacers are correctly positioned.
- Secure Wheels: Reinsert and tighten the axle bolts. Ensure the wheels spin freely without excessive wobble. Do not overtighten.
Handlebar Grip Installation
- Remove Old Grips: If your scooter has existing grips, carefully cut them off with a utility knife (exercise caution) or use compressed air to loosen them for removal. Clean the handlebar ends.
- Prepare New Grips: For easier installation, you can lightly spray the inside of the new grips or the handlebar ends with hairspray or rubbing alcohol. This acts as a lubricant and will dry to create a strong bond.
- Slide Grips On: Firmly slide the new Kick Push grips onto the handlebars. Twist and push until they are fully seated.
- Install End Caps: Insert the plastic end caps into the open ends of the grips.
- Allow to Dry: Allow any lubricant to dry completely before riding to ensure the grips are securely fixed.
Griptape Application
- Clean the Deck: Ensure the scooter deck surface is clean, dry, and free of any old griptape residue, dirt, or grease.
- Position Griptape: Carefully peel back a small section of the griptape's backing. Align the griptape with the scooter deck, ensuring it covers the desired area.
- Apply Gradually: Slowly peel off the remaining backing while pressing the griptape firmly onto the deck from one end to the other, smoothing out any air bubbles as you go. A roller or a firm object can help ensure even adhesion.
- Trim Excess (if necessary): If the griptape is larger than your deck, use a sharp utility knife to carefully trim the excess around the edges of the deck. You can use the edge of the deck as a guide.
- Edge Filing (optional): For a cleaner finish and to prevent peeling, you can lightly file the edges of the griptape with a metal file or sandpaper.
Operating Guidelines
Once the upgrade components are installed, your scooter is ready for use. Always prioritize safety when operating your scooter.
- Pre-Ride Check: Before each ride, inspect all components. Ensure wheels spin freely, handlebars are secure, and griptape provides adequate traction.
- Safety Gear: Always wear appropriate safety gear, including a helmet, knee pads, and elbow pads.
- Riding Surface: Ride on smooth, dry surfaces. Avoid rough terrain, wet conditions, or areas with loose debris.
- Weight Limit: Adhere to the scooter manufacturer's recommended weight limit.
- Braking: Familiarize yourself with your scooter's braking system and practice stopping safely.
Maintenance
Regular maintenance will extend the life of your Kick Push upgrade components and ensure optimal performance.
- Wheel and Bearing Care:
- Inspect wheels regularly for wear, cracks, or flat spots.
- Keep bearings clean and free of dirt and moisture. While the bearings are lubricated, excessive exposure to water or grit can reduce their lifespan.
- If wheels become noisy or sluggish, inspect bearings for debris.
- Grip Care:
- Check handlebar grips for tears or looseness. Replace if damaged.
- Ensure end caps are securely in place to protect the handlebars and grips.
- Griptape Care:
- Keep griptape clean. Use a stiff brush to remove dirt and debris.
- If griptape begins to peel at the edges, re-adhere with a strong adhesive or consider replacement.
- General Inspection: Periodically check all bolts and fasteners on your scooter, including axle bolts, to ensure they are tight.
Troubleshooting
This section addresses common issues you might encounter with your scooter after installing the upgrade pack.
| Problem | Possible Cause | Solution |
|---|---|---|
| Wheels not spinning freely | Axle bolts overtightened; debris in bearings; incorrect spacer placement. | Loosen axle bolts slightly; clean bearings; ensure spacers are correctly installed. |
| Handlebar grips slipping | Insufficient adhesion during installation; grips worn out. | Re-install grips using hairspray/alcohol; replace grips if worn. |
| Griptape peeling | Improper application; dirty deck surface; excessive wear. | Ensure deck is clean before application; firmly press down during application; re-adhere edges or replace griptape. |
| Scooter feels unstable | Loose components (e.g., handlebars, axles). | Check and tighten all bolts and fasteners on the scooter. |
Specifications
Detailed specifications for the Kick Push Upgrade Pack components:
| Component | Specification |
|---|---|
| Product Name | Kick Push Upgrade Pack for Razor Scooter |
| Brand | Kick Push |
| Model Number | B0786P2VN3 |
| UPC | 742091334564 |
| Scooter Wheels | 100mm Diameter, 24mm Width, 88A Durometer Urethane, Clear Color |
| Bearings | Bullseye, Chrome Steel balls, Low viscosity synthetic oil |
| Handlebar Grips | 4 inches Length, 7/8 inches Inner Diameter, Dense Foam, Black Color, with End Caps |
| Griptape | 4.5 inches x 16 inches, 80grit, Super Sticky Adhesive |
| Item Weight | 1 pound (approximate, for the pack) |
Ask a question about this manual
Ask about setup, troubleshooting, compatibility, parts, safety, or missing instructions. Manuals+ will review the question and use this page’s manual context to help answer it.