Introduction
This manual provides essential information for the installation, operation, and maintenance of your MOTORLINE Rosso 60 Automatic Roof Motor for garage doors. Please read this manual thoroughly before installation and use to ensure safe and efficient operation of the product.
Important Safety Information
WARNING: Improper installation or use can lead to serious injury or property damage. Always follow instructions carefully.
- This product is certified in accordance with European Community (CE) safety standards.
- The product complies with Directive 2011/65/EU (RoHS) regarding hazardous substances in electrical and electronic equipment.
- Ensure all electrical connections are made by a qualified professional and comply with local regulations.
- The motor operates on DC24V. Do not connect to incorrect voltage.
- The system includes a crushing safety system. Regularly test this feature to ensure proper function.
- Keep children and pets away from the garage door area during operation.
- Do not allow children to operate the remote controls.
- Disconnect power before performing any maintenance or repairs.
- Be cautious when handling the product and its electronic accessories, as they are susceptible to electric shocks. Observe all safety rules indicated in this manual.
Product Overview and Components
The MOTORLINE Rosso 60 is an automatic roof motor designed for section garage doors, suitable for doors up to 10m2. It features a robust design for intensive use and includes essential components for a complete automation system.

Figure 1: Overview of the MOTORLINE Rosso 60 system components, including the main motor unit, the durable iron guide rail, and two remote controls.
Included Components:
- Motor Unit: The main power unit (DC24V - 100W, 600N force) that drives the garage door.
- Iron Guide: A high-durability iron guide rail for smooth door movement.
- Remote Controls (x2): Two 433.92MHz Rolling Code remote controls for secure operation.
- Ceiling Brackets: Hardware for mounting the motor and guide to the ceiling.
- Door Bar: Component connecting the motor to the garage door, suitable for doors up to 2500mm height.
- User Manual: This instruction manual.
Technical Specifications
The following table details the technical specifications for the MOTORLINE Rosso 60 automatic garage door motor:

Figure 2: Technical specifications for Rosso EVO 60 (left column), Rosso EVO 100 (middle), and Rosso EVO 120 (right).
| Feature | Specification |
|---|---|
| Power Supply | AC 230V 50/60Hz |
| Motor Power | DC24V - 100W |
| Motor Force | 600 N |
| Speed | 140mm/sec |
| Noise Level | LpA <= 56dB (A) |
| Operating Temperature | -25°C to 55°C |
| Thermal Protection | 120°C |
| Protection Level (IP) | IP20 |
| Duty Cycle | 80% |
| Courtesy Light Duration | 3 minutes |
| Maximum Door Area | 10 m2 |
| Remote Control Memory | 100 remotes |
| Code Type | Rolling Code |
| Radio Frequency | 433.92 MHz |
| Item Weight | 16 Kilograms |
| Package Dimensions | 175 x 30 x 28 cm |
Installation Guide
The MOTORLINE Rosso 60 is designed for easy assembly. Follow these general steps for installation. For detailed diagrams and specific instructions, refer to the separate installation manual provided with your product.
Pre-Installation Checks:
- Ensure your garage door is in good working condition and moves freely.
- Verify that the door area does not exceed 10m2.
- Confirm that the door height is within 2500mm.
- Ensure a suitable power outlet (AC 230V 50/60Hz) is available near the installation point.
Installation Steps:
- Assemble the Iron Guide: Connect the sections of the durable iron guide rail according to the instructions.
- Mount the Motor Unit: Securely attach the motor unit to the end of the guide rail.
- Install Ceiling Brackets: Using the provided ceiling brackets, mount the assembled motor and guide rail centrally above the garage door opening. Ensure the rail is level and securely fastened.
- Connect the Door Bar: Attach the door bar from the motor's trolley to the garage door. Ensure proper alignment for smooth operation.
- Electrical Connection: Connect the motor to the AC 230V power supply. It is recommended to have this step performed by a qualified electrician.
- Adjust Limits and Safety System: Follow the specific instructions in the detailed installation manual to set the opening and closing limits of the door. Test the crushing safety system thoroughly to ensure it reverses the door upon obstruction.

Figure 3: The MOTORLINE Rosso 60 motor and rail system installed in a garage setting, showing the motor unit attached to the ceiling and the rail extending towards the garage door.

Figure 4: An installed MOTORLINE Rosso 60 system in a garage setting, demonstrating its integration with a typical garage door setup.
Operating Instructions
The MOTORLINE Rosso 60 is operated primarily using the provided remote controls. The motor unit also features an integrated control panel for direct operation and programming.
Remote Control Operation:
- Press the designated button on the remote control to open or close the garage door.
- Pressing the button again during operation will stop the door. A subsequent press will reverse its direction.
- The remote controls use a 433.92MHz Rolling Code for enhanced security, preventing unauthorized access.
- Ensure you are within the maximum operating range of 10 meters for reliable signal transmission.
Motor Unit Control Panel:
The motor unit features a digital display and control buttons for programming and manual operation.
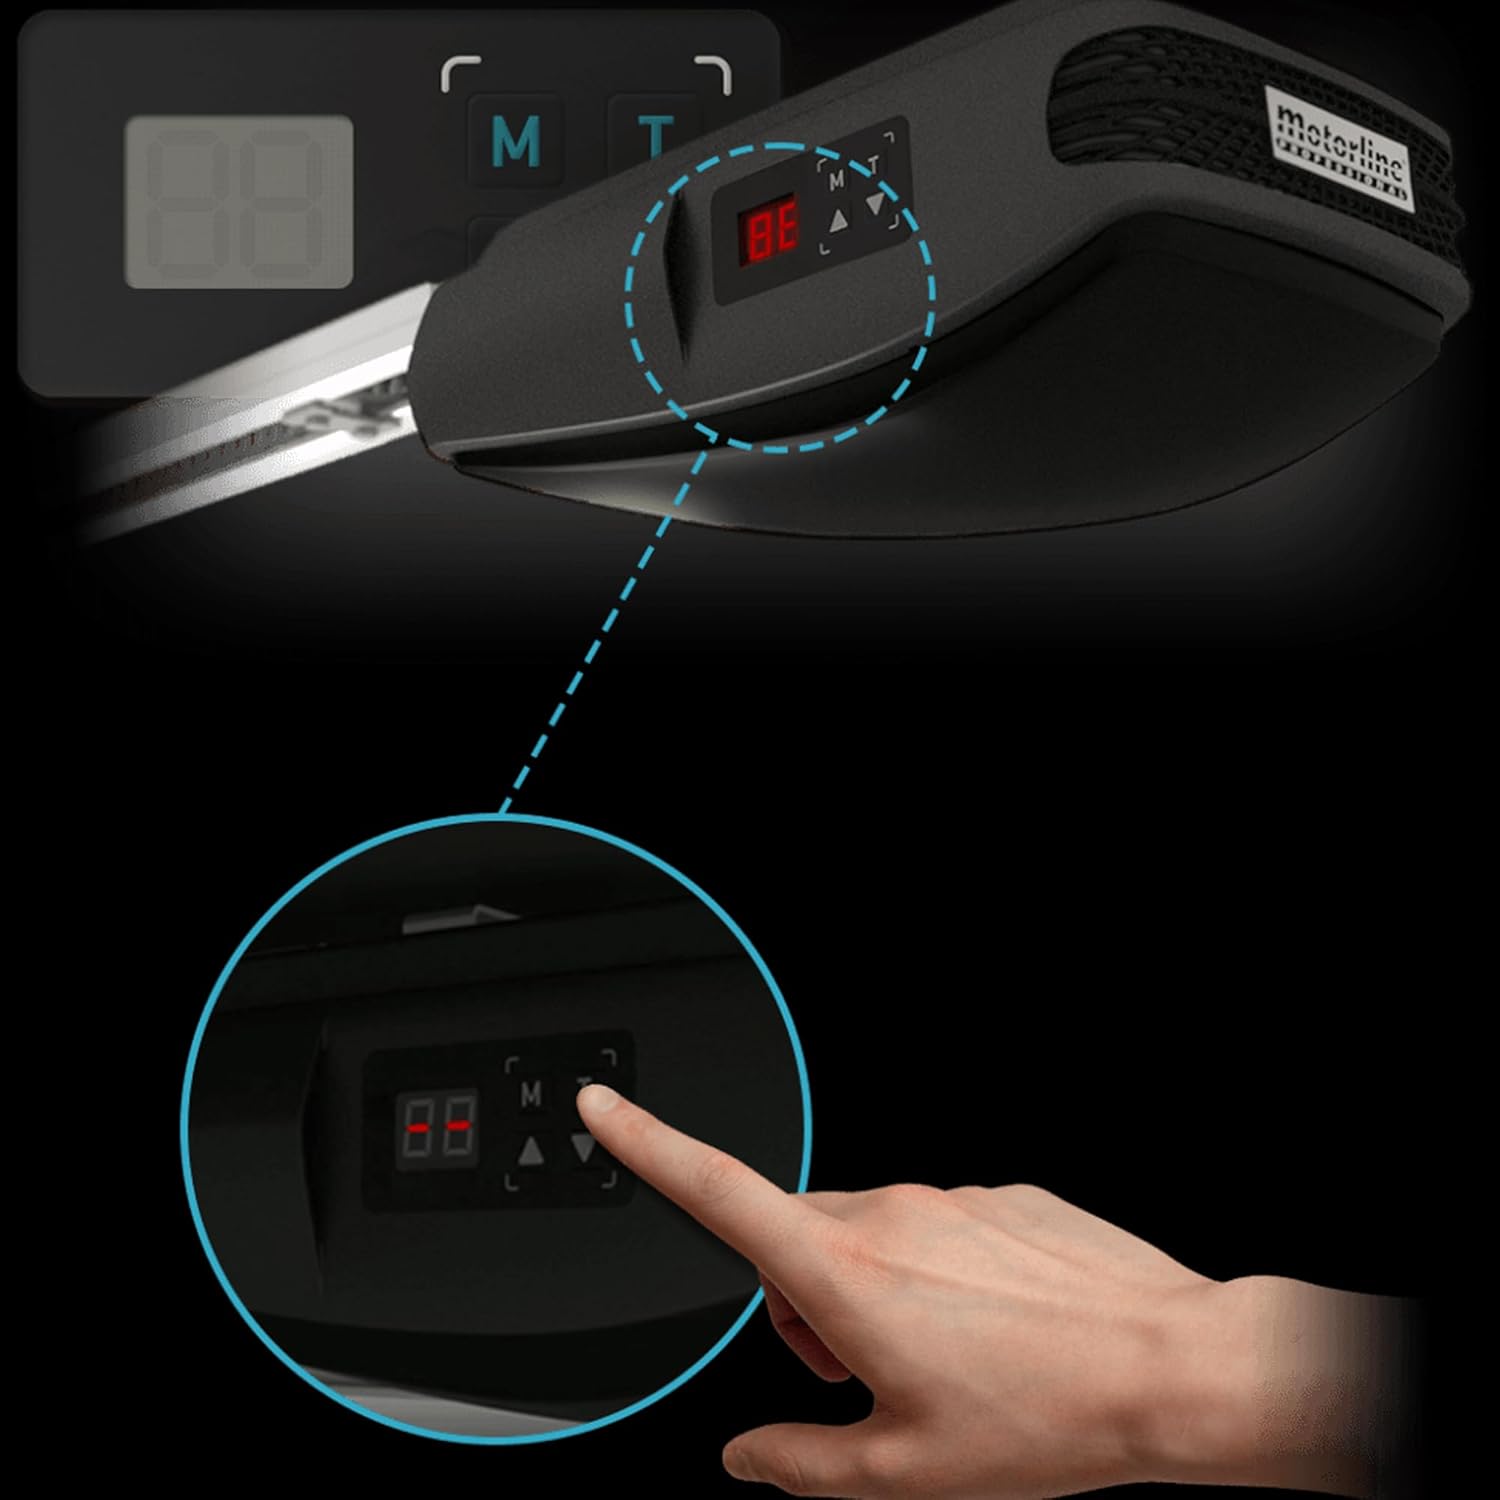
Figure 5: Detailed view of the MOTORLINE Rosso 60 motor's control panel, showing the digital display and navigation buttons for programming and manual control.
- The LED light on the motor unit will illuminate for 3 minutes after operation, providing courtesy lighting.
- Refer to the detailed programming section in the full manual for instructions on adding new remote controls or adjusting settings via the control panel.
Maintenance
Regular maintenance ensures the longevity and safe operation of your MOTORLINE Rosso 60 motor. Always disconnect power to the unit before performing any maintenance.
- Monthly: Inspect the garage door for proper balance and smooth movement. Lubricate moving parts of the door (hinges, rollers, springs) as recommended by the door manufacturer.
- Quarterly: Clean the iron guide rail to remove any dust or debris that could impede the trolley's movement.
- Annually: Have a qualified technician inspect the entire system, including electrical connections, motor performance, and safety features.
- Safety System Test: Periodically test the crushing safety system by placing an object (e.g., a roll of paper towels) in the door's path during closing. The door should reverse upon contact. If it does not, discontinue use and contact a technician.
Troubleshooting
This section provides solutions to common issues you might encounter. For problems not listed here, or if solutions do not resolve the issue, contact customer support.
| Problem | Possible Cause | Solution |
|---|---|---|
| Motor does not respond to remote control. | Dead remote battery; remote out of range; remote not programmed; power outage. | Replace remote battery; move closer to the motor; reprogram remote (refer to full manual); check power supply to the motor. |
| Door stops or reverses unexpectedly. | Obstruction in door path; safety sensor (photocell) misalignment or blockage; limit settings incorrect. | Remove any obstructions; clean and align safety sensors; reset door limits (refer to full manual). |
| Motor runs but door does not move. | Trolley disengaged from door; broken spring or cable on garage door. | Re-engage the trolley; inspect garage door hardware (contact a garage door specialist if springs/cables are broken). |
| Unusual noises during operation. | Lack of lubrication; loose hardware; worn components. | Lubricate door moving parts; check and tighten all mounting hardware; contact a technician if noise persists. |
Warranty and Customer Support
For information regarding the product warranty, please refer to the warranty card included with your purchase or contact the retailer where you purchased the MOTORLINE Rosso 60 motor. Warranty terms may vary by region and retailer.
If you require technical assistance, have questions about installation, or need to report a defect, please contact your authorized MOTORLINE dealer or the customer support provided by your retailer. Ensure you have your product model number (Rosso 60) and purchase details ready when contacting support.
Disposal Information
Proper disposal of this product and its components is essential for environmental protection and human health. This product contains electronic components and should not be discarded with household waste.
- The WEEE (Waste Electrical and Electronic Equipment) symbol (crossed-out wheeled bin) on the product indicates that it should not be disposed of with general household waste.
- Electronic accessories, such as remote controls, should also be disposed of separately.
- Batteries (if applicable) must not be discarded with household waste.
- Contact your local waste management authority or the retailer for information on recycling points and proper disposal methods for electronic waste and batteries in your area.
- Packaging materials (cardboard, plastic, etc.) should be separated and recycled according to local regulations.

Figure 6: Product label showing compliance markings (CE, RoHS) and disposal symbols (WEEE), indicating proper recycling is required.