
Introduction
The LUX Kono Smart Pro Edition Wi-Fi Thermostat is designed to provide personalized comfort, enhanced home décor, and energy savings. This manual provides comprehensive instructions for the installation, operation, and maintenance of your Kono thermostat, ensuring optimal performance and user experience.

Image: The LUX Kono Smart Pro Edition Wi-Fi Thermostat shown alongside its product packaging, highlighting its sleek design and "Pro Edition" branding.
Key Features
- Remote Control: Control your thermostat from anywhere using the LUX app, available for iOS and Android devices.
- Smart Home Integration: Compatible with Amazon Alexa and Apple HomeKit for voice control and integrated smart home ecosystems.
- Flexible Power Options: Can be powered by your system's C-wire or the included LUX Power Bridge.
- Universal Compatibility: Supports forced air gas, oil, and electric furnaces (up to 2H/1C), as well as heat pump systems (with or without auxiliary/emergency heat).
- Customizable Décor: Features unique décor-snap covers, allowing you to change the thermostat's appearance to match your personal style.
- Effortless Savings: Incorporates "Home & Away Aware" functionality to optimize energy usage based on occupancy.
Package Contents
Verify that all items are present in your product packaging:
- LUX Kono Smart Pro Edition Wi-Fi Thermostat
- LUX Power Bridge (for installations without a C-wire)
- Installation Guide
- Mounting Hardware
Setup and Installation
Before beginning installation, ensure power to your HVAC system is turned off at the circuit breaker. It is recommended to consult a qualified HVAC technician if you are unsure about any steps.
1. Wiring Your Thermostat
The Kono thermostat can be powered by a C-wire or the included LUX Power Bridge. Refer to the wiring diagram provided in the separate Installation Guide for specific connections based on your HVAC system type (e.g., conventional, heat pump).
- C-Wire Connection: If your system has a C-wire, connect it to the 'C' terminal on the Kono thermostat.
- LUX Power Bridge: If a C-wire is not available, install the LUX Power Bridge according to its instructions to provide continuous power to the thermostat.
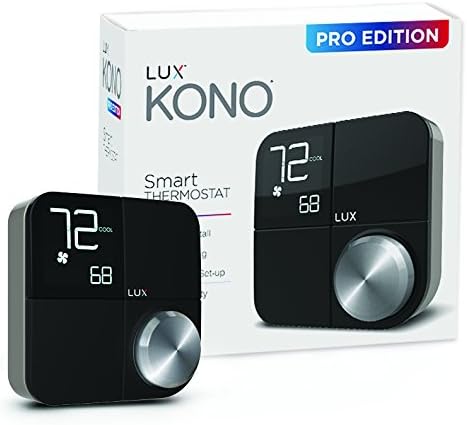
Image: Rear view of the LUX Kono thermostat, displaying the various wiring terminals for connection to HVAC systems.
2. Mounting the Thermostat
After wiring, securely mount the thermostat to the wall using the provided mounting hardware. Ensure it is level for proper operation and aesthetic appeal.
3. Initial Power-Up and Configuration
Once mounted, restore power to your HVAC system. The thermostat display will illuminate. Follow the on-screen prompts for initial setup, including:
- System Type Selection: Select your HVAC system type (e.g., conventional, heat pump). For heat pump systems, ensure the correct O/B valve setting (O for cooling, B for heating) is configured in the advanced settings if your system requires it. Consult your HVAC technician or the LUX support for guidance on this specific setting if needed.
- Wi-Fi Connection: Connect the thermostat to your home Wi-Fi network. This enables remote control via the LUX app and smart home integrations.
- Date and Time: Set the current date and time.
Operating Instructions
Manual Control
The Kono thermostat features a clear LCD display and intuitive controls for manual adjustments.
- Temperature Adjustment: Use the dial or buttons (depending on model variant) to increase or decrease the set temperature.
- Mode Selection: Toggle between heating, cooling, auto, and off modes.
- Fan Control: Select fan operation (Auto or On).
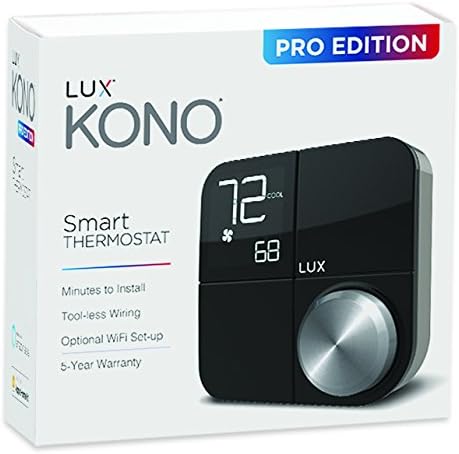
Image: Front view of the LUX Kono Smart Thermostat, showing its digital display with current and set temperatures.
Using the LUX App
Download the LUX app from the Apple App Store or Google Play Store to unlock the full potential of your Kono thermostat.
- Remote Access: Adjust settings, change modes, and monitor your home's temperature from anywhere.
- Scheduling: Create custom heating and cooling schedules to optimize comfort and energy efficiency.
- Home & Away Aware: Utilize geofencing features to automatically adjust temperature settings when you leave or return home.
- Energy Reports: View detailed energy usage reports to identify savings opportunities.
Voice Control Integration
Integrate your Kono thermostat with Amazon Alexa or Apple HomeKit for convenient voice control. Follow the instructions provided by Amazon or Apple to link your LUX account.
- Example Commands (Alexa): "Alexa, set the living room thermostat to 72 degrees."
- Example Commands (HomeKit): "Hey Siri, turn on the AC."
Maintenance
The LUX Kono thermostat requires minimal maintenance to ensure long-term performance.
- Cleaning: Gently wipe the thermostat's surface with a soft, damp cloth. Do not use abrasive cleaners or solvents.
- Software Updates: Ensure your thermostat's firmware is up to date through the LUX app to receive the latest features and performance improvements.
- HVAC System Maintenance: Regular maintenance of your HVAC system by a qualified technician is crucial for efficient operation and can impact thermostat performance.
Troubleshooting
If you encounter issues with your Kono thermostat, refer to the following common solutions:
| Problem | Possible Cause | Solution |
|---|---|---|
| Thermostat not powering on. | No power from C-wire or Power Bridge; circuit breaker tripped. | Check C-wire connection or Power Bridge installation. Verify circuit breaker for HVAC system is on. |
| Heating when set to cool, or vice versa (Heat Pump systems). | Incorrect O/B valve setting. | Access advanced settings on the thermostat or via the LUX app to adjust the O/B valve setting (O for cooling, B for heating). Consult LUX support if unsure. |
| Cannot connect to Wi-Fi or app loses connection. | Weak Wi-Fi signal; incorrect Wi-Fi password; router issues. | Ensure thermostat is within Wi-Fi range. Re-enter Wi-Fi password carefully. Restart your Wi-Fi router. Check for app updates. |
| Thermostat display is dim or limited information. | This model has a concise display; not a malfunction. | The Kono thermostat's display is designed to be minimalist. Detailed information and advanced controls are primarily accessed through the LUX app. |
| Temperature not reaching set point. | HVAC system malfunction; incorrect thermostat settings. | Verify thermostat mode (Heat/Cool/Auto) and set temperature. Ensure HVAC system is functioning correctly. Consult an HVAC technician if the issue persists. |
For further assistance, please contact LUXPRO Customer Support.
Specifications
| Attribute | Detail |
|---|---|
| Brand | LUXPRO |
| Model Name | PEKN-S-B1-B04 |
| Controller Type | Vera, Apple HomeKit, Amazon Alexa, iOS, Android |
| Special Feature | Smart Scheduling |
| Color | Black |
| Specific Uses For Product | Heat Pump |
| Temperature Control Type | Remote or Programmable |
| Connectivity Technology | Wi-Fi |
| Included Components | Thermostat |
| Power Source | Electric (C-wire or Power Bridge) |
| Item Weight | 1.1 Pounds (approx. 0.5 kg) |
| Material | Plastic |
| Shape | Rectangular |
| Display Type | LCD |
| Control Type | Button Control |
| Control Method | Voice, App, Manual |
| Mounting Type | Wall Mount |
| Backlight | Yes |
| Specification Met | Energy Star |
| Product Dimensions | 2.8 x 6.5 x 6 inches (approx. 7.1 x 16.5 x 15.2 cm) |
Warranty and Support
For warranty information and technical support, please refer to the official LUXPRO website or contact their customer service directly. Keep your purchase receipt as proof of purchase.
LUXPRO Customer Support:
- Visit the LUXPRO Store on Amazon for more information.
- Refer to the contact information provided in your product packaging or on the official LUXPRO website.


