
1. Product Overview
The J.LUMI YCA1050 PIR Motion Sensor Light Switch is a passive infrared (PIR) sensor designed to detect motion by sensing changes in infrared energy (body heat). This device automatically controls connected lighting equipment or other electronic devices, providing convenience and energy savings. Its slim profile and 360-degree detection capability make it suitable for various indoor applications.
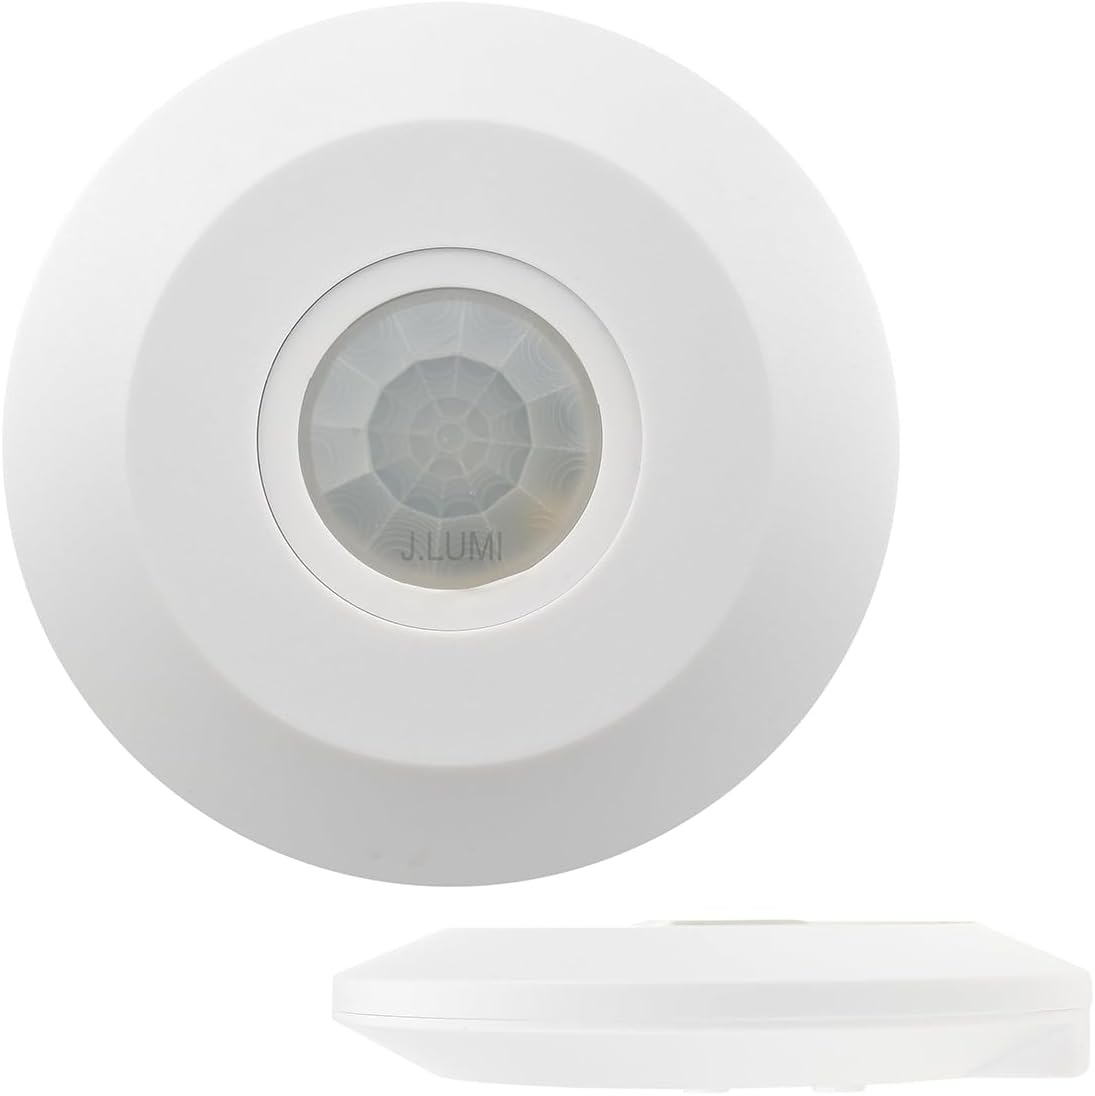
Figure 1: Top and side view of the J.LUMI YCA1050 PIR Motion Sensor, highlighting its compact and slim design.
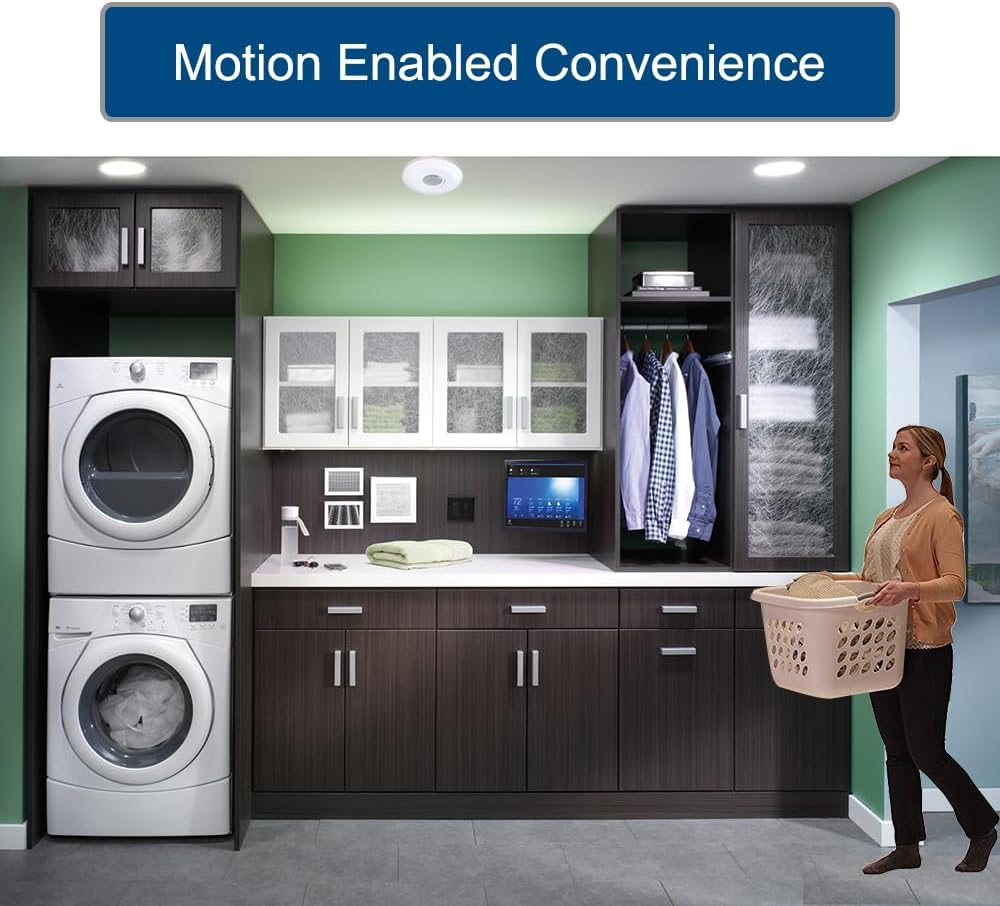
Figure 2: The YCA1050 motion sensor installed in a laundry room ceiling, demonstrating its discreet integration and motion-activated convenience.
2. Safety Information
Please read and understand all instructions before installing or operating this device. Failure to follow these instructions may result in electric shock, fire, or property damage.
- WARNING: Risk of Electric Shock. Disconnect power at the circuit breaker or fuse box before installation or servicing.
- Installation should be performed by a qualified electrician in accordance with all national and local electrical codes.
- Do not install if the product is damaged.
- This device is rated for indoor use only (IP22). Do not expose to water or excessive moisture.
- Ensure all wire connections are secure and properly insulated.
- Do not exceed the maximum load ratings: 800W (100-130VAC) or 1200W (220-240VAC).
3. Key Features
- Ultra Slim Profile: Modern design with an approximately 1-inch thin profile for discreet ceiling integration.
- Full Detection Capability: Offers 360-degree surround and 160-degree downward detection.
- Wide Detection Range: Up to 50 feet (with clear line of sight) at 70°F operating temperature.
- Passive Infrared Technology: Detects moving objects by infrared signals, consuming only 0.1 Watt on standby.
- Photocell Enabled: Built-in photocell with adjustable sensitivity to activate lighting only when ambient light levels are low.
- Adjustable Time Delay: Configurable delay for how long the connected load remains on after motion ceases (5 seconds to 8 minutes).
- Dual Voltage Compatibility: Operates with 85-265V AC input.
- Versatile Applications: Ideal for laundry rooms, hallways, garages, walk-in closets, or integration with home alarm systems.

Figure 3: Side profile view illustrating the ultra-slim 1-inch thickness and 4.5-inch diameter of the YCA1050 sensor.
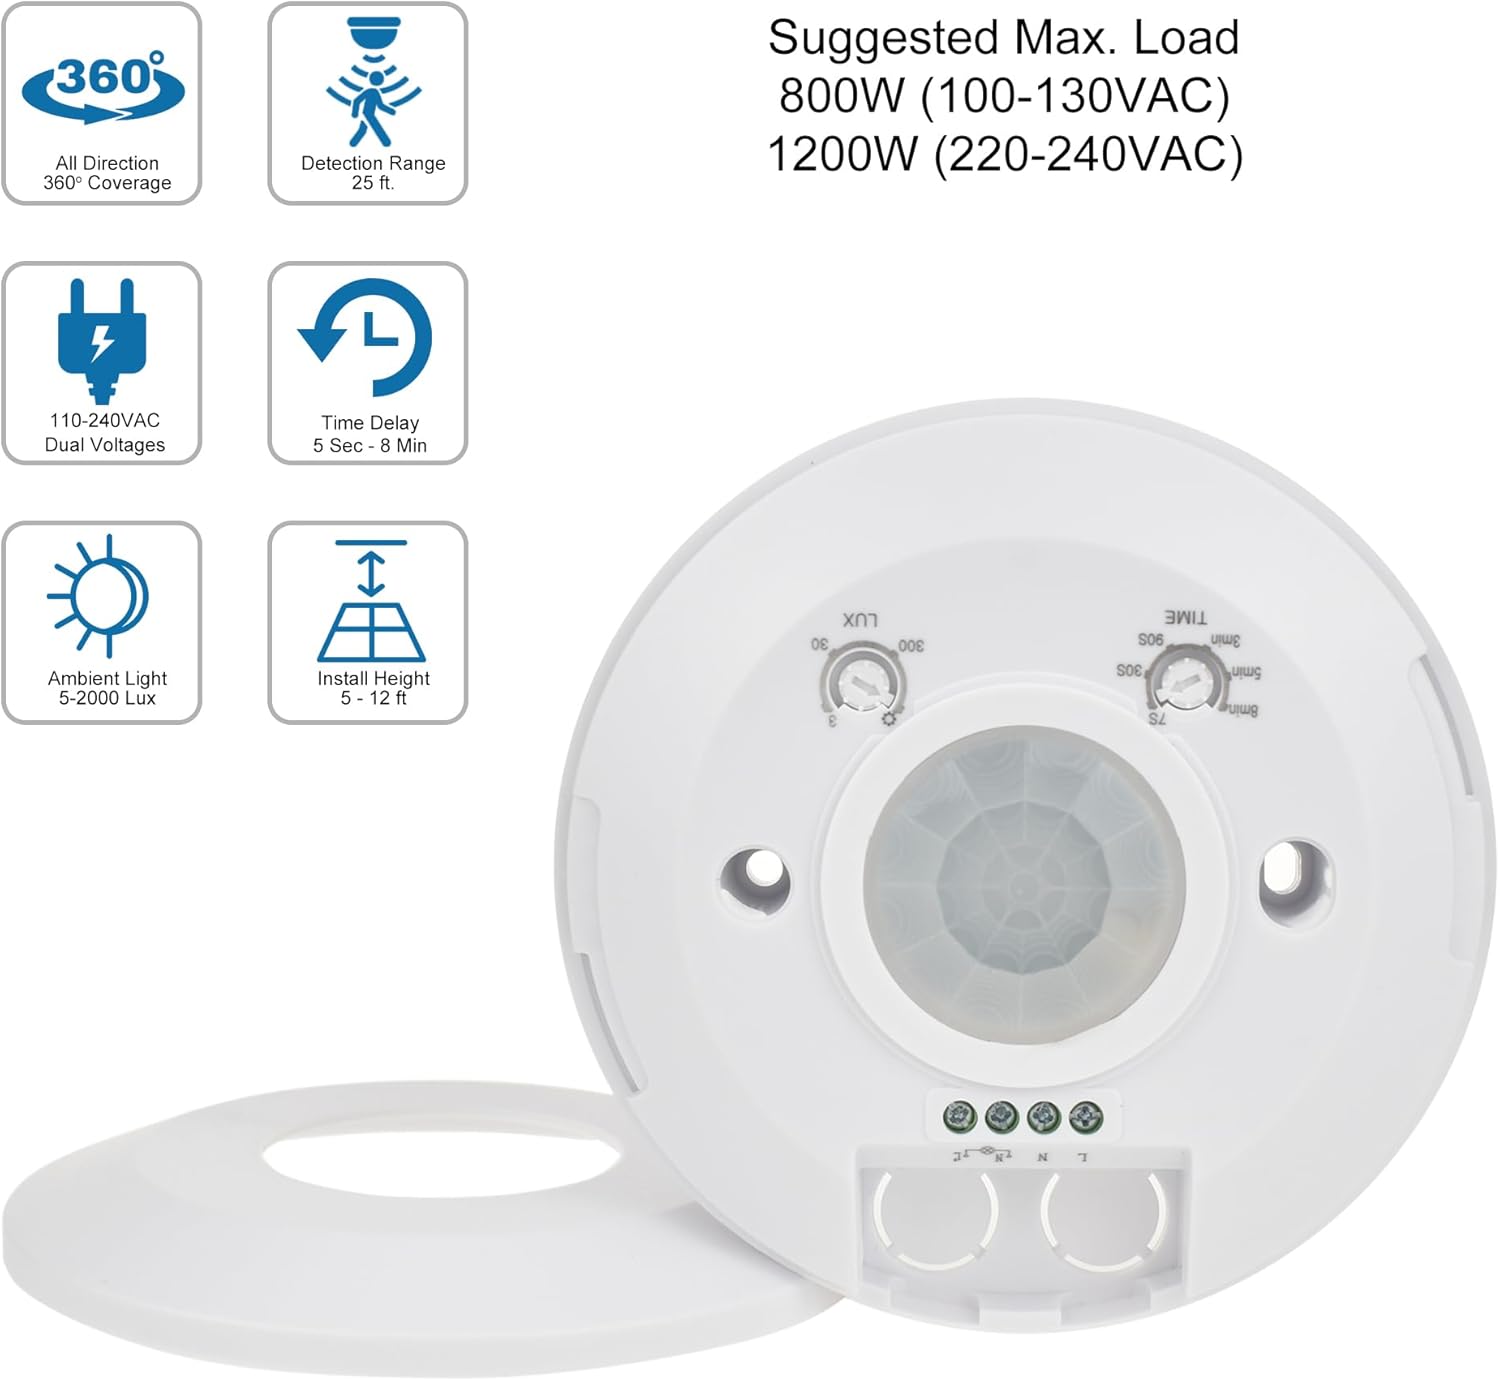
Figure 4: Overview of the sensor's capabilities including 360° coverage, 25 ft detection range, dual voltage, time delay, ambient light sensitivity, and recommended installation height. Also shows the LUX and TIME adjustment dials.
4. Package Contents
Verify that all components are present before beginning installation:
- J.LUMI YCA1050 PIR Motion Sensor Unit
- Mounting Screws (for ceiling electrical box)
- Plastic Sleeves (for drywall mounting)
5. Technical Specifications
| Model Number | YCA1050 |
| Power Source | Corded Electric |
| Input Voltage | 85-265V AC |
| Max. Load (100-130VAC) | 800W |
| Max. Load (220-240VAC) | 1200W |
| Detection Technology | Passive Infrared (PIR) |
| Detection Angle | 360 degrees (surround), 160 degrees (downward) |
| Maximum Detection Range | 50 feet (approx. 15 meters) |
| Time Delay Adjustment | 5 seconds to 8 minutes |
| Ambient Light Sensitivity (LUX) | Adjustable (5-2000 Lux) |
| Recommended Installation Height | 5 - 12 feet |
| Operating Temperature | 70°F (approx. 21°C) |
| Dimensions (D x H) | 4.5" x 1" (11.43 cm x 2.54 cm) |
| Item Weight | 3.2 Ounces (approx. 90.7 grams) |
| IP Rating | IP22 (Indoor Use) |
6. Installation Guide
Before starting, ensure power is disconnected at the circuit breaker. It is recommended that installation be performed by a qualified electrician.
6.1 Wiring Instructions
Use 14 AWG electrical wire for connections. The sensor has clearly marked terminals for Line (IN) and Load (OUT) connections, including Neutral (N) and Live (L) for both input and output.
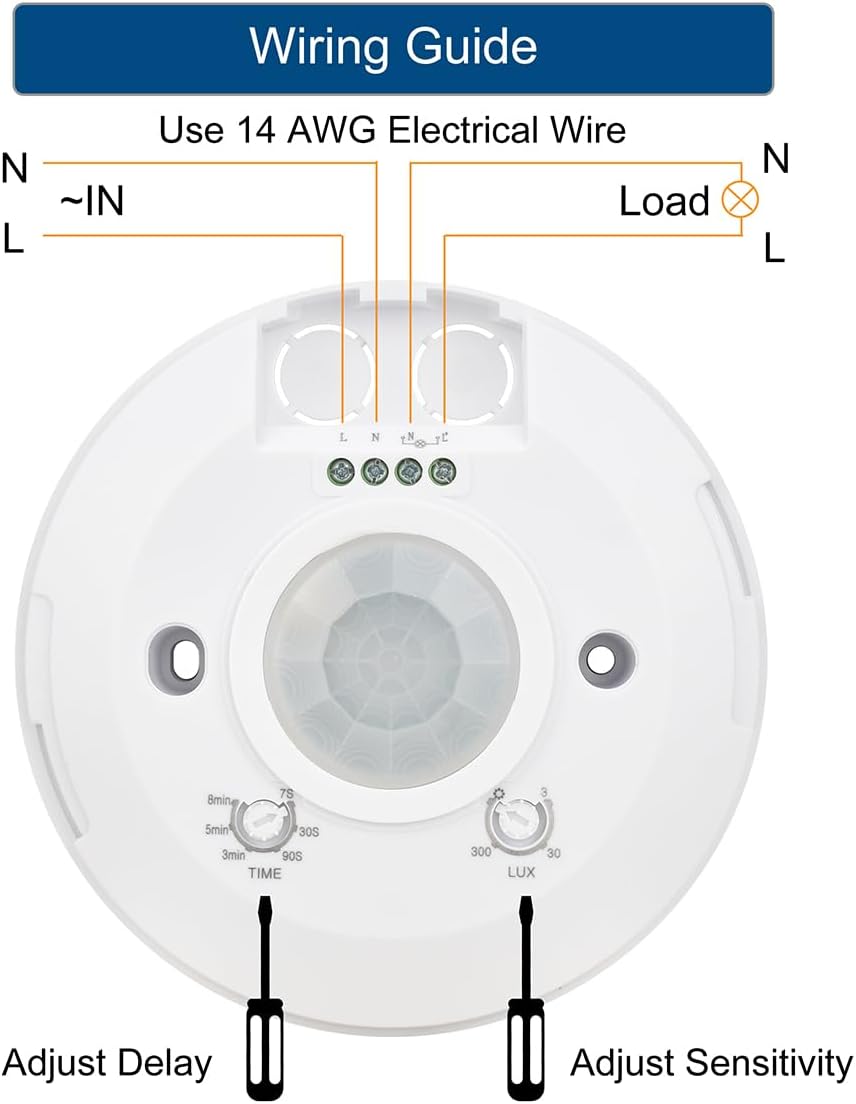
Figure 5: Wiring diagram for the YCA1050 sensor, showing connections for Neutral (N) and Live (L) for both input power and the connected load. Note the small terminal screws requiring a tiny Philips screwdriver.
- Identify the incoming power wires (Line IN) and the wires going to your light fixture or load (Load OUT).
- Connect the Neutral (N) wire from the incoming power to the 'N ~IN' terminal on the sensor.
- Connect the Live (L) wire from the incoming power to the 'L ~IN' terminal on the sensor.
- Connect the Neutral (N) wire going to your load to the 'N Load' terminal on the sensor.
- Connect the Live (L) wire going to your load to the 'L Load' terminal on the sensor.
- Ensure all connections are tight and secure.
Note: The sensor does not include a ground connection. Ensure proper grounding is maintained within your electrical box or system as per local codes.
6.2 Mounting Options
The YCA1050 sensor can be mounted in two primary ways:
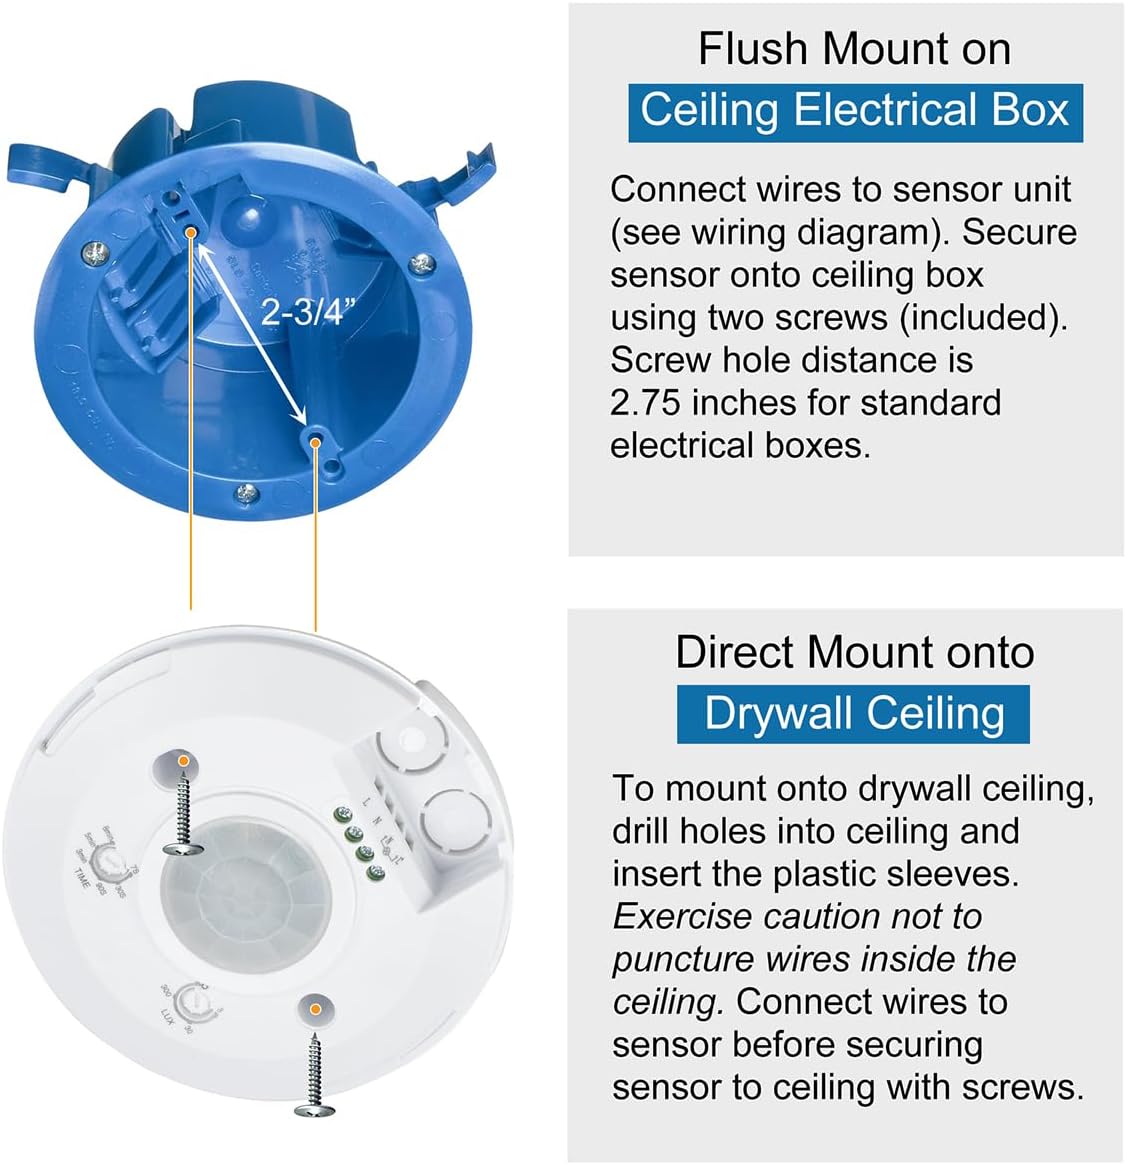
Figure 6: Illustrations of flush mounting to a ceiling electrical box and direct mounting to a drywall ceiling.
6.2.1 Flush Mount on Ceiling Electrical Box
- Connect wires to the sensor unit as per the wiring diagram (Figure 5).
- Secure the sensor onto the ceiling electrical box using the two included screws. The screw hole distance on the sensor is approximately 2.75 inches, designed to align with standard electrical boxes.
6.2.2 Direct Mount onto Drywall Ceiling
- Before mounting, drill appropriate holes into the drywall ceiling.
- Insert the provided plastic sleeves into the drilled holes.
- Exercise caution to avoid puncturing any wires inside the ceiling during drilling.
- Connect wires to the sensor before securing the sensor to the ceiling with the screws into the plastic sleeves.
6.3 Optimal Placement
- For optimal performance, install the sensor approximately 6 feet away from your light fixture to prevent the photocell from being affected by the light it controls.
- Avoid installing near heat sources (e.g., vents, radiators) or in direct sunlight, as this can cause false triggers.
- Ensure the sensor has a clear line of sight to the area where motion is to be detected.
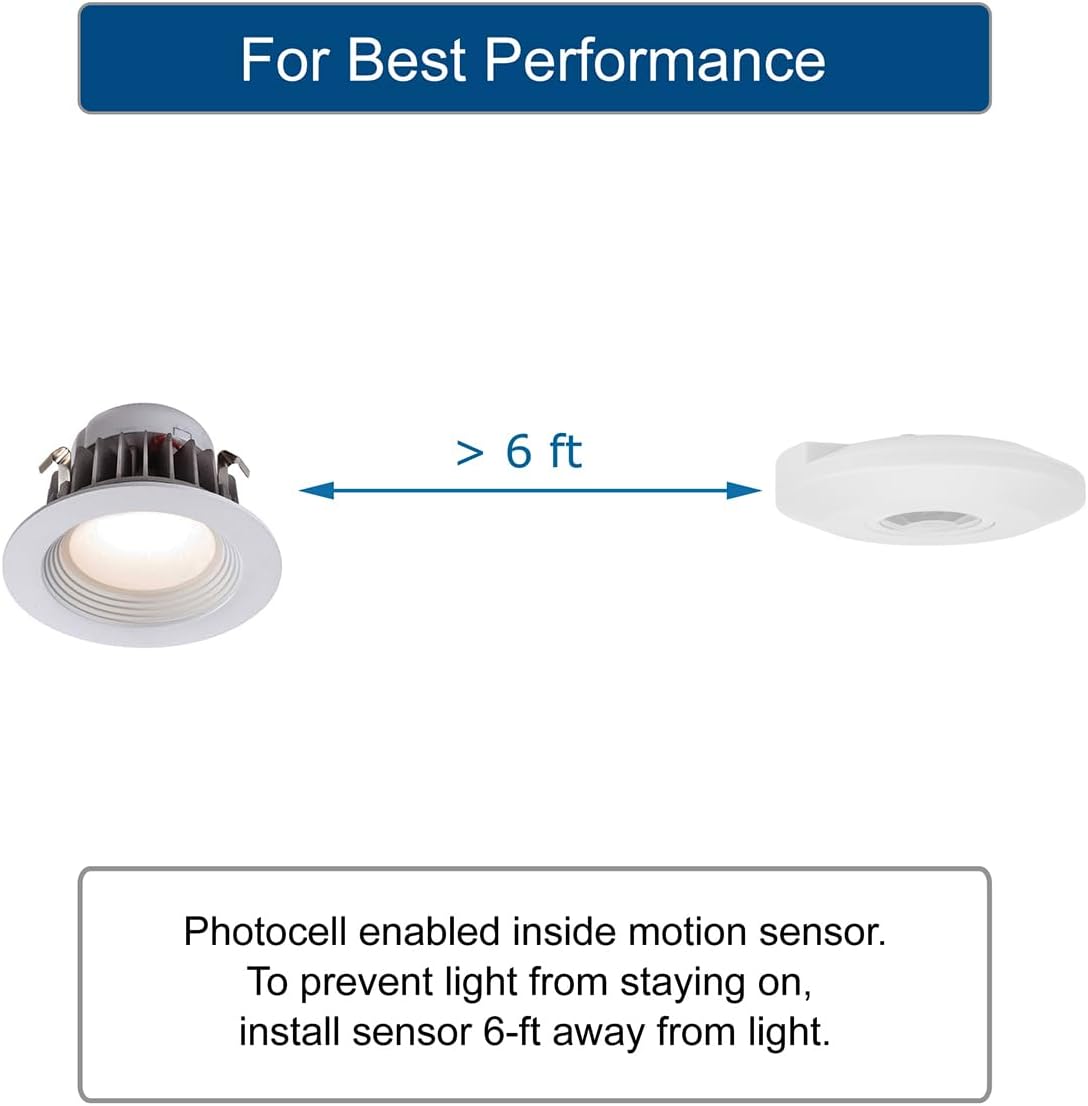
Figure 7: Diagram illustrating the recommended installation distance of greater than 6 feet between the motion sensor and the light fixture for best photocell performance.
7. Operation and Settings
After installation, restore power to the circuit. The sensor will enter a warm-up period (typically 30-60 seconds) during which it may cycle on and off. Once warm-up is complete, the sensor is ready for adjustment.
7.1 Adjusting Time Delay (TIME)
The "TIME" dial controls how long the connected light or device remains on after motion is no longer detected. Use a small Philips screwdriver to adjust this dial.
- Rotate clockwise to increase the delay time.
- Rotate counter-clockwise to decrease the delay time.
- Available settings range from approximately 5 seconds to 8 minutes.
7.2 Adjusting Ambient Light Sensitivity (LUX)
The "LUX" dial controls the ambient light level at which the sensor will activate the connected device. This feature ensures the light only turns on when needed, saving energy. Use a small Philips screwdriver to adjust this dial.
- Rotate towards the "Sun" icon (higher LUX value) for the sensor to activate in brighter conditions (e.g., during the day).
- Rotate towards the "Moon" icon (lower LUX value) for the sensor to activate only in darker conditions (e.g., at night or in very dim areas).
- Available settings range from approximately 5 Lux (dark) to 2000 Lux (bright).
Tip: To test the motion detection regardless of ambient light, set the LUX dial to the maximum (Sun icon). Once motion detection is confirmed, adjust the LUX dial to your desired ambient light level.
8. Maintenance
The J.LUMI YCA1050 PIR Motion Sensor requires minimal maintenance.
- Cleaning: Periodically wipe the sensor lens with a soft, dry cloth to remove dust or debris that may obstruct detection. Do not use abrasive cleaners or solvents.
- Inspection: Occasionally inspect the sensor for any visible damage or loose connections. If any issues are found, disconnect power and consult a qualified electrician.
9. Troubleshooting
If you experience issues with your J.LUMI YCA1050 PIR Motion Sensor, refer to the following common problems and solutions:
| Problem | Possible Cause | Solution |
|---|---|---|
| Light does not turn on when motion is detected. |
|
|
| Light stays on constantly or turns on without motion. |
|
|
| Detection range is poor or inconsistent. |
|
|
10. Warranty and Support
10.1 Warranty Information
The J.LUMI YCA1050 PIR Motion Sensor Light Switch comes with a 1-year limited warranty from the date of purchase. This warranty covers defects in materials and workmanship under normal use. It does not cover damage resulting from improper installation, misuse, abuse, accidents, or unauthorized repairs.
Please retain your proof of purchase for warranty claims.
10.2 Customer Support
For technical assistance, troubleshooting beyond this manual, or warranty inquiries, please contact J.LUMI customer support through the retailer where the product was purchased or visit the official J.LUMI store page on Amazon:
