1. Introduction
Thank you for choosing the Dynamic Power AQ-HW304 Canister Filter. This external filter system is designed to provide efficient mechanical, biological, and chemical filtration for aquariums up to 500 liters. Featuring a powerful 2000 liters per hour flow rate and an integrated UV sterilizer, it helps maintain clear, healthy water for your aquatic environment. Please read this manual thoroughly before installation and operation to ensure proper use and longevity of your filter.

Figure 1.1: Dynamic Power AQ-HW304 Canister Filter. This image displays the main unit of the canister filter, showcasing its compact and functional design.
2. Safety Instructions
- Always disconnect the power supply before performing any maintenance, cleaning, or assembly.
- Ensure all electrical connections are dry and away from water.
- Do not operate the filter if any part is damaged, especially the power cord or UV lamp.
- This appliance is for indoor use only and intended for aquariums.
- Keep out of reach of children.
- Never run the filter dry. Ensure it is fully primed with water before starting.
3. Package Contents
Verify that all components are present before beginning installation:
- Canister Filter Unit (AQ-HW304) with UV Light
- Filter Baskets (4 units)
- Inlet and Outlet Hoses (2 x 1.8m)
- Inlet and Outlet Pipework (including spray bar, intake strainer)
- Suction Cups and Clips
- Media Kit (Ceramic noodles, bio balls, activated carbon, filter floss)
- Instruction Manual

Figure 3.1: Included Accessories. This image displays the various hoses, pipes, and fittings that come with the canister filter, essential for connecting it to the aquarium.
4. Specifications
| Feature | Specification |
|---|---|
| Model Number | AQ-HW304 |
| Flow Rate | 2000 Liters per Hour (L/H) |
| Power Consumption | 55 Watts |
| UV Lamp Power | 9 Watts |
| Suitable Aquarium Size | Up to 500 Liters |
| Filter Baskets | 4 (Multi-level filtration) |
| Dimensions (LxWxH) | 50 x 39 x 33 cm |
| Weight | 10.5 kg |
5. Setup Instructions
5.1 Initial Preparation
- Unpack all components and inspect for any damage.
- Rinse all filter media and internal components thoroughly with clean water (not tap water if it contains chlorine, use dechlorinated water) to remove any manufacturing residue.
5.2 Media Installation
The filter features four baskets for multi-level filtration. Arrange the media as follows, typically from bottom to top:
- Bottom Basket: Coarse mechanical filtration (e.g., coarse sponge, ceramic rings for biological).
- Middle Baskets: Biological filtration (e.g., bio balls, ceramic noodles).
- Top Basket: Fine mechanical filtration (e.g., fine filter floss) and chemical filtration (e.g., activated carbon).
Ensure the UV lamp is securely seated in its compartment, typically located in the filter head or top basket area, as shown in Figure 5.1.
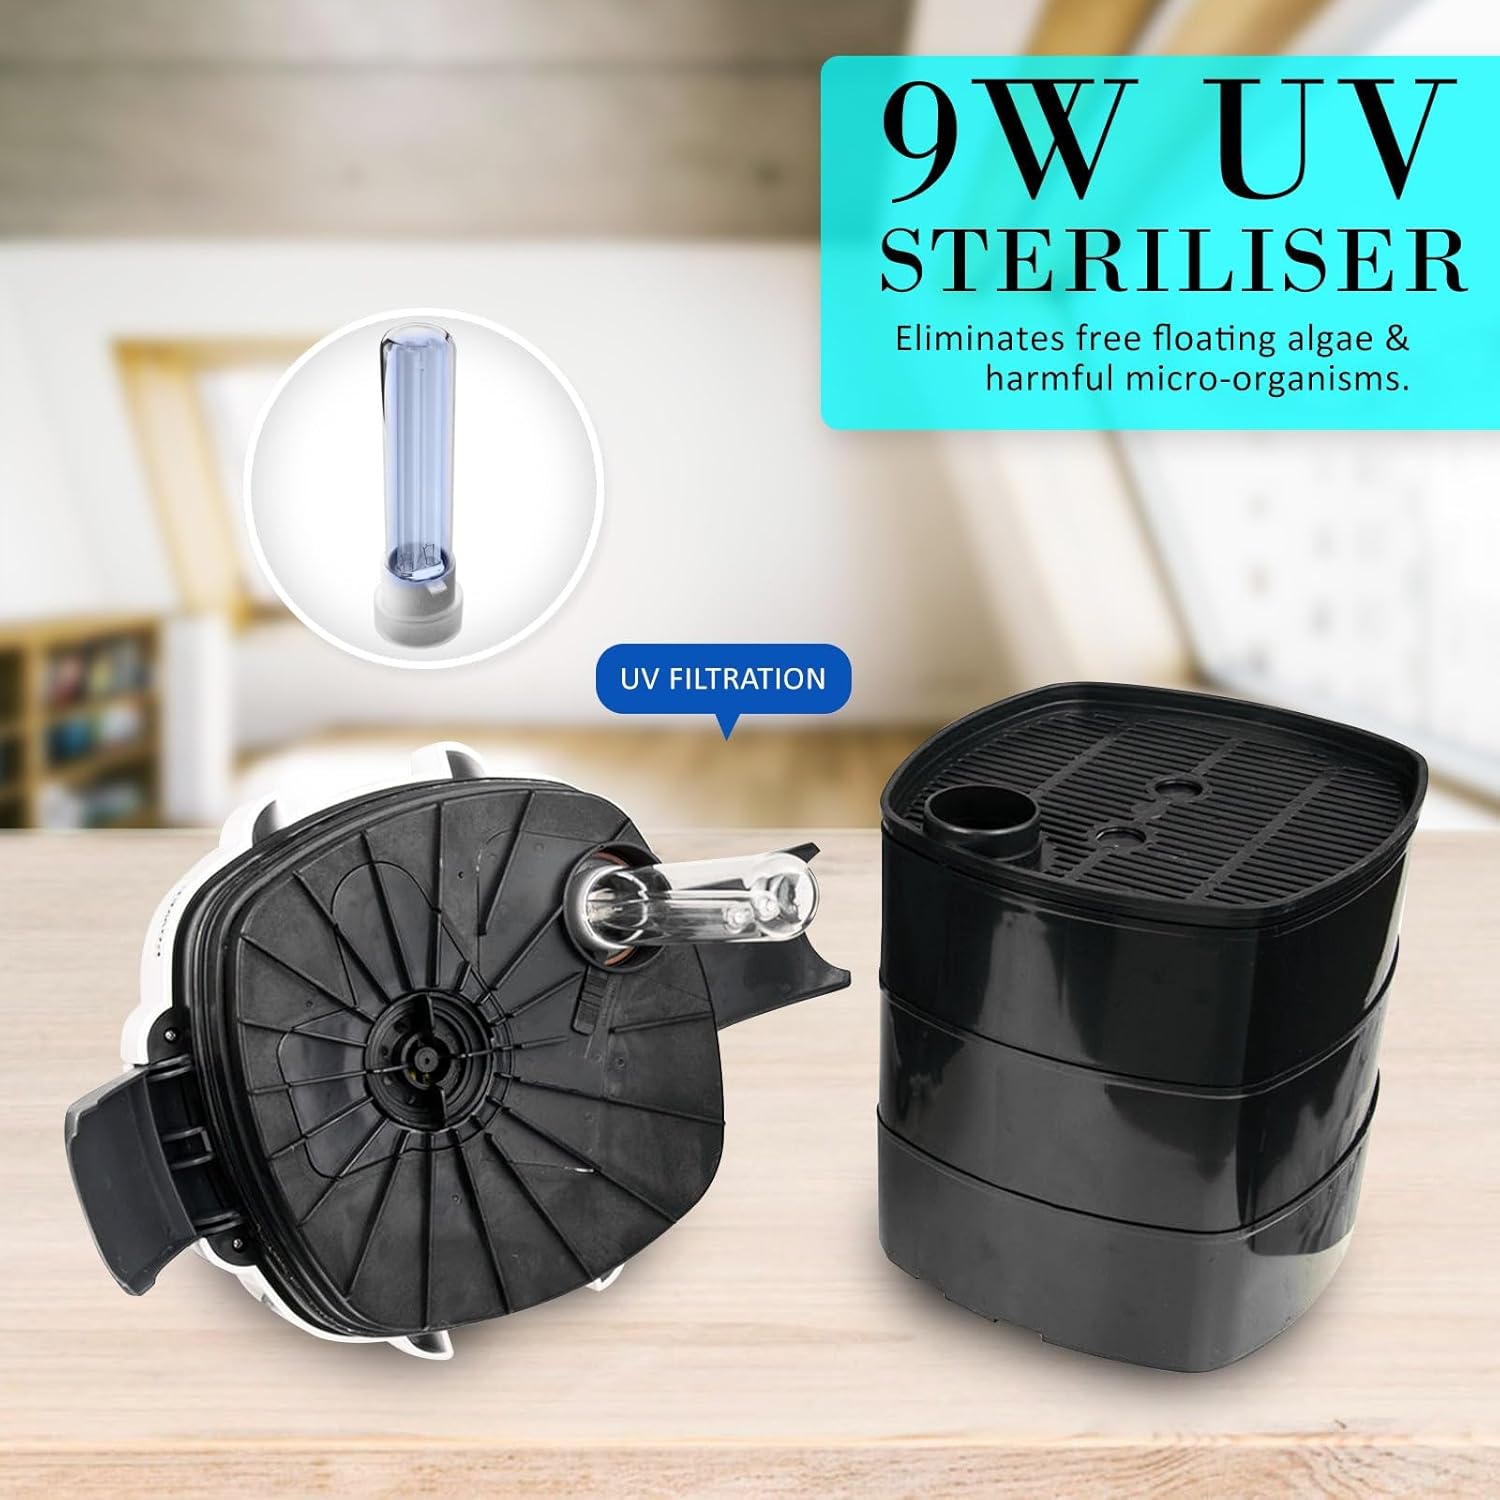
Figure 5.1: UV Sterilizer and Filter Baskets. This image illustrates the internal structure of the filter, showing the UV lamp and the stackable filter media baskets with handles for easy access.
After placing the media, close the filter head securely using the secure clips. Refer to Figure 5.2 for clip operation.

Figure 5.2: Secure Clip Mechanism. This image demonstrates how to operate the secure clips to properly seal the filter head to the canister body, ensuring a watertight connection.
5.3 Hose Connection
- Connect the inlet and outlet hoses to the corresponding ports on the filter head. Ensure a tight fit to prevent leaks.
- Attach the inlet pipework (with strainer) to one end of the inlet hose and place it inside the aquarium.
- Attach the outlet pipework (e.g., spray bar) to one end of the outlet hose and place it inside the aquarium.
- Use the provided suction cups and clips to secure the pipework inside the aquarium.

Figure 5.3: Water Flow Diagram. This image illustrates the path of water from the aquarium, through the canister filter, and back into the aquarium, showing the inlet and outlet hose connections.
5.4 Placement
Position the canister filter below the aquarium water level. This allows gravity to assist in priming and ensures efficient operation. Ensure the filter is on a stable, level surface.
6. Operating Instructions
6.1 Priming the Filter
Before starting the filter, it must be primed to fill the canister with water and remove air. This model features a built-in primer pump:
- Ensure all hose connections are secure and the quick-release tap is in the open position.
- Repeatedly press the primer button located on top of the filter head until water begins to flow into the canister and out through the outlet hose into the aquarium.
- Continue pressing until the canister is full and a steady flow of water is established.

Figure 6.1: Prime Pump Button. This image highlights the primer button on the filter head, which is used to manually draw water into the canister during initial setup.
6.2 Starting the Filter
- Once primed, connect the power cord to an electrical outlet.
- The filter pump will start, and water will begin circulating through the system.
- Check for any leaks immediately after starting.
6.3 UV Light Operation
The integrated 9W UV lamp helps control bacteria and algae. The UV light operates automatically when the filter is powered on. It is recommended to run the UV light continuously for optimal water clarity and sterilization. The UV lamp is located within the filter head or top section of the media baskets.
7. Maintenance
Regular maintenance is crucial for the efficient operation and longevity of your filter.
7.1 Regular Cleaning
It is recommended to clean the filter media and internal components every 2-4 weeks, depending on aquarium bioload.
- Disconnect the filter from the power supply.
- Lift the quick-release tap lever to shut off water flow, then disconnect the hose assembly from the filter head. Refer to Figure 7.1.

Figure 7.1: Quick Release Tap. This image shows the quick-release tap lever, which allows for easy disconnection of hoses and prevents water spillage during maintenance.
- Carry the filter unit to a suitable cleaning area.
- Open the secure clips and remove the filter head.
- Carefully remove the filter baskets.
- Rinse mechanical media (sponges, floss) in old aquarium water to preserve beneficial bacteria. Replace if heavily clogged.
- Rinse biological media (bio balls, ceramic noodles) gently in old aquarium water. Avoid excessive cleaning that could remove beneficial bacteria.
- Clean the impeller and impeller housing in the filter head.
- Reassemble the filter in reverse order, ensuring all seals are properly seated.

Figure 7.2: Filter Cleansing Process. This image depicts a user performing maintenance on the canister filter, demonstrating the ease of access for cleaning filter media.
7.2 Media Replacement
- Filter Floss/Sponges: Replace as needed, typically every 1-3 months, or when visibly degraded.
- Activated Carbon: Replace every 2-4 weeks as its adsorptive capacity diminishes.
- Biological Media: Replace only when necessary (e.g., damaged), as it houses beneficial bacteria. If replacing, do so gradually or seed new media with old media to maintain bacterial colonies.
7.3 UV Lamp Replacement
The 9W UV lamp has a limited lifespan, typically 6-12 months of continuous use. Replace the UV lamp annually or when its effectiveness diminishes.
- Disconnect power to the filter.
- Remove the filter head and locate the UV lamp housing.
- Carefully remove the old UV lamp and replace it with a new 9W UV lamp of the correct type. Avoid touching the glass part of the new lamp with bare hands.
- Reassemble the filter.
8. Troubleshooting
| Problem | Possible Cause | Solution |
|---|---|---|
| Filter not starting / No flow | No power; Air in canister; Clogged impeller; Damaged impeller. | Check power connection; Re-prime the filter; Clean impeller; Replace impeller. |
| Reduced flow rate | Clogged media; Clogged hoses/pipework; Air in canister. | Clean/replace media; Clean hoses/pipework; Re-prime the filter. |
| Leaks from filter head | Improperly sealed clips; Damaged O-ring; Debris on O-ring. | Ensure clips are fully engaged; Inspect and clean O-ring; Replace O-ring if damaged. |
| Excessive noise | Air in canister; Impeller obstruction; Impeller wear. | Re-prime the filter; Clean impeller; Replace impeller. |
| Water remains cloudy | Insufficient mechanical/biological filtration; UV lamp ineffective. | Clean/replace media; Check UV lamp operation; Replace UV lamp if needed. |
9. Warranty and Support
This Dynamic Power product is covered by a manufacturer's warranty against defects in materials and workmanship. Please refer to your purchase documentation for specific warranty terms and duration. For technical support, spare parts, or warranty claims, please contact your retailer or the Dynamic Power customer service department with your model number (AQ-HW304) and proof of purchase.