1. Introduction
This manual provides essential information for the safe and efficient operation of your Ideal-Air Pro Series 180 Pint Dehumidifier. Please read all instructions carefully before installation and use. Retain this manual for future reference.
1.1 Important Safety Information
- Always connect the unit to a grounded electrical outlet.
- Do not operate the unit with a damaged power cord or plug.
- Ensure the unit is placed on a stable, level surface.
- Keep the air inlet and outlet clear of obstructions.
- Do not insert objects into the unit's openings.
- Unplug the unit before cleaning or performing any maintenance.
- This appliance is not intended for use by persons (including children) with reduced physical, sensory or mental capabilities, or lack of experience and knowledge, unless they have been given supervision or instruction concerning use of the appliance by a person responsible for their safety.
1.2 Product Overview
The Ideal-Air Pro Series 180 Pint Dehumidifier is a commercial-grade unit designed for effective moisture removal in environments such as workshops, greenhouses, and grow rooms. It features a robust design, automatic restart, an internal condensate pump, and a user-friendly digital control panel.

2. Setup
2.1 Unpacking and Initial Placement
- Carefully remove the dehumidifier from its packaging.
- Place the unit upright on a flat, stable surface.
- Allow the unit to stand upright for at least 3 hours before plugging it in and operating. This allows the refrigerant to settle.
- Ensure there is adequate space around the unit for proper airflow (at least 12 inches from walls or other obstructions).
2.2 Components
The dehumidifier includes the following key components:
- Digital Control Panel
- Air Inlet Grille (with removable filter)
- Air Outlet Grille
- Heavy-duty Handles and Wheels for portability
- Internal Condensate Pump with drain hose connection

3. Operating Instructions
3.1 Control Panel Functions

- POWER Button: Press to turn the unit ON or OFF.
- ADD / MINUS Buttons: Use these buttons to adjust the desired humidity level (relative humidity percentage) or to set the timer duration.
- CONT (Continuous) Button: Activates continuous dehumidification mode, regardless of the set humidity level. The 'CONT' indicator light will illuminate.
- DRAIN Button: Activates the internal condensate pump to drain collected water.
- TIMER Button: Press to set a delay start or delay stop time for the unit. The 'TIMER' indicator light will illuminate.
- FULL Indicator: Illuminates when the internal water reservoir (if applicable, or indicates a pump issue if continuously on) is full or requires attention.
- DEFROST Indicator: Illuminates when the unit is in defrost mode, which occurs automatically at lower temperatures to prevent ice buildup on the coils.
3.2 Initial Operation
- Plug the power cord into a grounded 115V, 60Hz electrical outlet.
- Press the POWER button to turn on the unit. The digital display will show the current room humidity.
- Use the ADD or MINUS buttons to set your desired humidity level. The unit will operate until the ambient humidity reaches the set level, then cycle off.
- For continuous operation, press the CONT button. The unit will run continuously, removing moisture until manually turned off or the timer expires.
3.3 Special Features
- Automatic Restart: In case of a power outage, the unit will automatically restart with the previous settings once power is restored.
- Built-in Defrost: The unit is equipped with an automatic defrost function, allowing it to operate effectively down to 41°F (5°C) by preventing ice buildup on the evaporator coils.
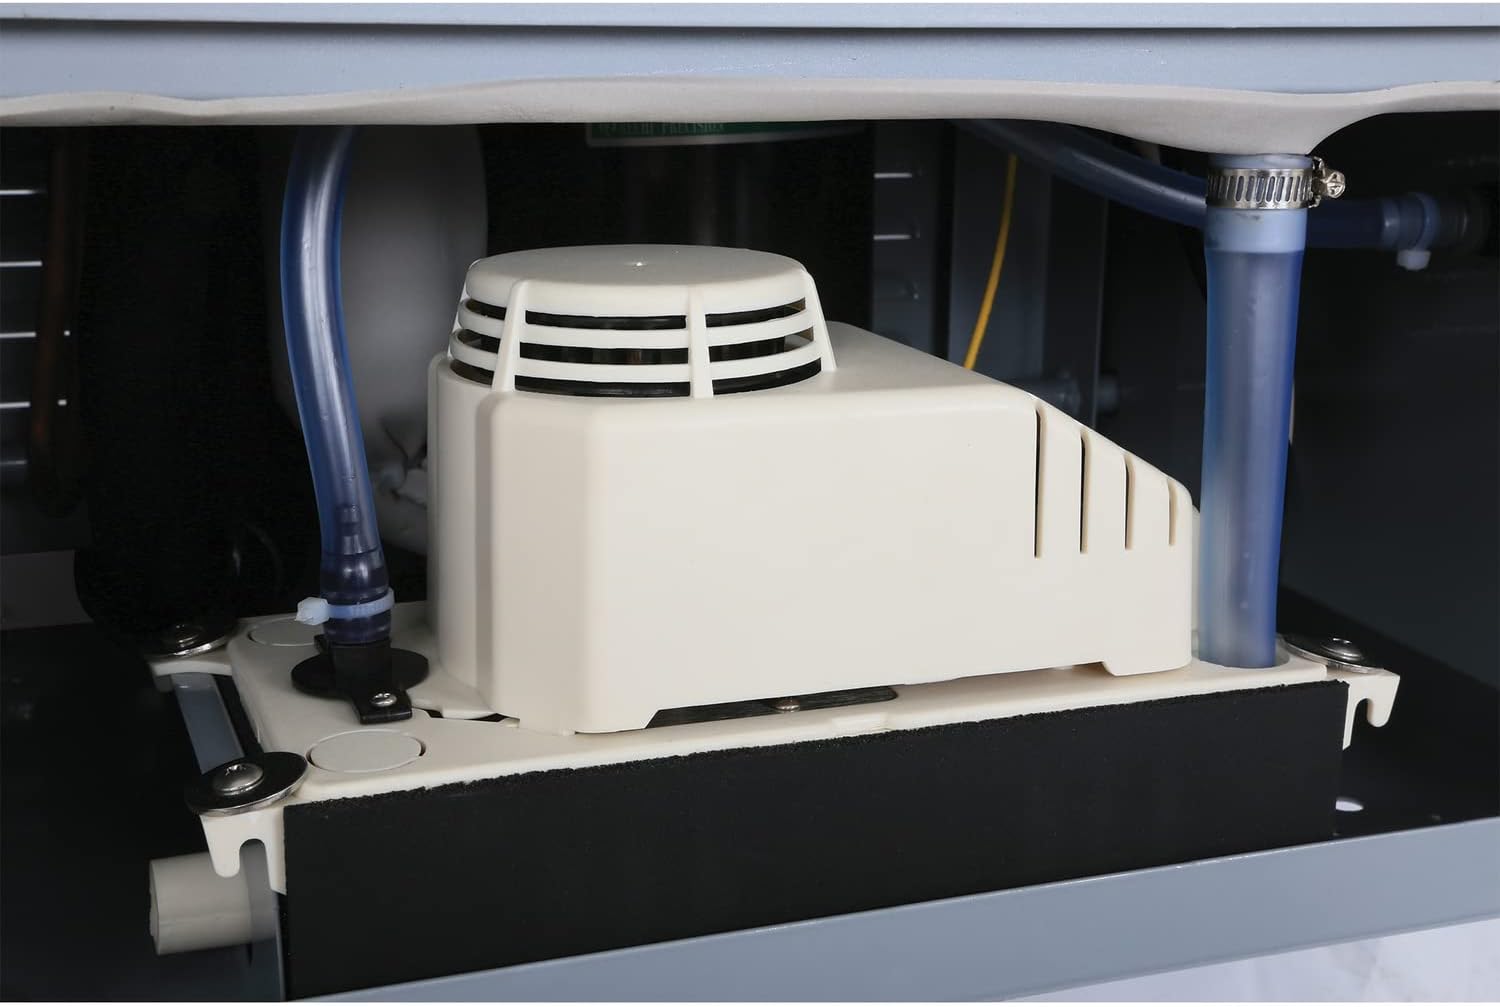
- Internal Condensate Pump: This unit includes an internal pump for automatic water removal. Connect a suitable drain hose to the pump outlet for continuous drainage.
4. Maintenance
4.1 Air Filter Cleaning
Regular cleaning of the air filter is crucial for maintaining the dehumidifier's efficiency and lifespan.
- Turn off and unplug the dehumidifier.
- Locate the air filter, typically behind the front grille (refer to Figure 2).
- Carefully remove the filter.
- Wash the filter with warm, soapy water. Rinse thoroughly.
- Allow the filter to air dry completely before reinstalling.
- Reinsert the dry filter and secure the grille.
4.2 Condensate Pump Maintenance
The internal condensate pump requires periodic inspection to ensure proper drainage and prevent blockages. While the pump is internal, ensure the drain hose is clear and free of kinks or obstructions. If the pump appears to be malfunctioning, consult a qualified technician.

5. Troubleshooting
Before contacting support, review the following common issues and solutions:
| Problem | Possible Cause | Solution |
|---|---|---|
| Unit does not turn on. | No power supply; power cord not plugged in; circuit breaker tripped. | Ensure power cord is securely plugged in. Check circuit breaker. |
| Unit is running but not dehumidifying. | Air filter is clogged; ambient temperature is too low; humidity setting is too high. | Clean the air filter. Ensure room temperature is within operating range (41-95°F). Lower the humidity setting. |
| Unit is icing up. | Ambient temperature is too low for prolonged operation; defrost cycle not initiating. | The unit has an automatic defrost. If icing persists, ensure the room temperature is above 41°F. |
| Water is not draining. | Drain hose is kinked or blocked; condensate pump malfunction. | Check and clear the drain hose. Ensure the hose is properly connected. If the pump is suspected, professional service may be required. |
| Unit is noisy. | Unit not on a level surface; loose parts; fan obstruction. | Place unit on a level surface. Check for any loose components. Ensure no obstructions are near the fan. |
6. Specifications
Technical data for the Ideal-Air Pro Series 180 Pint Dehumidifier:
| Specification | Value |
|---|---|
| Model Number | HGC701600 |
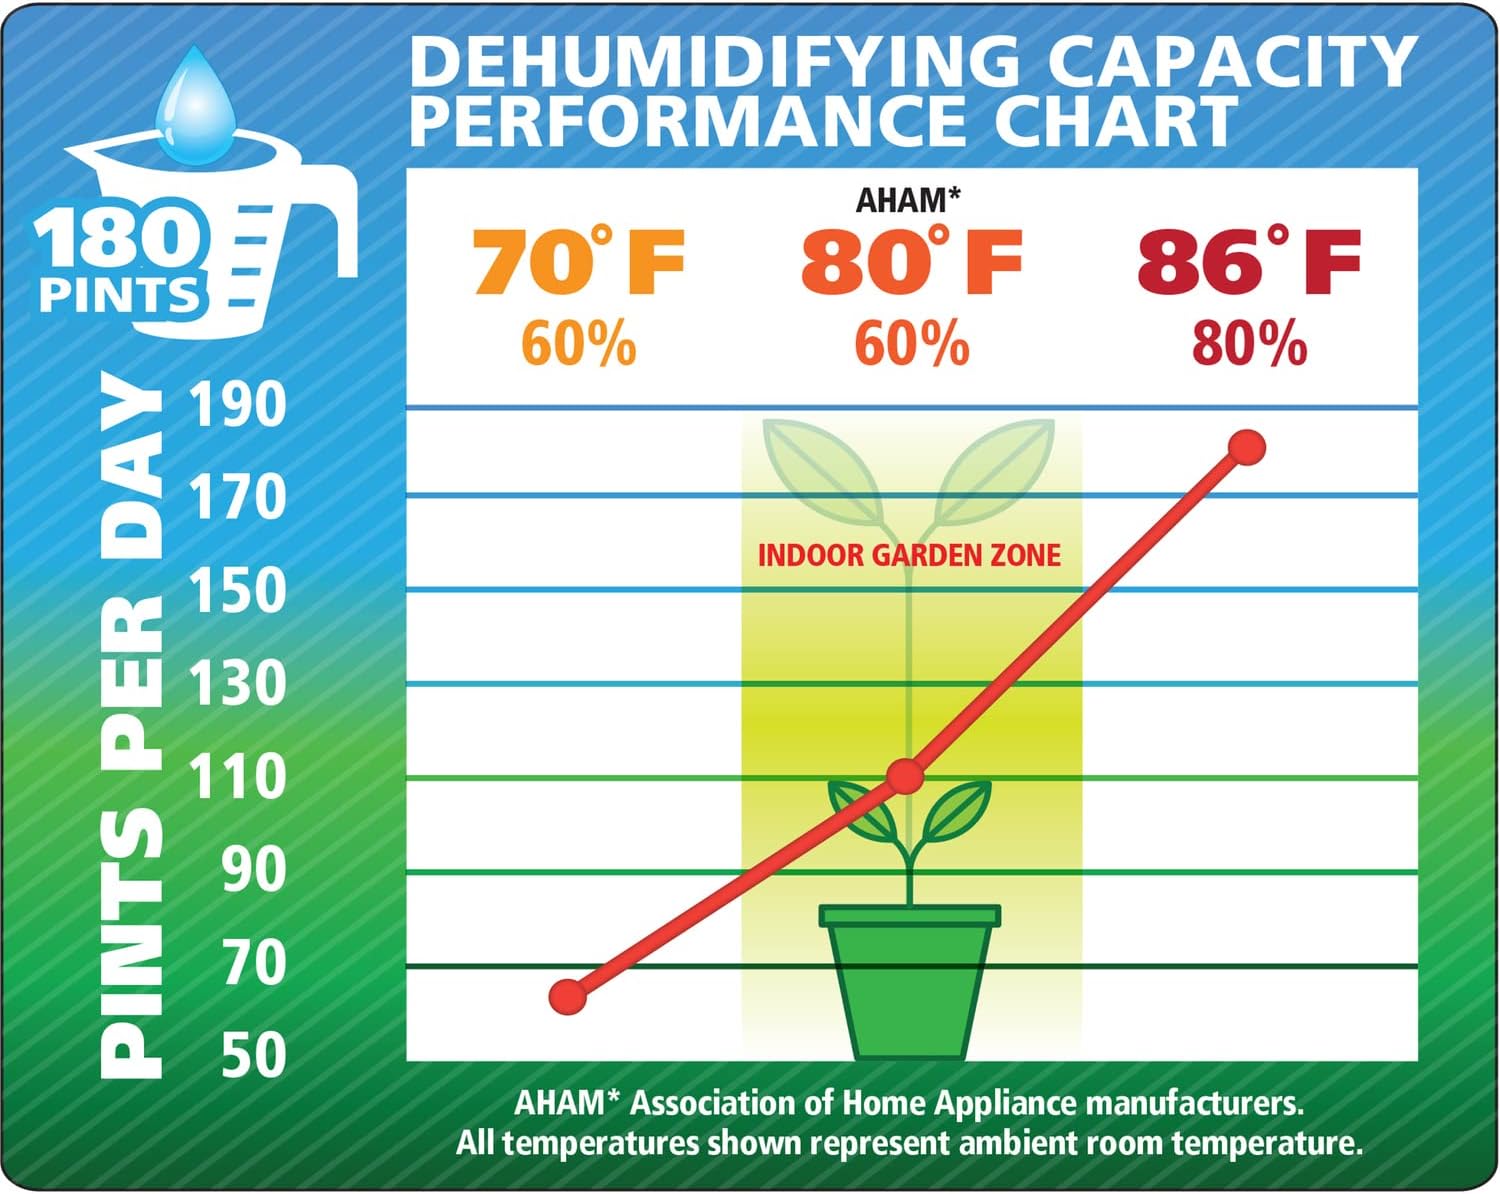
| Capacity (24 hours) | 180 Pints (at 86°F, 80% RH) |
| Supply Voltage | 115V, 1 Phase, 60Hz |
| Power Consumption | 12.3 Amps / 1350 Watts |
| Operating Temperature Range | 41°F - 95°F (5°C - 35°C) |
| Refrigerant | R410A |
| Unit Dimensions (D x W x H) | 22.5" x 23" x 40" (Unit only) / 22"D x 25"W x 46"H (with handles/wheels) |
| Item Weight | 143 Pounds |
| Material | Metal |
| Special Features | Automatic Restart, Portable, Internal Condensate Pump |


7. Warranty and Support
For warranty information, technical support, or service inquiries, please consult your original retailer or the manufacturer directly. Keep your purchase receipt as proof of purchase for warranty claims.