1. Introduction
This manual provides detailed instructions for the installation, operation, and maintenance of your Time Watch Bio-7 Biometric Fingerprint Time and Attendance System. Please read this manual thoroughly before using the device to ensure proper functionality and to prevent damage.
The Bio-7 system is designed for efficient and secure time and attendance tracking, utilizing advanced fingerprint recognition technology, password, and card verification methods.
2. Product Overview
The Time Watch Bio-7 is a robust biometric device featuring a 4.3-inch TFT color screen and a touch interface for user-friendly operation. It supports a large user capacity and extensive log storage, making it suitable for various organizational needs.
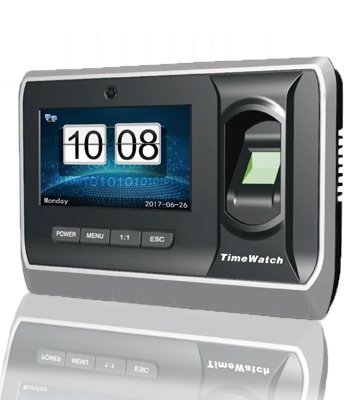
Figure 1: Front view of the Time Watch Bio-7 device, showing the 4.3-inch TFT color screen, fingerprint sensor, and touch interface.
Key Features:
- User Capacity: 10,000 (Fingerprint/Password/Card)
- Log Capacity: 200,000 records
- Display: 4.3-inch TFT Color Screen
- Interface: Touch Screen
- Communication: TCP/IP, USB
- Security: Camera for enhanced verification (optional)
- Error Rates: FAR (False Acceptance Rate) <0.0001%, FRR (False Rejection Rate) <1%
- Access Control: Optional functionality
- Power: Built-In Battery Back Up
3. Setup
3.1 Unpacking and Inspection
Carefully unpack the Bio-7 device and all accessories. Inspect the contents for any signs of damage. If any components are missing or damaged, contact your supplier immediately.
3.2 Mounting the Device
Choose a suitable location for installation, typically near an entrance or exit, at a comfortable height for users. Ensure the mounting surface is stable and secure. Use the provided mounting template (if applicable) to mark drilling points. Secure the device firmly to the wall using appropriate screws and anchors.
3.3 Power Connection
Connect the power adapter to the device's power input port and then plug it into a standard electrical outlet. The device will power on automatically. The built-in battery provides backup power in case of an outage.
3.4 Network Connection
- TCP/IP: Connect an Ethernet cable from the device's LAN port to your network router or switch. Configure network settings (IP address, subnet mask, gateway) via the device's menu.
- USB: For direct data transfer, connect the device to a computer using a USB cable. This method is typically used for downloading attendance logs or uploading user data.
4. Operating Instructions
4.1 Administrator Setup
Upon first use, it is recommended to set up an administrator account. This account will have full access to system settings and user management. Navigate to the 'User Management' menu and register an administrator fingerprint, password, or card.
4.2 User Registration
To register new users:
- Access the 'User Management' menu as an administrator.
- Select 'Add User'.
- Enter the user ID and name.
- Register the user's fingerprint by placing their finger on the sensor multiple times as prompted.
- Optionally, register a password or an RFID card for alternative verification.
- Save the user information.
4.3 Time and Attendance Recording
Users can record their attendance by presenting their registered fingerprint, entering their password, or scanning their registered card on the device. A successful verification will be indicated by a visual and/or audible confirmation.
4.4 Data Download and Management
Attendance logs and user data can be downloaded from the device using either the TCP/IP network connection or a direct USB connection to a computer. Refer to the accompanying software manual for detailed instructions on using the data management software.
5. Maintenance
5.1 Cleaning the Device
Regularly clean the fingerprint sensor and the screen with a soft, dry, lint-free cloth. Do not use abrasive cleaners, solvents, or alcohol, as these can damage the surface. Ensure the device is powered off before cleaning.
5.2 Data Backup
It is highly recommended to regularly back up attendance logs and user data to an external storage device or computer. This prevents data loss in case of unforeseen issues.
5.3 Firmware Updates
Periodically check the manufacturer's website for available firmware updates. Updates can improve performance, add new features, or fix bugs. Follow the provided instructions carefully when performing a firmware update.
6. Troubleshooting
6.1 Device Not Powering On
- Check if the power adapter is securely connected to both the device and the power outlet.
- Verify that the power outlet is functional.
- If using battery backup, ensure the battery is charged.
6.2 Fingerprint Not Recognized
- Ensure the fingerprint sensor is clean and free from dirt or moisture.
- Place the finger flat and centered on the sensor.
- Try re-registering the fingerprint if the issue persists.
- Ensure the user is registered in the system.
6.3 Network Connection Issues
- Check the Ethernet cable connection.
- Verify the network settings (IP address, subnet mask, gateway) on the device.
- Ensure the network router/switch is functioning correctly.
For other issues, please refer to the comprehensive troubleshooting guide available on the Time Watch support website or contact customer support.
7. Specifications
| Feature | Description |
|---|---|
| Model | Bio-7 |
| User Capacity | 10,000 (Fingerprint/Password/Card) |
| Log Capacity | 200,000 |
| LCD Display Screen | 4.3-inch TFT Color Screen |
| High End Feature | Camera, Touch Screen |
| Communication Interface | TCP/IP, USB |
| FAR (False Acceptance Rate) | <0.0001% |
| FRR (False Rejection Rate) | <1% |
| Access Control | Optional |
| Battery Back Up | Built-In |
8. Warranty and Support
For warranty information, please refer to the warranty card included with your product or visit the official Time Watch website. For technical support, troubleshooting assistance, or service inquiries, please contact Time Watch customer support through their official channels.