Pro-Fit 5000966
Pro-Fit 5000966 2 in. Framing Screws User Manual
Model: 5000966
Introduction
This manual provides essential information for the proper use, installation, and maintenance of Pro-Fit 5000966 2 in. Framing Screws. Please read these instructions carefully before use to ensure safety and optimal performance.
Setup and Preparation
Before beginning any framing project, ensure you have the correct tools and safety equipment. These screws are designed for framing applications and require appropriate pre-drilling in some materials.
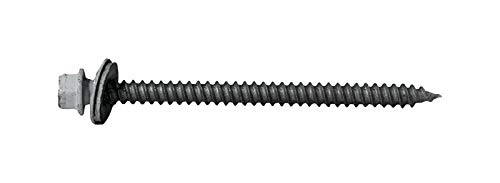
Figure 1: Pro-Fit 2 in. Framing Screw. This image displays a single white framing screw, featuring a hexagonal head with an integrated washer, a fully threaded body, and a sharp, pointed tip designed for secure fastening in framing applications.
Required Tools:
- Power drill or impact driver
- Appropriate driver bit (e.g., hex bit for the screw head)
- Safety glasses
- Gloves
- Measuring tape
- Level
Always wear safety glasses to protect your eyes from debris during installation.
Operating Instructions
Follow these steps for effective and safe use of Pro-Fit 2 in. Framing Screws:
- Select Material: Ensure the material you are fastening is suitable for 2-inch framing screws.
- Positioning: Mark the precise location where the screw needs to be driven.
- Pre-drilling (Optional but Recommended): For harder woods or to prevent splitting, pre-drill a pilot hole slightly smaller than the screw's core diameter.
- Driving the Screw: Attach the appropriate driver bit to your power drill. Place the screw on the bit and align it with the marked spot or pilot hole. Apply steady, firm pressure and drive the screw into the material until the head is flush with the surface. Avoid over-tightening, which can strip the screw head or damage the material.
- Inspection: After driving, inspect the screw to ensure it is securely fastened and the material is not damaged.
For optimal performance, use a drill with adjustable torque settings to prevent over-driving.
Maintenance and Storage
Proper storage of your Pro-Fit framing screws will ensure their longevity and readiness for future projects.
- Storage: Store screws in a dry, cool environment to prevent corrosion. Keep them in their original packaging or a sealed container to protect them from moisture and dust.
- Handling: Handle screws carefully to avoid bending or damaging the threads.
- Inspection: Before use, quickly inspect screws for any signs of damage or corrosion. Do not use damaged screws.
Troubleshooting
| Problem | Possible Cause | Solution |
|---|---|---|
| Screw head strips | Incorrect driver bit, excessive torque, worn bit. | Use the correct driver bit, reduce torque, replace worn bit. |
| Screw not driving fully | Material too dense, insufficient power from drill, no pilot hole. | Use a more powerful drill, pre-drill a pilot hole, ensure screw is aligned. |
| Material splitting | No pilot hole, screw too large for material, driving too fast. | Pre-drill a pilot hole, use a smaller screw if appropriate, drive slowly. |
Specifications
- Model: 5000966
- Color: White
- Size: 2 inches
- Product Dimensions: 15.24 x 15.24 x 15.24 cm (6 x 6 x 6 inches)
- Item Weight: 2.27 kg (5 lbs)
- Manufacturer: Pro-Fit
- ASIN: B077L882BM
- Date First Available: March 29, 2018
Warranty Information
Pro-Fit framing screws are manufactured to high-quality standards. For specific warranty details, please refer to the product packaging or contact Pro-Fit directly. Keep your purchase receipt as proof of purchase.
Customer Support
If you have any questions or require assistance with your Pro-Fit 2 in. Framing Screws, please contact the manufacturer, Pro-Fit, through their official website or customer service channels. Always provide the model number (5000966) and ASIN (B077L882BM) when seeking support.
Ask a question about this manual
Ask about setup, troubleshooting, compatibility, parts, safety, or missing instructions. Manuals+ will review the question and use this page’s manual context to help answer it.