
1. Introduction
This manual provides detailed instructions for the Avital 5305L 2-Way LCD Remote Start and Alarm system, combined with the Directed DB3 XPressKit DEI Databus All Combo Bypass/Door Lock Interface. It covers product overview, setup procedures, operating instructions, maintenance tips, troubleshooting guidance, and product specifications. Please read this manual thoroughly to ensure proper use and to maximize the benefits of your new system.
2. Product Overview
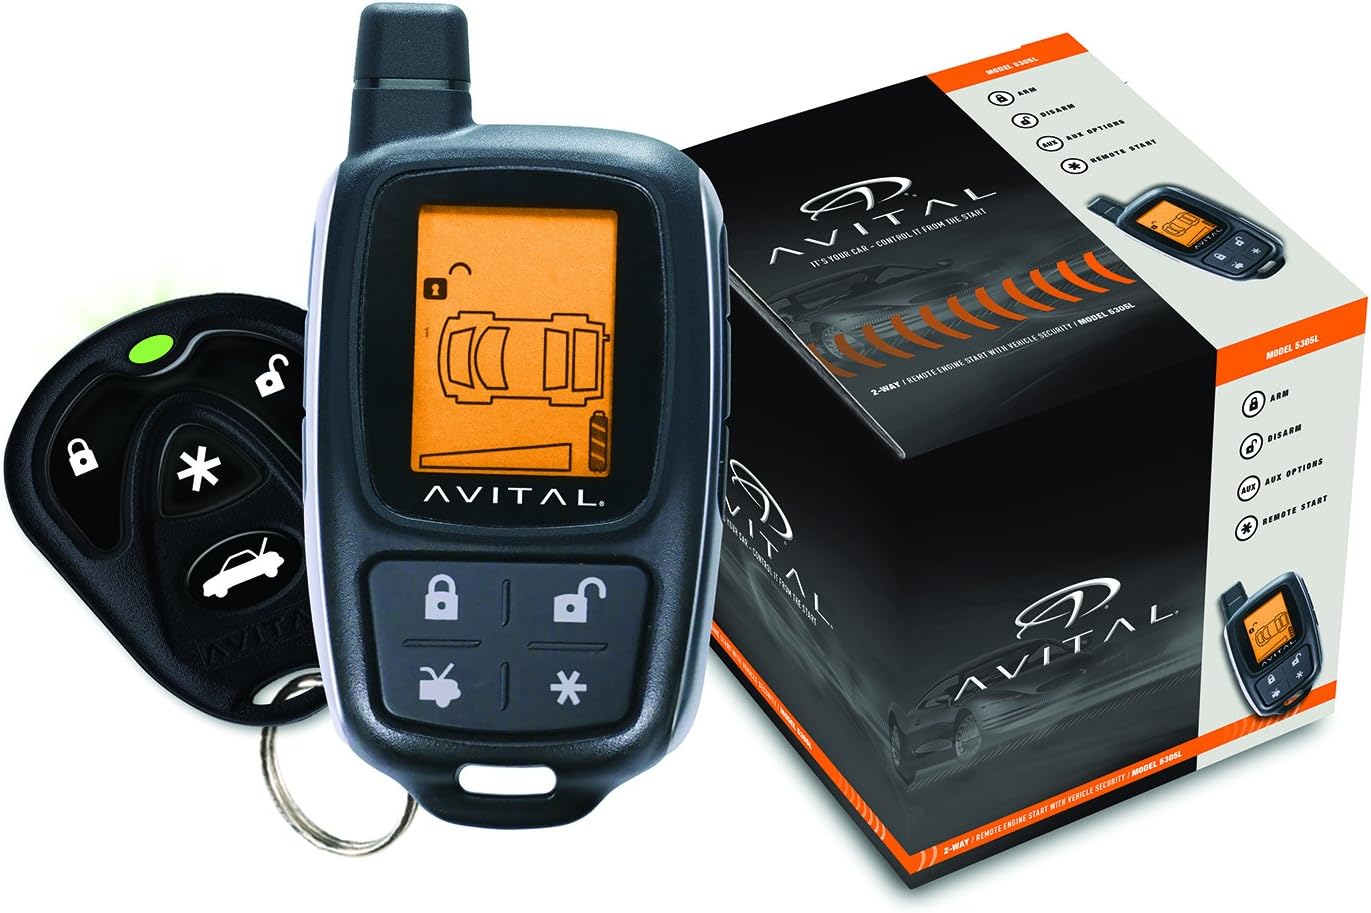
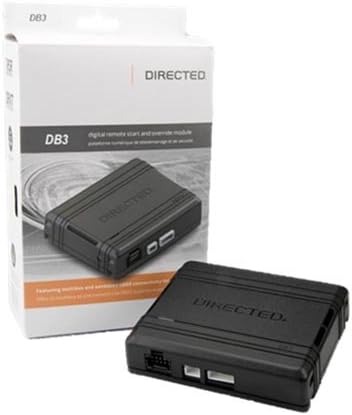
The Avital 5305L and Directed DB3 combo offers advanced vehicle security and remote start functionalities. The system includes a 2-way LCD pager remote for confirmation and a 4-button 1-way remote for basic controls. The Directed DB3 module provides comprehensive vehicle integration for bypass and door lock functions.
Key Features:
- Avital 5305L Remote Start & Alarm: Remote engine start up to 1500 ft, 2-way LCD pager remote with confirmation, 4-button 1-way remote with keyless entry and trunk release, SmartStart capability.
- Directed DB3 XPressKit DEI Databus Interface: All-in-one comfort & override module, covers over 95% of vehicles, Multibus and advanced OBD2 connectivity, RSR/RXT compatible, customizable features with DirectLink, vehicle-specific T-Harnesses, RF loop compatible, unique module ID for history lookup.
Product Components:





3. Setup
3.1 Professional Installation Recommended
Installation of the Avital 5305L remote start and alarm system along with the Directed DB3 interface requires specialized knowledge of vehicle electrical systems. It is highly recommended that this system be installed by a certified professional to ensure proper functionality and to avoid damage to your vehicle. Incorrect installation can lead to system malfunction or vehicle damage.
3.2 DB3 Module Flashing and Programming
The Directed DB3 module requires flashing and programming with vehicle-specific firmware before installation. This process is typically performed by the installer. Click & ADD offers free flashing/programming if you provide your car's year, make, model, engine type (hybrid or non), and ignition function/key type (smart key, standard key, or push to start) when placing your order.
The following video demonstrates the general process of flashing and updating a Blade module and Compustar controller, which is similar to the DB3 module programming:
Video 1: Idatalink BLADE Remote Start/Security Bypass Module Flashing. This video illustrates the steps involved in flashing and updating a bypass module, a critical step for vehicle compatibility and functionality.
General Steps for Module Flashing:
- Create an account on the manufacturer's website (e.g., compustar.idatalink.com).
- Connect the ADS-USB cable to your computer.
- Dock the DB3 module into the Compustar controller (if applicable) and connect it to the ADS-USB cable.
- Launch the web updater tool in your browser.
- Select your vehicle's year, make, and model.
- Flash the appropriate firmware to the module.
- Configure any desired features for the remote start system.
4. Operating Instructions
Your Avital system comes with two remotes: a 2-Way LCD Pager Remote and a 4-Button 1-Way Remote. Both remotes provide convenient control over your vehicle's security and remote start features.
4.1 Avital 2-Way LCD Pager Remote Functions
This remote provides visual and audible confirmation of commands and vehicle status.
- Lock/Arm: Press the Lock button once. The remote will chirp and display 'LOCKED' or 'ARM' to confirm.
- Unlock/Disarm: Press the Unlock button once. The remote will chirp and display 'UNLOCKED' or 'DISARM' to confirm.
- Remote Start: Press and hold the Remote Start button (often indicated by a star or engine icon) for approximately 3 seconds. The remote will confirm the start command and indicate if the engine has successfully started.
- Trunk Release: Press and hold the Trunk Release button (often indicated by a trunk icon) for approximately 3 seconds. The remote will confirm the trunk has opened.
- Alarm Notifications: The 2-way remote will alert you with chirps, vibrations, and on-screen icons if the alarm is triggered or if a door is opened.
- Panic Mode: Typically activated by pressing and holding a specific button (e.g., the lock button) for several seconds. This will trigger the vehicle's alarm.
4.2 Avital 4-Button 1-Way Remote Functions
This remote provides basic control without visual confirmation.
- Lock/Arm: Press the Lock button once.
- Unlock/Disarm: Press the Unlock button once.
- Remote Start: Press the Remote Start button (often indicated by a star or engine icon) twice within 2 seconds.
- Trunk Release: Press and hold the Trunk Release button (often indicated by a trunk icon) for approximately 3 seconds.
4.3 Remote Operation Demonstrations
The following videos provide visual demonstrations of remote control operations, including locking, unlocking, trunk release, and remote start features.
Video 2: Compustar Prime T9 Operation. This video demonstrates basic operations of a 2-way LCD remote, including locking, unlocking, trunk release, and remote start, which are similar to the Avital 5305L remote.
Video 3: VIPER Color Remotes: 5908V, 7957V, D9957V. This video showcases various Viper 2-way remotes and their customizable features, providing insight into the advanced capabilities of such systems.
Video 4: Viper 5908V 2-Way Color LCD Remote Start & Security System. This video highlights the features and functionality of a Viper 2-way LCD remote start and security system, demonstrating its ease of use and comprehensive control.
4.4 Remote Start Benefits
Remote start allows you to warm up or cool down your vehicle's interior before you enter, enhancing comfort in extreme weather conditions.
Video 5: Warm Up & Cool Down w/Compustar Long-Range Remote Starters. This video illustrates the convenience of remote start for pre-heating or pre-cooling your vehicle, improving comfort in various climates.
5. Maintenance
5.1 Remote Battery Replacement
The 2-Way LCD Pager Remote will display a low battery indicator when replacement is needed. Refer to the specific remote's user guide for instructions on how to open the remote casing and replace the battery. Typically, small coin-cell batteries are used.
5.2 System Checks
Periodically test all functions of your remote start and alarm system to ensure they are working correctly. This includes locking, unlocking, remote start, and alarm triggers. If any issues arise, consult the troubleshooting section or contact your installer.
6. Troubleshooting
If you experience issues with your Avital 5305L and Directed DB3 system, consider the following common solutions:
- Remote Not Responding: Check the remote's battery. If the battery is low or dead, replace it. Ensure you are within the system's operating range (up to 1500 ft).
- Vehicle Not Remote Starting: Ensure all doors, hood, and trunk are closed. The vehicle must be in park (automatic transmission) or properly set for remote start (manual transmission, if configured). Check for any dashboard warning lights that might prevent starting.
- Alarm False Triggers: The sensitivity of the impact sensor might be too high. This usually requires adjustment by a professional installer.
- No 2-Way Confirmation: Ensure the 2-way remote has sufficient battery power and is within range. Obstructions can sometimes interfere with the signal.
For persistent issues, it is recommended to contact your professional installer or the manufacturer's technical support.
7. Specifications
| Brand | Click & ADD |
| Model Number | 5305L+DB3 |
| Maximum Range | 1500 Feet |
| Remotes Included | One 2-Way LCD Pager Remote, One 4-Button 1-Way Remote |
| DB3 Module Features | All-in-one comfort & override, Multibus, OBD2 connectivity, RSR/RXT compatible, SmartStart compatible |
| UPC | 761835259451 |
| Date First Available | November 14, 2017 |
8. Warranty & Support
8.1 Free Flashing/Programming Offer
Click & ADD offers free flashing/programming for your DB3 module. To avail this service, please email the following information when you place your order: car year, make, model, engine type (hybrid or non), and ignition function/key type (smart key, standard key, or push to start). The installation/wiring guide will be conveniently emailed to you.
8.2 Technical Support
For any technical assistance, installation questions, or troubleshooting beyond the scope of this manual, please contact your authorized installer. They possess the expertise to diagnose and resolve complex issues related to your specific vehicle and system configuration.