Foredom K.EMX-50
Foredom K.EMX-50 Dial Control Kit Instruction Manual
For 115V TX or LX Motors with H.50 Chisel Handpiece and 11 Chisels
1. Introduction
This instruction manual provides essential information for the safe and effective use of your Foredom K.EMX-50 Dial Control Kit. This kit is specifically designed for use with 115V Foredom Series TX or LX permanent magnet motors. It includes the C.EMX-1 Dial Speed Control, the H.50 Chisel Handpiece, and a comprehensive set of 11 chisels. The H.50 Chisel Handpiece offers a power-assisted carving experience for various materials such as wood, plastic, plaster, and soft carving stone. Please read this manual thoroughly before operating the equipment.
2. Safety Information
Always observe basic safety precautions to reduce the risk of fire, electric shock, and personal injury.
- Read All Instructions: Familiarize yourself with the operation and limitations of the tool and the specific hazards involved.
- Wear Eye Protection: Always wear safety glasses or goggles to protect against flying debris.
- Secure Workpiece: Always clamp or otherwise secure the workpiece to prevent movement during carving.
- Maintain a Clean Work Area: Cluttered areas invite accidents.
- Avoid Accidental Starting: Ensure the speed control is in the 'OFF' position before plugging in or performing maintenance.
- Do Not Overreach: Maintain proper footing and balance at all times.
- Disconnect Power: Always disconnect the tool from the power source before changing accessories, making adjustments, or performing maintenance.
- Use Correct Voltage: Ensure the power supply matches the 115V requirement of the control kit.
- Inspect Tools: Before each use, inspect the handpiece, chisels, and control for damage. Replace or repair damaged parts immediately.
3. Components Overview
The Foredom K.EMX-50 Dial Control Kit includes the following main components:

Figure 1: Complete Foredom K.EMX-50 Dial Control Kit, showing the C.EMX-1 Dial Speed Control, H.50 Chisel Handpiece, various chisels, a wrench, and a tube of lubricant.
3.1 C.EMX-1 Dial Speed Control

Figure 2: The C.EMX-1 Dial Speed Control, featuring a rotary dial for speed adjustment and a power switch.
This bench-top dial speed control allows for precise and consistent speed regulation of your Foredom motor. It features a rotary dial for setting the desired RPM and a power switch for activation.
3.2 H.50 Chisel Handpiece
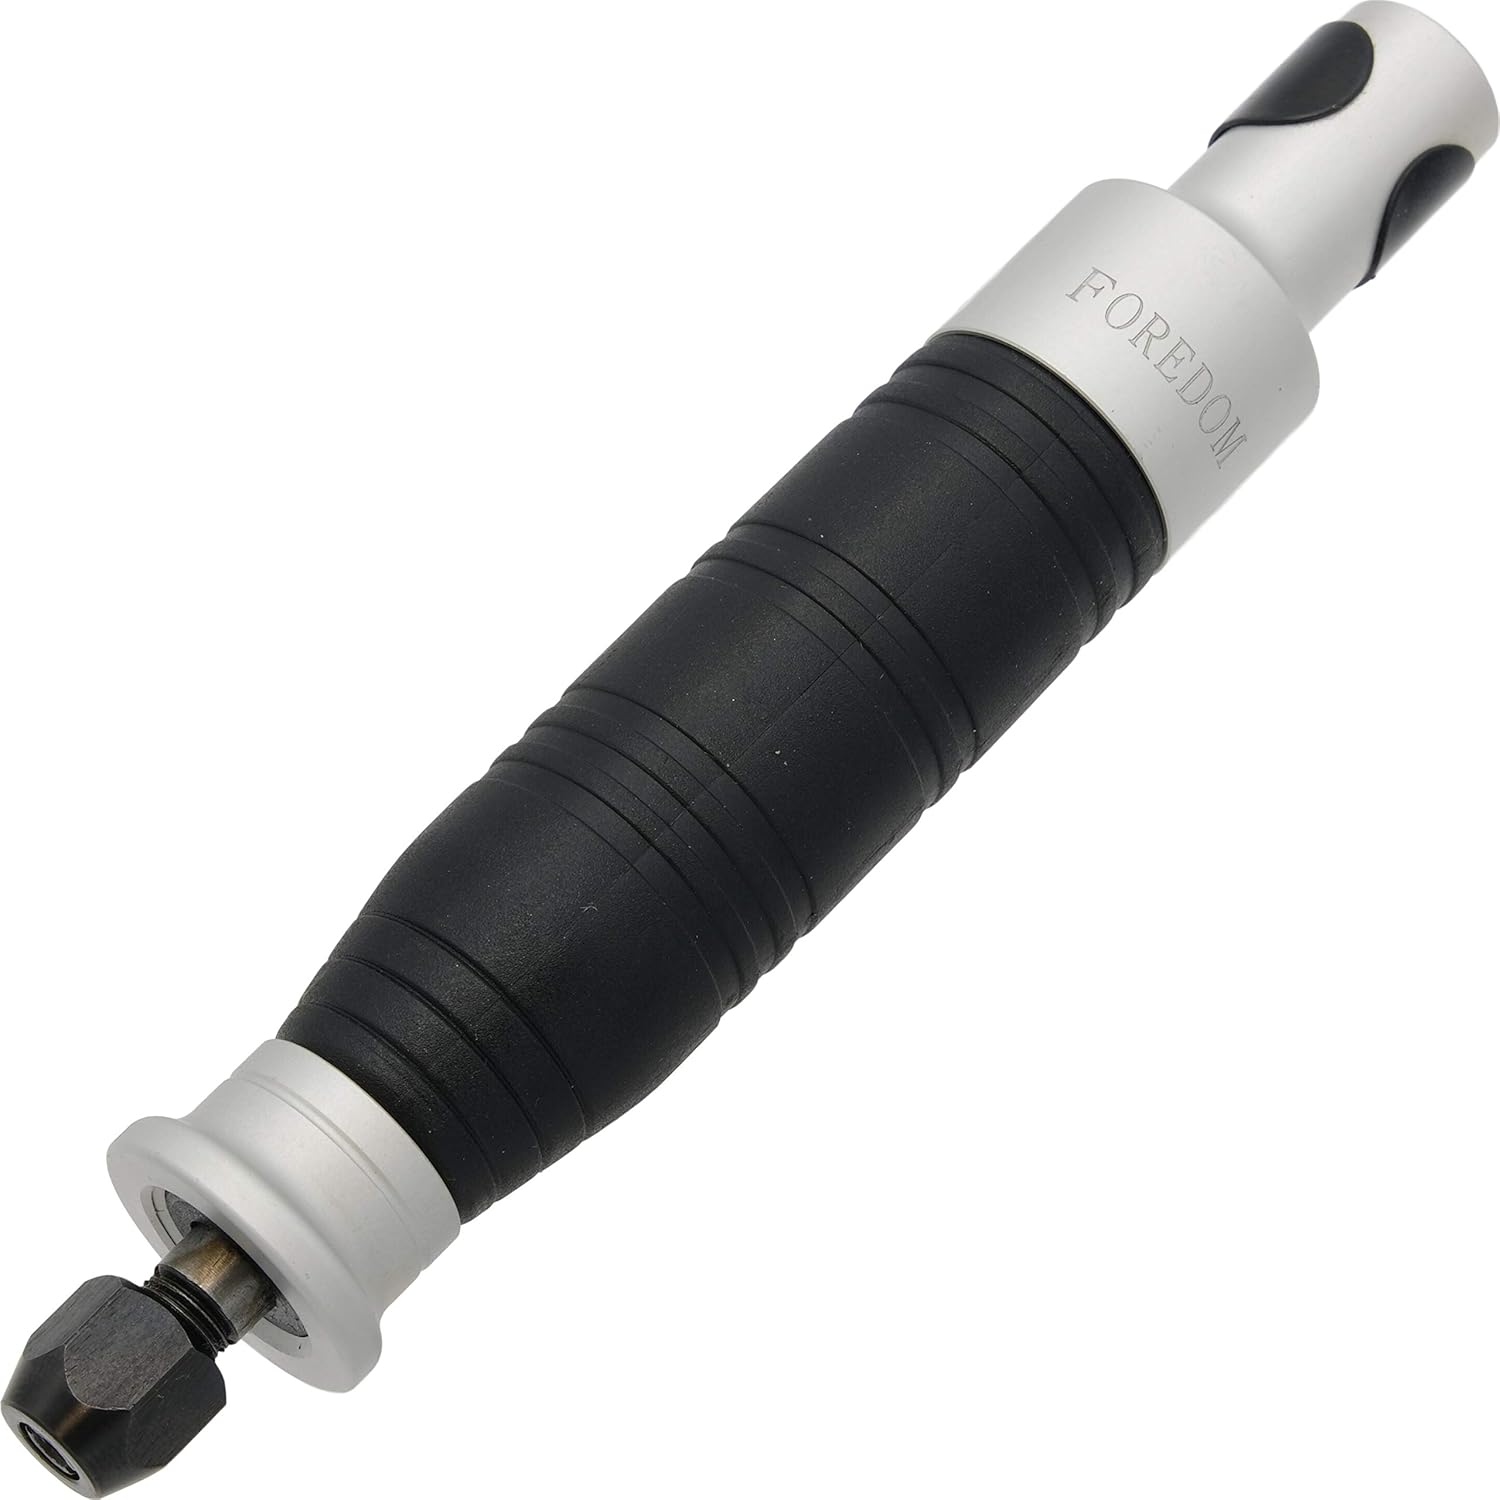
Figure 3: The H.50 Chisel Handpiece, showing its textured barrel and tapered aluminum tip.
The H.50 is a reciprocating hammer-type handpiece designed to provide a power assist for carving. It connects to a Foredom or other compatible flex shaft with a standard key tip shaft. Its design features a rugged textured plastic barrel and a tapered aluminum tip for comfortable and controlled use.
3.3 Included Chisels
The kit includes a selection of 11 chisels for various carving applications:
- A-KC501
- A-KC502
- A-KC503
- A-KC504
- A-KC505
- A-KC506
- A-KC507
- A-KC508
- A-KC509
- A-KC510
- A-KC511
These chisels are designed to be inserted into the H.50 Chisel Handpiece for powered carving.
4. Setup Instructions
Follow these steps to set up your Foredom K.EMX-50 Dial Control Kit:
- Position the Dial Control: Place the C.EMX-1 Dial Speed Control on a stable, flat workbench surface. Ensure it is within reach of a standard 115V power outlet.
- Connect to Power: Plug the power cord of the C.EMX-1 Dial Speed Control into a grounded 115V electrical outlet. Ensure the dial control is in the 'OFF' position before plugging it in.
- Connect Motor: Plug your Foredom Series TX or LX motor's power cord into the receptacle on the back of the C.EMX-1 Dial Speed Control.
- Attach Handpiece: Connect the H.50 Chisel Handpiece to your Foredom flex shaft. The handpiece features a standard key tip shaft connection. Ensure it is securely seated.
- Insert Chisel: Select the desired chisel. Loosen the chuck on the H.50 Handpiece using the provided wrench. Insert the chisel fully into the chuck and tighten securely with the wrench. Ensure the chisel is firmly held to prevent it from coming loose during operation.
5. Operation
Operating the Foredom K.EMX-50 Dial Control Kit is straightforward:
- Power On: Turn the C.EMX-1 Dial Speed Control to the 'START' position. The motor should begin to rotate.
- Adjust Speed: Rotate the dial on the C.EMX-1 to increase or decrease the motor speed. The H.50 Chisel Handpiece is recommended for use between 1,000 and 8,000 RPM for optimal performance. The dial control allows you to set and maintain a steady speed within this range.
- Engage Chisel Action: The H.50 Chisel Handpiece is a reciprocating hammer type. It requires light pressure against the workpiece to engage the hammering chisel action. Do not apply excessive force; let the tool do the work.
- Carving Direction: The Chisel Handpiece is recommended for use with motors in forward rotation only.
- Power Off: When finished, turn the C.EMX-1 Dial Speed Control to the 'OFF' position. Disconnect the unit from the power outlet when not in use.
6. Maintenance
Regular maintenance ensures the longevity and optimal performance of your Foredom K.EMX-50 kit.
- Chisel Sharpening: Chisels may require sharpening over time to maintain cutting efficiency. Use appropriate sharpening tools and techniques for the chisel material.
- Handpiece Lubrication: Periodically lubricate the H.50 Chisel Handpiece according to Foredom's recommendations, typically using specialized grease for chisel handpieces. Refer to the grease tube for specific instructions.
- Cleaning: Keep the handpiece, chisels, and dial control clean and free of dust and debris. Use a soft, dry cloth. Do not use harsh chemicals or abrasive cleaners.
- Storage: Store the kit in a dry, clean environment when not in use.
7. Troubleshooting
If you encounter issues with your Foredom K.EMX-50 Dial Control Kit, consider the following common solutions:
- No Power to Motor:
- Check if the C.EMX-1 Dial Speed Control is plugged into a live 115V outlet.
- Ensure the motor is securely plugged into the dial control.
- Verify the dial control is in the 'START' position.
- Check the fuse on the dial control unit.
- Chisel Not Engaging/Weak Action:
- Ensure the chisel is properly inserted and tightened in the handpiece.
- Verify the handpiece is securely attached to the flex shaft.
- Confirm the motor speed is within the recommended 1,000-8,000 RPM range.
- Apply light pressure to the workpiece to activate the reciprocating action.
- Check for proper lubrication of the handpiece.
- Excessive Vibration or Noise:
- Ensure the chisel is correctly seated and tightened.
- Inspect the flex shaft and handpiece for any damage or wear.
- Verify the motor is running smoothly.
If problems persist, discontinue use and contact Foredom customer support.
8. Specifications
| Feature | Detail |
|---|---|
| Model Number | K.EMX-50 |
| Voltage | 115 Volts |
| Compatible Motors | Foredom Series TX, LX (permanent magnet motors) |
| Recommended RPM Range | 1,000 - 8,000 RPM |
| Handpiece Type | Reciprocating Hammer |
| Handpiece Material | Plastic, Aluminum |
| Item Weight | 3.52 pounds (Kit) |
| Package Dimensions | 10.55 x 7.4 x 6.81 inches |
9. Warranty Information
Specific warranty details for the Foredom K.EMX-50 Dial Control Kit are not provided within this manual. Please refer to the warranty card included with your product packaging or visit the official Foredom website for comprehensive warranty terms and conditions.
10. Customer Support
For technical assistance, replacement parts, or further inquiries regarding your Foredom K.EMX-50 Dial Control Kit, please contact Foredom customer support directly. Contact information can typically be found on the Foredom website or on the product packaging.