Sundown Audio 1/0 OFC Amplifier Installation Kit User Manual
1. Introduction
This manual provides essential information for the proper installation and use of your Sundown Audio 1/0 Oxygen-Free Copper (OFC) Amplifier Installation Kit. This kit is designed to provide high-quality power and signal transfer for vehicle amplifier installations. Please read all instructions carefully before beginning installation.
2. Safety Information
- Always disconnect the vehicle's negative battery terminal before installing any electrical equipment.
- Wear appropriate safety gear, including eye protection and gloves.
- Ensure all connections are secure and properly insulated to prevent short circuits.
- Route cables away from moving parts, sharp edges, and heat sources.
- Use the included fuse holder and fuse as close to the battery as possible to protect against overcurrent.
- If you are unsure about any part of the installation process, consult a professional installer.
3. Package Contents
Your Sundown Audio 1/0 OFC Amplifier Installation Kit includes the following components:
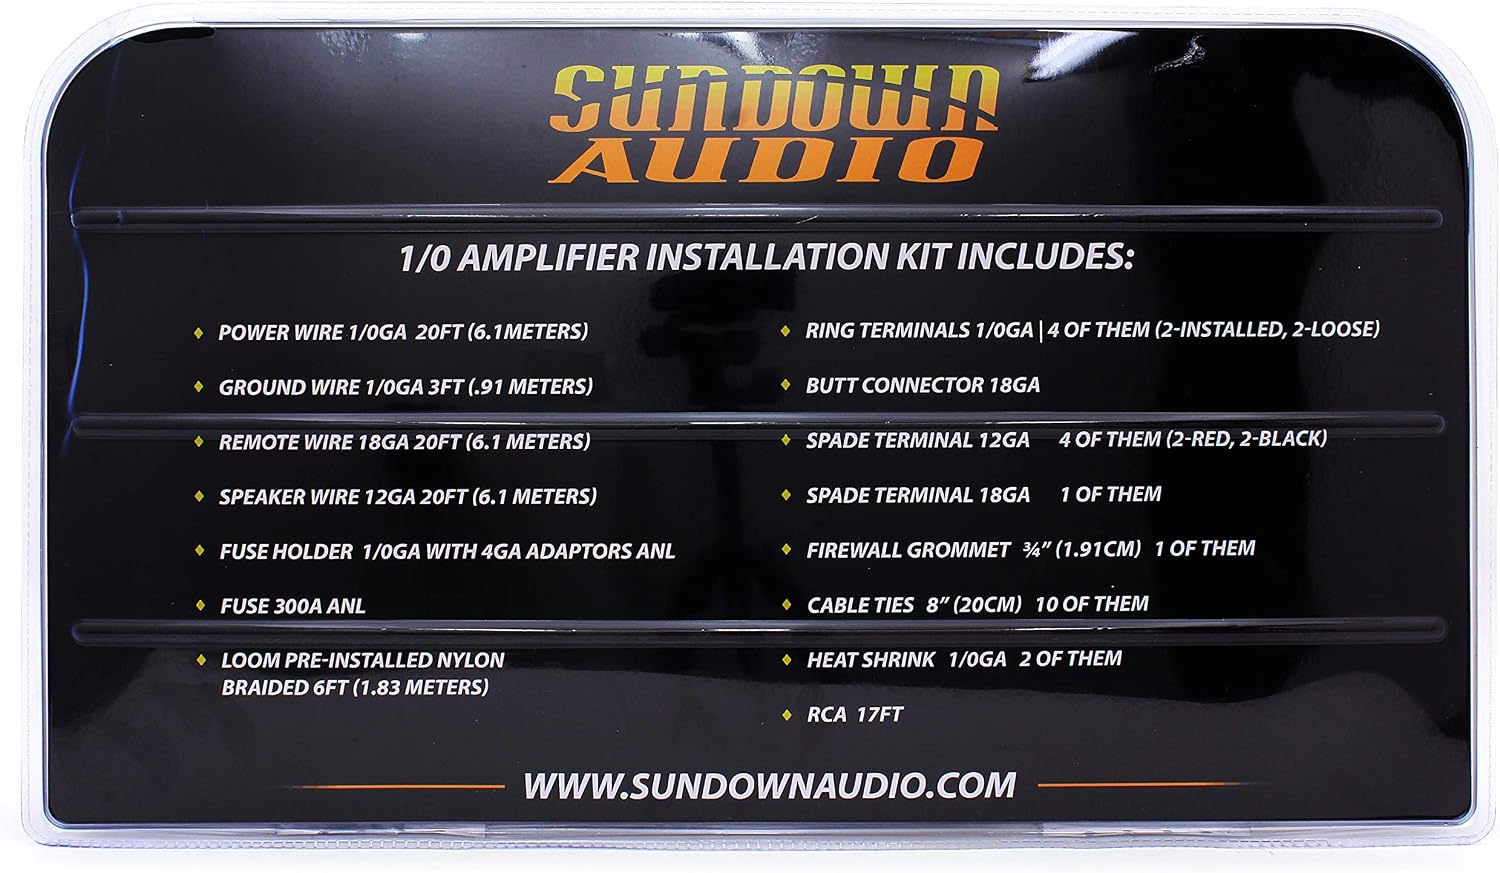
Back of the product packaging listing all included components.
- Power Wire: 1/0 Gauge, 20 feet (6.1 meters)
- Ground Wire: 1/0 Gauge, 3 feet (0.91 meters)
- Remote Wire: 18 Gauge, 20 feet (6.1 meters)
- Speaker Wire: 12 Gauge, 20 feet (6.1 meters)
- Fuse Holder: 1/0 Gauge with 4 Gauge adaptors (ANL type)
- Fuse: 300A ANL
- Nylon Braided Loom: 6 feet (1.83 meters), pre-installed on power wire
- Ring Terminals: 1/0 Gauge (4 total: 2 pre-installed, 2 loose)
- Butt Connector: 18 Gauge
- Spade Terminals: 12 Gauge (4 total: 2 red, 2 black)
- Spade Terminal: 18 Gauge (1 total)
- Firewall Grommet: 3/4 inch (1.91 cm)
- Cable Ties: 10 pieces (20 cm each)
- Heat Shrink: 1/0 Gauge (2 pieces)
- RCA Cable: 17 feet

Sundown Audio 1/0 OFC Amplifier Installation Kit in retail packaging.

Various installation accessories included in the kit, such as terminals, heat shrink, and zip ties.

High-performance RCA interconnect cables with gold-plated connectors.

Spool of 12-gauge speaker wire.
3-foot 1/0 gauge ground wire with pre-installed ring terminal.

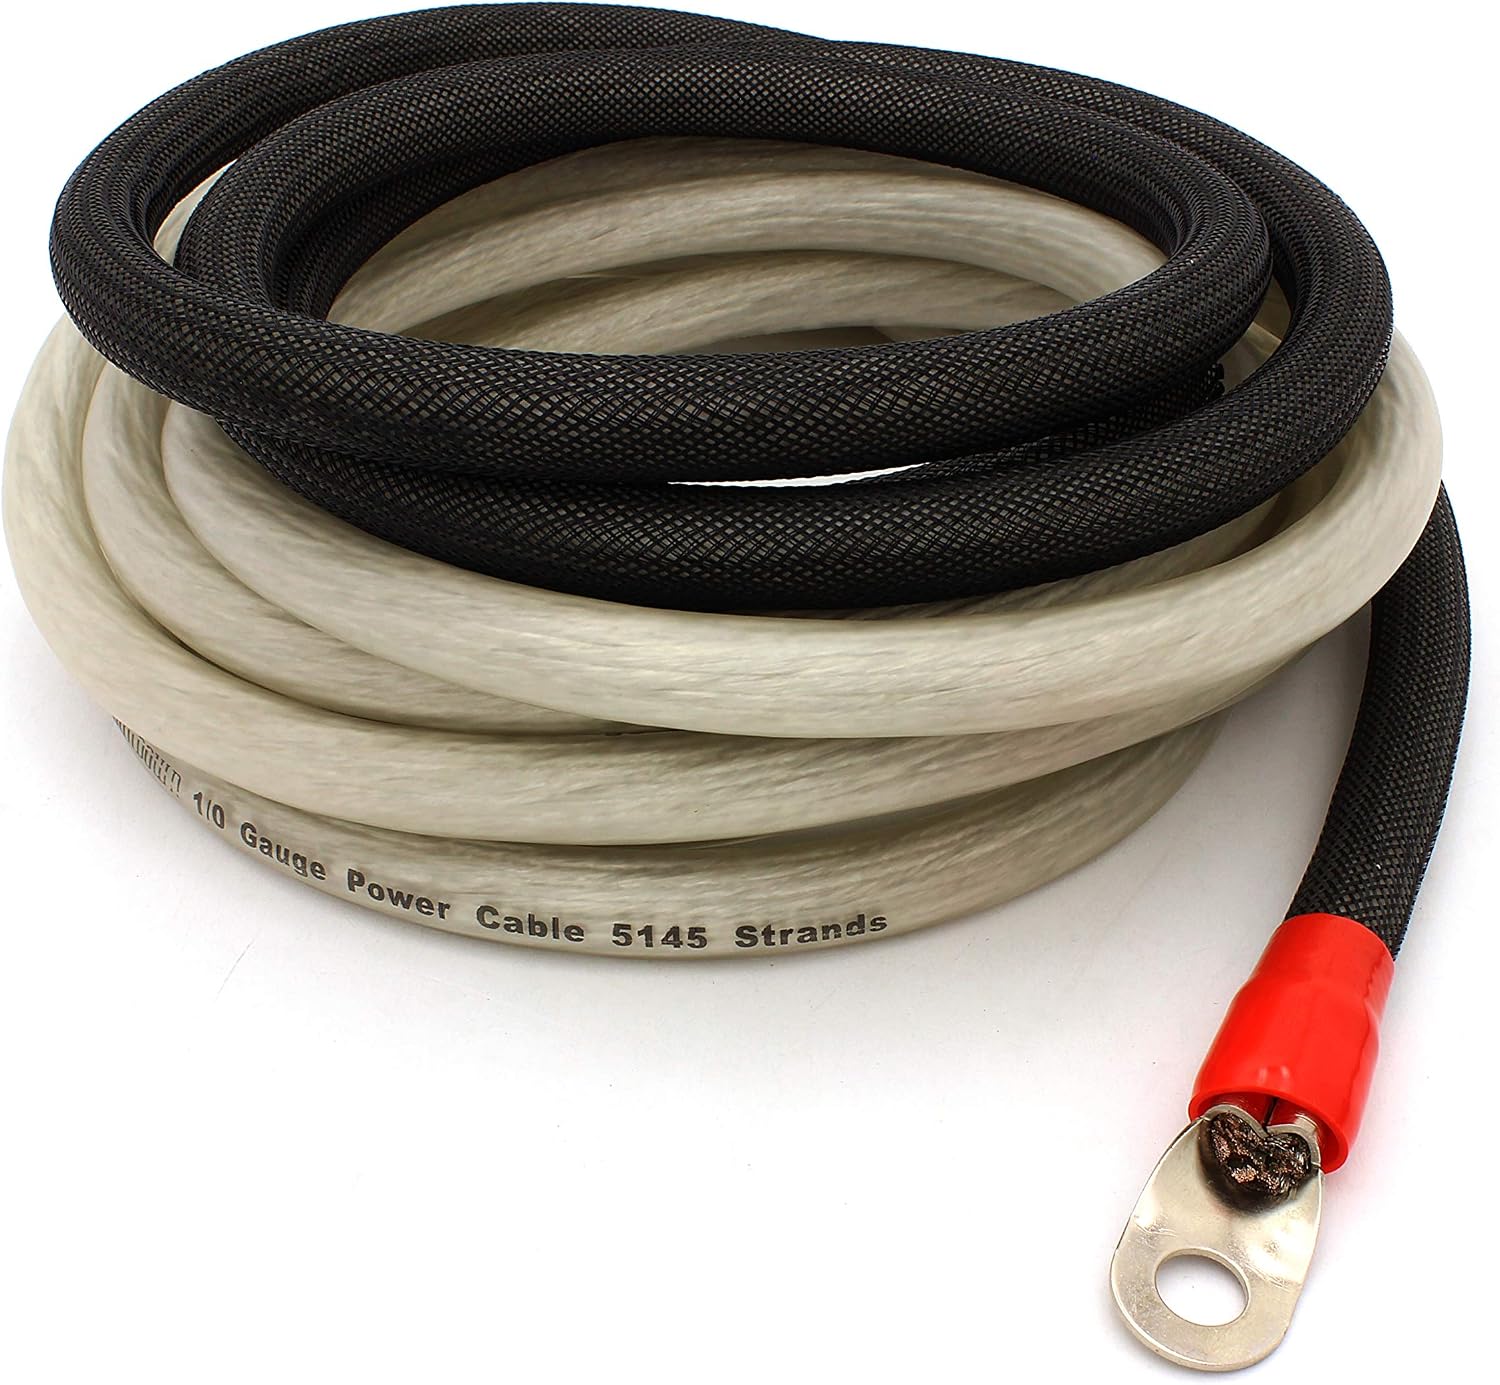
20-foot 1/0 gauge power wire with pre-installed ring terminal and protective loom.

ANL fuse holder for high current protection.
4. Setup and Installation
Proper installation is crucial for optimal performance and safety. Follow these general steps:
- Plan Your Layout: Determine the best routing for all cables to minimize interference and ensure sufficient length.
- Disconnect Battery: Always disconnect the negative terminal of your vehicle's battery before starting any electrical work.
- Install Fuse Holder: Mount the ANL fuse holder within 18 inches (45 cm) of the positive battery terminal. Ensure it is easily accessible for maintenance.
- Run Power Wire: Connect the 1/0 gauge power wire from the positive battery terminal (through the fuse holder) to your amplifier. Use the firewall grommet to protect the wire when passing it through the firewall. The pre-installed nylon braided loom provides additional protection for the first 6 feet.
- Run Ground Wire: Connect the 1/0 gauge ground wire from your amplifier to a clean, unpainted metal surface on the vehicle's chassis. Ensure a solid, secure connection. The ground wire should be as short as possible, ideally less than 3 feet.
- Run Remote Turn-On Wire: Connect the 18 gauge remote wire from your head unit's remote output to your amplifier's remote input. This wire tells the amplifier when to turn on and off with your vehicle's stereo.
- Run RCA Cables: Connect the 17-foot RCA cables from your head unit's RCA outputs to your amplifier's RCA inputs. Route these cables separately from power wires to prevent noise.
- Run Speaker Wire: Connect the 12 gauge speaker wire from your amplifier's speaker outputs to your speakers. Ensure correct polarity (+ to + and - to -).
- Secure All Wires: Use the included cable ties to secure all wires, preventing them from moving, rubbing, or interfering with vehicle operation.
- Reconnect Battery: Once all connections are made and secured, reconnect the negative battery terminal.
Installation Videos
This video demonstrates the features and quality of NVX amplifier wiring kits, showcasing flexible tinned copper power and ground cables, high-efficiency power delivery, and triple-shielded OFC copper RCA cables with brass copper connectors. It also highlights the ANL fuse holder with gold nickel finish and various installation accessories.
This video provides an overview of the Ruikarhop 0 Gauge Amp Wiring Kit components, including the 17ft 0 gauge red power cable, 3ft high-performance car grounding OFC wire, 100A gold-plated AGU fuse holder, 17ft high-performance RCA interconnect cable, 17ft blue remote turn-on wire, and various terminals and heat shrink tubes.
This video explains the advantages of Rockville's 100% Oxygen-Free Copper (OFC) wiring kits, emphasizing superior signal quality, higher thermal rating, and minimal power loss compared to aluminum-copper blends. It details the construction of mega power and ground cables, planar speaker wire, and Crystal SQ RCA cables, along with all included installation accessories.
5. Operating Instructions
Once the amplifier installation kit is correctly installed, the system operates in conjunction with your vehicle's audio system. Ensure your amplifier is properly configured according to its own user manual for gain, crossover, and other settings. The wiring kit facilitates the power and signal delivery, allowing your amplifier to function optimally.
6. Maintenance
- Periodically inspect all cable connections for tightness and corrosion.
- Check the fuse in the ANL fuse holder regularly. Replace only with a fuse of the same amperage rating.
- Ensure cables are not pinched, frayed, or exposed to excessive heat.
- Keep the area around the amplifier and wiring clean and free of debris.
7. Troubleshooting
- No Power to Amplifier: Check the fuse in the ANL fuse holder. Verify all power and ground connections are secure. Ensure the remote turn-on wire is receiving a signal from the head unit.
- Poor Sound Quality/Noise: Ensure RCA cables are routed away from power cables to prevent interference. Check all RCA and speaker wire connections for proper seating and polarity. Verify ground connection is clean and secure.
- Amplifier Overheating: Ensure the amplifier has adequate ventilation. Check speaker impedance to ensure it matches the amplifier's capabilities.
8. Specifications
| Brand | Sundown Audio |
| Compatible Devices | Amplifier |
| Special Feature | Heat Resistant, Tangle Free |
| Recommended Uses | Vehicle Amplifier Installation |
| Item Weight | 15 Pounds |
| Package Dimensions | 22 x 13 x 3 inches |
| Maximum Voltage | 32 Volts (DC) |
9. Warranty and Support
For warranty information and technical support, please refer to the official Sundown Audio website or contact their customer service directly. Keep your purchase receipt as proof of purchase for any warranty claims.