1. Product Overview
The Klip xtreme KPM-310 Dual Monitor Desk Mount Stand is designed to optimize your workspace by securely holding two monitors, freeing up valuable desk space. This robust mount promotes an ergonomic viewing experience with its extensive adjustability.
Constructed from high-grade steel, the KPM-310 supports two screens, each up to 32 inches in size and weighing up to 17.6 lbs. It features a sturdy desktop C-clamp base for stability and a fully articulating mechanism allowing for tilt, swivel, and rotation adjustments. Integrated cable management clips help maintain a tidy setup, and a tool holder ensures the hexagonal key is always accessible for quick adjustments.

Figure 1: The Klip xtreme KPM-310 Dual Monitor Desk Mount Stand, showing its C-clamp base and two articulating arms designed to hold monitors.
2. Package Contents
Please verify that all components are present before beginning installation. If any parts are missing or damaged, please contact customer support.
- Main Pole with C-Clamp Base
- Dual Articulating Arms
- VESA Mounting Plates (2x)
- Hardware Kit (screws, washers, spacers)
- Hexagonal Key (for adjustments)
- Cable Management Clips

Figure 2: Front view of the assembled monitor mount, illustrating the main pole, dual arms, and VESA plates.
3. Setup and Installation
Follow these steps to properly install your monitor desk mount.
3.1. Attaching the C-Clamp Base to Your Desk
- Place the main pole with the integrated C-clamp base onto the edge of your desk.
- Tighten the C-clamp screw securely until the mount is firmly attached to the desk surface. Ensure the desk surface is stable and can support the weight of the mount and two monitors.
3.2. Assembling the Articulating Arms
- Slide the articulating arms onto the main pole at your desired height.
- Secure the arms in place using the provided locking mechanism or screws.

Figure 3: Top-down view of the monitor mount, showing the full extension of the articulating arms and the central pole.
3.3. Attaching Monitors to VESA Plates
- Remove the VESA mounting plates from the articulating arms by loosening the securing screws.
- Align the VESA plate with the mounting holes on the back of your monitor (compatible with VESA 75x75mm or 100x100mm patterns).
- Secure the VESA plate to the monitor using the appropriate screws from the hardware kit. Do not overtighten.
- Carefully slide the monitor with the attached VESA plate back onto the articulating arm.
- Secure the VESA plate to the arm using the securing screws.
- Repeat for the second monitor.
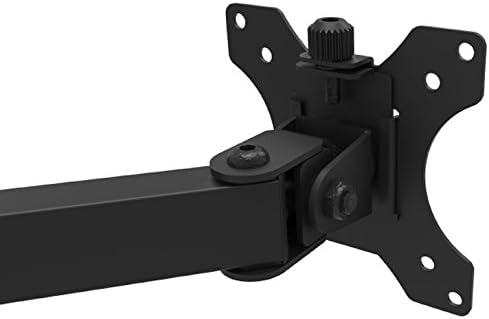
Figure 4: Close-up view of a VESA mounting plate attached to an articulating arm, illustrating the connection point for a monitor.
4. Operating and Adjustments
The KPM-310 offers a range of adjustments to achieve optimal viewing angles and ergonomic positioning.
- Height Adjustment: Loosen the collar on the main pole to slide the arms up or down. Retighten to secure.
- Tilt Adjustment: The monitor can be tilted +45° to -45° (90° total range) to reduce glare and optimize viewing angle. Use the hexagonal key to adjust the tension at the tilt joint if needed.
- Swivel Adjustment: Each arm can swivel +90° to -90° (180° total range) at the pole and at the monitor connection point, allowing you to position monitors side-by-side or at an angle.
- Rotation Adjustment: Monitors can be rotated 360° (+180° to -180°) from landscape to portrait orientation without removing the screen.
- Tension Adjustment: All joints can be tightened or loosened individually using the hexagonal key to control the fluidity or rigidity of movement.
After making adjustments, ensure all connections are secure to prevent monitors from shifting.
5. Maintenance
Regular maintenance ensures the longevity and proper function of your monitor mount.
- Cleaning: Wipe the mount with a soft, damp cloth. Avoid abrasive cleaners or solvents that may damage the finish.
- Tightness Check: Periodically check all screws and connections, especially the C-clamp and VESA plate screws, to ensure they remain tight and secure.
- Lubrication: No lubrication is typically required for the joints. If movement becomes stiff, check for debris or overtightened screws.
6. Troubleshooting
If you encounter issues with your monitor mount, refer to the following common problems and solutions:
- Monitors are sagging or not holding position:
- Ensure the C-clamp is securely tightened to the desk.
- Use the hexagonal key to tighten the tension screws at the articulating joints and VESA plate connection points.
- Verify that the monitor weight does not exceed the maximum load capacity of 17.6 lbs per arm.
- Mount feels unstable:
- Confirm the C-clamp is fully tightened and the desk surface is sturdy.
- Ensure the main pole is properly seated in the base.
- Difficulty adjusting tilt/swivel/rotation:
- Loosen the tension screws at the respective joints slightly using the hexagonal key.
- Ensure no cables are obstructing movement.
7. Specifications
| Feature | Specification |
|---|---|
| Model Number | KPM-310 |
| Monitor Screen Size Compatibility | 13 to 32 inches (per arm) |
| Maximum Load Capacity | 17.6 lbs (8 kg) per arm |
| Maximum Height | 18.3 inches |
| VESA Compatibility | 75x75mm, 100x100mm |
| Tilt Angle | +45° to -45° (90° total) |
| Swivel Angle | +90° to -90° (180° total) |
| Rotation Adjustment | +180° to -180° (360° total) |
| Material | High-grade Steel, Plastic |
| Color | Black |
| Product Dimensions (L x W x H) | 35.1 x 11 x 18.3 inches |
| Product Weight (with hardware) | 9.2 lbs |
| Mounting Type | C-Clamp (Tabletop) |
8. Warranty and Support
The Klip xtreme KPM-310 Monitor Desk Mount Stand comes with a Lifetime Warranty, ensuring peace of mind regarding its quality and durability.
For technical support, warranty claims, or inquiries about missing parts, please contact Klip xtreme customer service. Refer to the official Klip xtreme website for contact information.